I absolutely love sharing The Best Classic Chili Recipe with friends because it’s one of those dishes that feels like a warm hug on a chilly day. Whether you’re meal prepping for the week or hosting a casual get-together, this chili hits all the right notes with its rich, hearty flavors and cozy spices. I first tried this recipe years ago, and it quickly became a staple in my kitchen for those times when comfort food is just what you need.
You’ll find that The Best Classic Chili Recipe is incredibly approachable, with simple ingredients you probably already have on hand, and it comes together fairly quickly. Plus, it’s so versatile—you can make it mild for the kids or kick it up a notch with a splash of hot sauce for the grown-ups. Trust me, once you try this, it’ll be a go-to you’ll want to make again and again.
Why You’ll Love This Recipe
- Simple Ingredients: Easily found pantry staples come together to create a rich, flavorful chili without fuss.
- Customizable Heat Level: You control the spice, making it perfect for both kids and spice lovers.
- Quick Comfort Food: Ready in just about 30 minutes, it’s perfect for busy weeknights.
- Family Favorite: My family goes crazy for this classic chili, making it a reliable crowd-pleaser.

Ingredients You’ll Need
Choosing fresh and quality ingredients really brings The Best Classic Chili Recipe to life. Each spice and every component plays its role, creating layers of flavor that make this chili unforgettable. I always recommend using a chili powder brand you trust because the heat and flavor can vary quite a bit.
- Olive oil: Helps brown the beef and sauté the onions nicely for a deep, rich base.
- Yellow onion: Adds that savory sweetness that balances the spices perfectly.
- Ground beef (90% lean): Lean enough to keep it hearty without too much grease.
- Chili powder: The star spice – pick your favorite brand for flavor control.
- Ground cumin: Brings a warm, earthy depth that makes the chili extra cozy.
- Granulated sugar: A subtle hint of sweetness to balance the acidity of the tomatoes.
- Tomato paste: Concentrates the tomato flavor and thickens the sauce beautifully.
- Garlic powder: Adds that comforting garlicky kick without the hassle of fresh garlic.
- Salt: Essential for enhancing all the flavors.
- Ground black pepper: Adds just a touch of bite.
- Ground cayenne pepper (optional): Perfect for those who love a bit of heat; I usually skip it for family-friendly meals.
- Beef broth: Builds a savory, rich base that keeps the chili juicy.
- Petite diced tomatoes (canned): Provides freshness and texture in every bite.
- Red kidney beans (canned, drained, and rinsed): Classic chili beans that add heartiness and fiber.
- Tomato sauce: Gives a smooth consistency and deepens the tomato flavor.
Variations
I’ve often played around with this chili recipe to suit what’s in my pantry or to match different dietary needs. The great thing is that The Best Classic Chili Recipe is super flexible, so don’t hesitate to make it your own!
- Vegetarian Variation: Swap out the ground beef for hearty mushrooms or a plant-based meat substitute—I’ve tried both, and they’re fantastic.
- Extra Veggies: Adding diced bell peppers or corn gives a sweet crunch that my family enjoys on colder evenings.
- Spice Level Adjustments: For a kid-friendly version, skip the cayenne and offer hot sauce on the side for the adults.
- Slow Cooker Version: I’ve made this chili in my slow cooker by browning the meat and onions first, then dumping everything in to simmer for 4-6 hours—perfect for busy days.
How to Make The Best Classic Chili Recipe
Step 1: Sauté the Onions to Sweet Perfection
Start by heating the olive oil in a large soup pot over medium-high heat—let it warm up for about 2 minutes. Then, add the diced onions and cook them for around 5 minutes, stirring occasionally until they’re soft and translucent. This step is key because those sweet onions form a great savory foundation for the chili.
Step 2: Brown the Ground Beef
Next, toss in the ground beef. Using a wooden spoon, break it apart as it cooks. It usually takes about 6-7 minutes to brown evenly. Don’t rush—allow the beef to brown well because that caramelization adds tons of flavor. Stir occasionally so it cooks evenly but avoid overcrowding the pot to prevent steaming rather than browning.
Step 3: Stir in the Spices and Tomato Paste
Once the beef is browned, sprinkle in the chili powder, cumin, sugar, tomato paste, garlic powder, salt, black pepper, and if you want, cayenne pepper. Stir everything thoroughly for a couple of minutes so those spices toast lightly and become fragrant—this awakens their full flavor potential.
Step 4: Add Liquids and Beans
Pour in the beef broth, canned diced tomatoes with their juice, drained kidney beans, and tomato sauce. Stir well to combine everything. This creates a rich, saucy base for your chili that’s just begging to be simmered slowly for deeper flavor.
Step 5: Simmer and Let the Flavors Meld
Bring the chili to a gentle boil, then lower the heat to a low or medium-low simmer. Let it cook uncovered for 20-25 minutes, stirring occasionally so it doesn’t stick or burn on the bottom. This simmering allows the flavors to marry and the chili to thicken to that perfect consistency I love.
Step 6: Rest Before Serving
Remove the pot from the heat and let the chili rest for 5-10 minutes before serving. This little pause gives the flavors a chance to settle and the chili to thicken gently. Trust me, this rest period makes a noticeable difference every time.
Pro Tips for Making The Best Classic Chili Recipe
- Choose Your Chili Powder Wisely: I learned that different brands vary widely—McCormick is my go-to because it’s flavorful but not too spicy.
- Brown Meat Properly: Taking your time to brown the beef well builds flavor layers that make all the difference.
- Don’t Skip the Rest Time: Letting the chili sit after cooking enhances the taste and thickness, a trick I always follow.
- Adjust Spice at Serving: I leave cayenne out for family dinners and offer hot sauce on the side so everyone’s happy.
How to Serve The Best Classic Chili Recipe
Garnishes
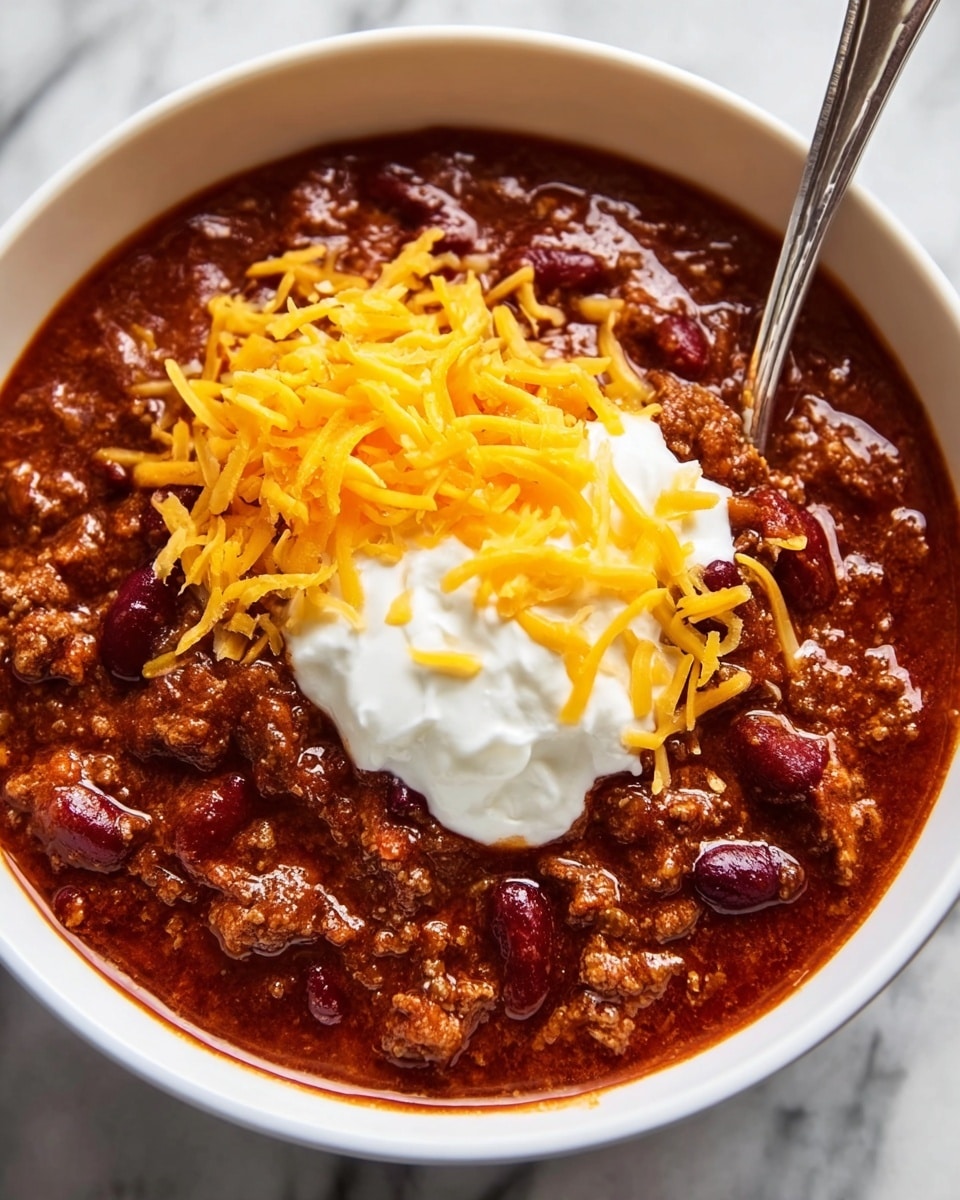
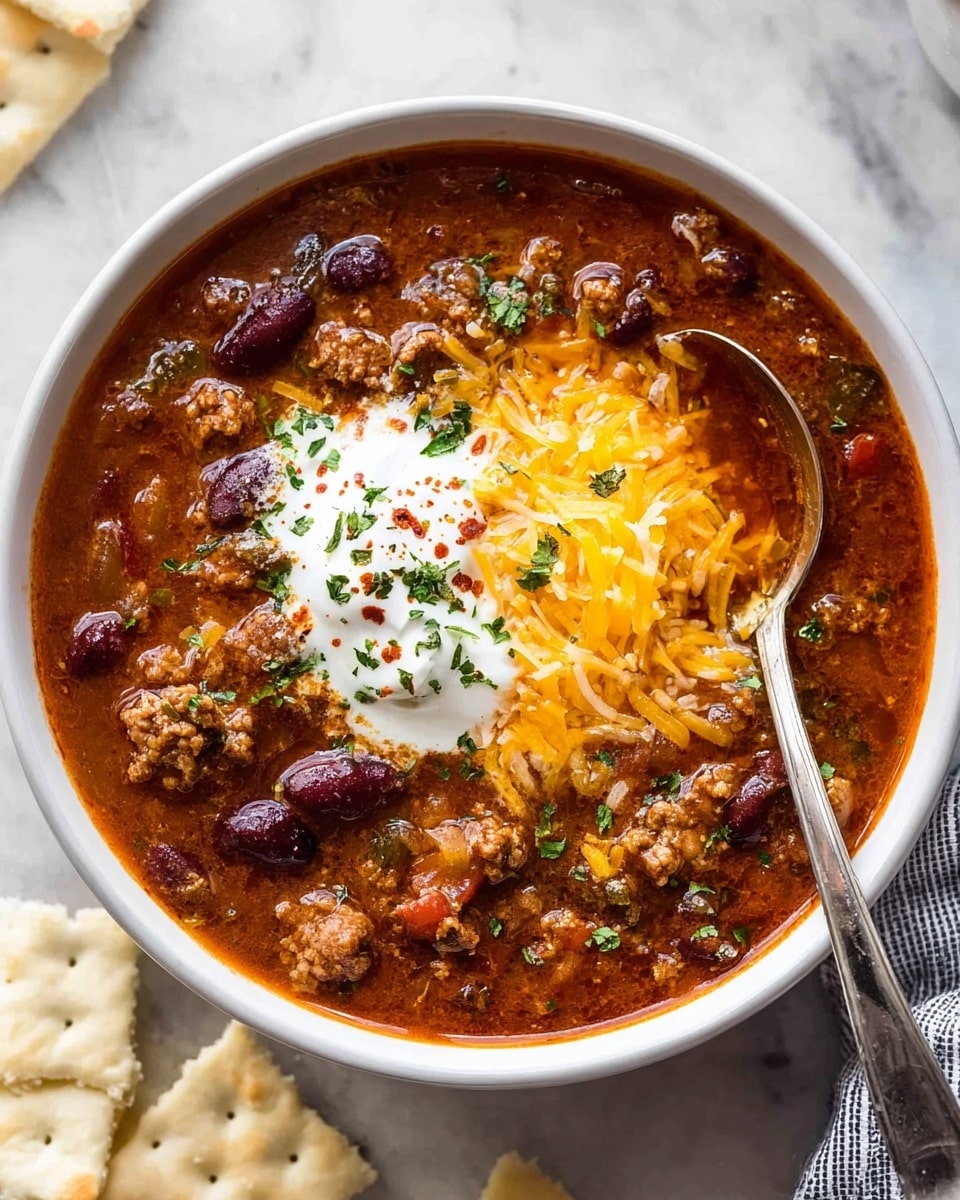
I’m a big fan of toppings that add freshness and texture—shredded cheddar cheese, a dollop of sour cream, and some thinly sliced green onions are my go-tos. Sometimes I throw on a sprinkle of chopped cilantro for a fresh, herbal note. These garnishes bring balance and extra flavor to every bite.
Side Dishes
For sides, I like pairing this chili with warm cornbread or crunchy tortilla chips. A simple green salad with a tangy vinaigrette helps cut through the richness, making the meal feel balanced and satisfying. On chillier nights, I’ll often serve crusty bread to soak up that delicious sauce.
Creative Ways to Present
For a fun twist, I’ve served this chili over baked potatoes or even spooned it into crispy bell pepper halves for a festive touch at potlucks. Another favorite is layering it in a skillet with tortilla chips and cheese for an easy chili dip that disappears fast at parties.
Make Ahead and Storage
Storing Leftovers
Leftover chili is even better the next day! I store it in an airtight container in the refrigerator and usually it lasts well for 3-4 days. I always make sure it cools down fully before sealing and refrigerating to keep it fresh longer.
Freezing
I’ve frozen this chili plenty of times for quick meals later on. Just portion it into freezer-safe containers or bags, and it keeps beautifully for up to 3 months. When I’m ready, I thaw it overnight in the fridge for the best texture.
Reheating
The best way I’ve found to reheat chili is gently on the stovetop over medium-low heat, stirring occasionally to prevent sticking. If it’s too thick, I add a splash of beef broth or water to loosen it up. Microwave works too—it just takes a bit more stirring to keep it even.
FAQs
-
Can I make The Best Classic Chili Recipe vegetarian?
Absolutely! You can substitute the ground beef with plant-based crumbles, lentils, or even extra beans to keep it hearty. Adding vegetables like mushrooms or bell peppers will also make it tasty and satisfying without the meat.
-
How spicy is this chili?
The spice level is very adjustable. The recipe includes chili powder and optional cayenne pepper. I usually leave out cayenne for family meals and let everyone add hot sauce if they like more heat. Using a mild chili powder brand also keeps the dish approachable.
-
Can I prepare this chili ahead of time?
Yes! This chili actually tastes better the next day as the flavors have more time to develop. You can make it a day or two ahead, store it in the fridge, and reheat before serving. It also freezes well for longer storage.
-
What’s the best way to thicken the chili if it’s too watery?
Simmering the chili uncovered helps reduce excess liquid naturally. If you’re in a hurry, you can also stir in a small spoonful of tomato paste or corn starch slurry to thicken it quickly.
Final Thoughts
This recipe truly holds a special place in my heart because it’s such a reliable crowd-pleaser that makes everyone feel cozy and satisfied. I hope you’ll give The Best Classic Chili Recipe a try soon—it’s straightforward, adaptable, and absolutely delicious. Whether you’re cooking for family, meal prepping, or feeding a crowd, this chili recipe has you covered like a warm blanket.
Print
The Best Classic Chili Recipe
- Prep Time: 5 minutes
- Cook Time: 25 minutes
- Total Time: 30 minutes
- Yield: 6 servings
- Category: Main Dish
- Method: Stovetop
- Cuisine: American
Description
A hearty and flavorful classic chili recipe featuring lean ground beef, kidney beans, and a perfect blend of spices. This easy-to-make chili is ideal for comforting family meals, delivering rich, warm flavors with every bite.
Ingredients
Main Ingredients
- 1 tablespoon olive oil
- 1 medium yellow onion, diced
- 1 pound 90% lean ground beef
- 2 1/2 tablespoons chili powder*
- 2 tablespoons ground cumin
- 2 tablespoons granulated sugar
- 2 tablespoons tomato paste
- 1 tablespoon garlic powder
- 1 1/2 teaspoons salt
- 1/2 teaspoon ground black pepper
- 1/4 teaspoon ground cayenne pepper** (optional)
- 1 1/2 cups beef broth
- 1 (15 oz.) can petite diced tomatoes
- 1 (16 oz.) can red kidney beans, drained and rinsed
- 1 (8 oz.) can tomato sauce
Instructions
- Heat the oil and cook onions: Add the olive oil to a large soup pot and heat it over medium-high for two minutes. Add the diced onion and cook for 5 minutes, stirring occasionally until softened.
- Brown the ground beef: Add the ground beef to the pot and break it apart with a wooden spoon. Cook the beef for 6 to 7 minutes until fully browned and no longer pink, stirring occasionally to ensure even cooking.
- Add spices and seasonings: Mix in chili powder, cumin, sugar, tomato paste, garlic powder, salt, black pepper, and the optional cayenne pepper. Stir thoroughly to combine all the spices evenly with the beef and onion mixture.
- Add liquids and beans: Pour in the beef broth, petite diced tomatoes with their juice, drained kidney beans, and tomato sauce. Stir all ingredients well to combine and distribute flavors.
- Simmer the chili: Bring the liquid to a low boil, then reduce the heat to low or medium-low. Let the chili simmer uncovered for 20 to 25 minutes. Stir occasionally to prevent sticking and to let flavors meld.
- Rest the chili before serving: Remove the pot from heat and allow the chili to rest for 5 to 10 minutes. This resting time enhances the flavor and texture before serving.
Notes
- The chili powder brand you select greatly affects the spice level; McCormick Chili Powder is recommended for flavorful but mild chili.
- Cayenne pepper is optional and can be omitted for milder flavor, especially if serving children. Offer hot sauce on the side for those who prefer extra heat.
Nutrition
- Serving Size: 1/6th of the recipe
- Calories: 334 kcal
- Sugar: 10 g
- Sodium: 1249 mg
- Fat: 11 g
- Saturated Fat: 3 g
- Unsaturated Fat: 7 g
- Trans Fat: 0 g
- Carbohydrates: 34 g
- Fiber: 9 g
- Protein: 25 g
- Cholesterol: 49 mg


