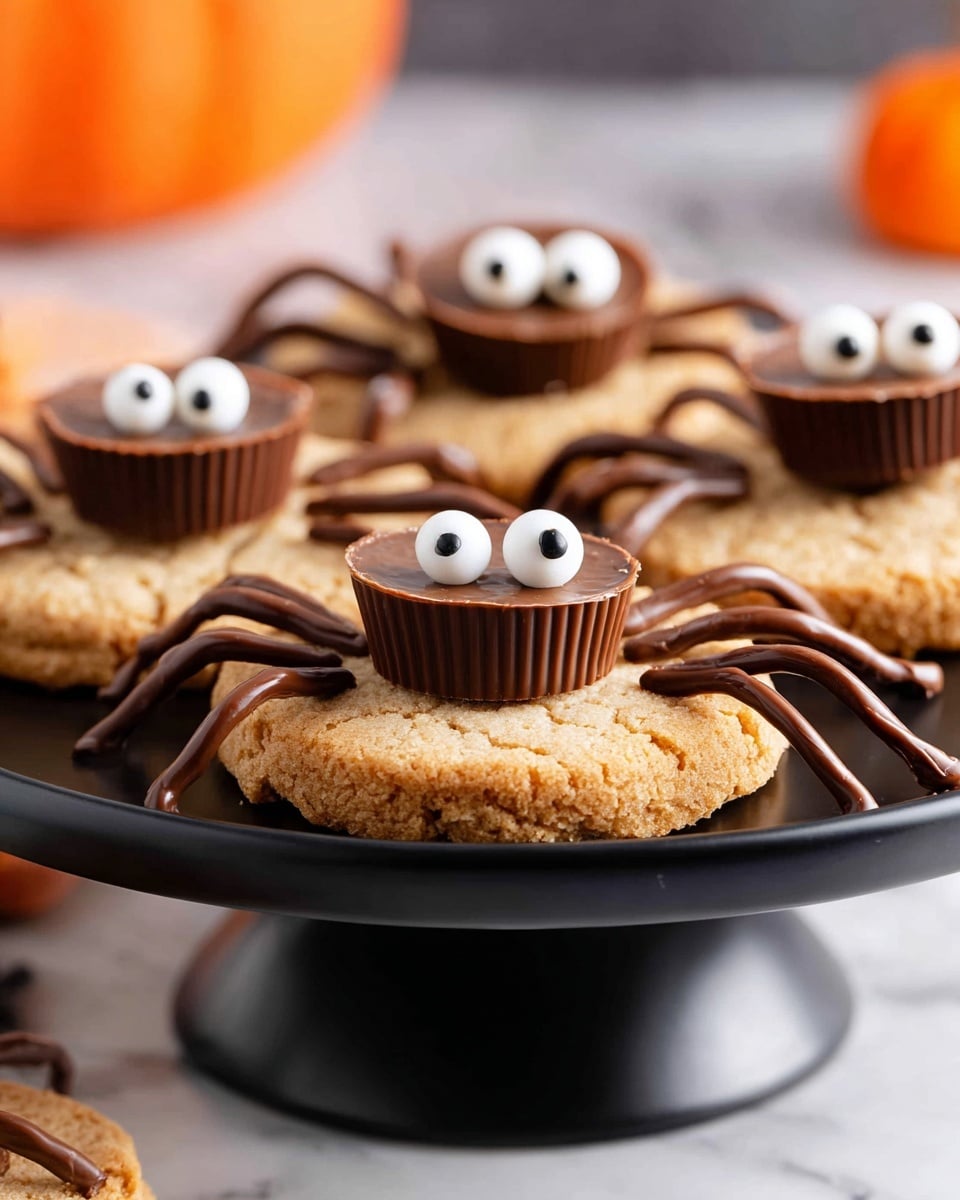
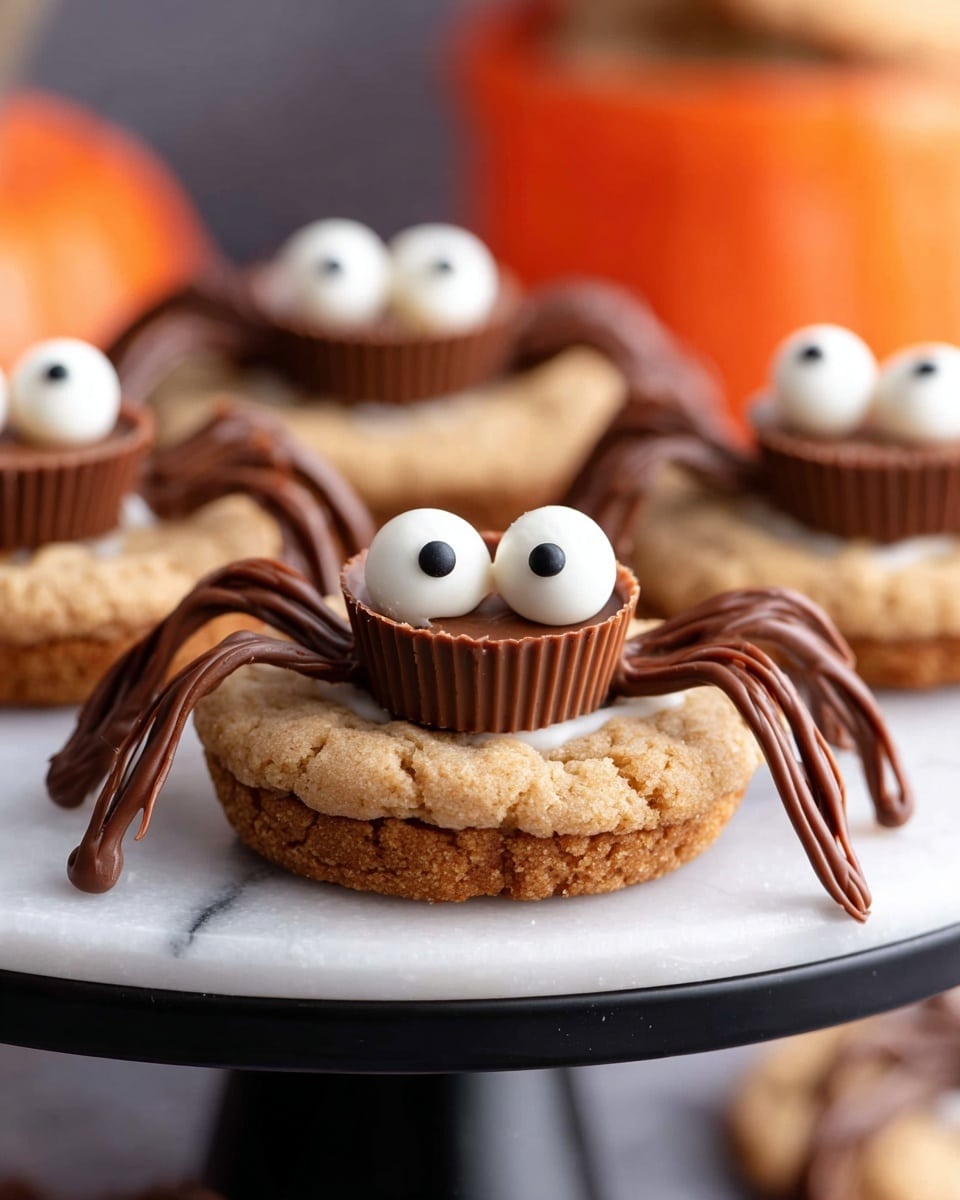
If you’re on the hunt for a fun, festive treat that’s as cute as it is delicious, you’re going to love this Spider Peanut Butter Cookie Bites with Candy Eyes and Chocolate Legs Recipe. Seriously, these little spider bites are the perfect mix of rich peanut butter, sweet chocolate, and a whimsical Halloween vibe that’ll make everyone smile. Whether you’re baking for a party, the kids, or just because, this recipe is fan-freaking-tastic and surprisingly simple to pull off — stick with me!
Why You’ll Love This Recipe
- Super Simple Ingredients: It’s mostly pantry staples, so you can whip it up anytime without a special trip to the store.
- Kid-Friendly Fun: Decorating with candy eyes and chocolate legs makes this a perfect kitchen activity for little helpers.
- No Fuss Method: Minimal steps and quick bake time mean you won’t be stuck in the kitchen all day.
- Unforgettable Flavor: That creamy peanut butter cookie base paired with Reese’s peanut butter cups is guaranteed to have everyone asking for seconds.

Ingredients You’ll Need
Each ingredient in this recipe works together to create that perfect peanut butter cookie texture, with the fun twist of candy eyes and chocolate legs that bring the spooky spider right to life. Grab good quality peanut butter and melting wafers for the best results.
- Creamy Peanut Butter: Smooth peanut butter works best to ensure a soft, chewy cookie base without crumbly texture.
- Granulated Sugar: Adds sweetness and helps create that classic peanut butter cookie crust when rolled.
- Egg: Binds all ingredients together and gives structure to the cookies.
- Chocolate Melting Wafers: These melt smoothly for decorating and make those chocolate legs easy to pipe.
- Miniature Reese’s Peanut Butter Cups: Serve as the perfect spider body—gooey, rich, and absolutely irresistible.
- Mini Candy Eyes: The fun element that brings your spider cookies to life, making them Halloween-ready!
Variations
I like to play around with this Spider Peanut Butter Cookie Bites with Candy Eyes and Chocolate Legs Recipe depending on the season or who’s munching on them. Feel free to customize and make it your own!
- Nut-Free Variation: Use sunflower seed butter instead of peanut butter and swap out Reese’s for a nut-free chocolate candy, so everyone can enjoy without worries.
- Chocolate Spider Cookies: Mix cocoa powder into the cookie dough for a chocolaty base, then decorate with white candy eyes—it gives the spiders a totally different vibe that my family surprisingly loved.
- Extra Crunch: Toss in mini chocolate chips or chopped peanuts to the dough for a delightful crunch and extra texture boost.
- Festive Colors: Use colored candy eyes or drizzle white chocolate dyed with food coloring for holiday-specific spider cookies that steal the show.
How to Make Spider Peanut Butter Cookie Bites with Candy Eyes and Chocolate Legs Recipe
Step 1: Mix the Cookie Dough
Start by preheating your oven to 350°F and lining a baking sheet with parchment paper or a silicone baking mat—trust me, cleanup will thank you later. In a medium bowl, combine the creamy peanut butter, granulated sugar, and that egg until everything is smooth and silky. Don’t worry if the dough feels a little sticky; you can pop it in the fridge for 10-20 minutes, which makes it much easier to handle when rolling these bites.
Step 2: Shape and Sugar Coat
Grab a medium cookie scoop or use your hands to roll the dough into 12 equal 1-inch balls. Pour some extra granulated sugar in a small bowl and roll each ball around until it’s fully coated—that sugar crust adds a great crunch and sweetness balance to the cookie. Place the sugared balls on your lined baking sheet with some space in between. Then, press each one gently with a fork to create a classic criss-cross pattern on top.
Step 3: Bake the Cookies
Bake these delightful bites for 8-10 minutes or until the bottoms are just starting to turn a light golden brown. Don’t overbake—these cookies should stay soft and tender inside. Right when you pull them out of the oven, let them cool on the pan for about 2 minutes before moving on.
Step 4: Add the Peanut Butter Cup Body
While the cookies are still warm, gently press one miniature Reese’s peanut butter cup onto the center of each. The heat will help the peanut butter cup stick down and soften just enough to meld with the cookie base—this step is pure magic, I swear.
Step 5: Decorate with Chocolate Legs and Candy Eyes
Once your cookies are completely cooled, melt the chocolate wafers in a microwave-safe bowl. Heat in 30-second bursts, stirring between each, until smooth and shiny. Transfer the melted chocolate into a small zip-top bag and snip a tiny corner off for piping. Pipe two small chocolate dots on top of each peanut butter cup to help the candy eyes stick. Next, carefully attach two mini candy eyes to each spider’s head area, then pipe 4 legs on each side extending from the peanut butter cup. Let the chocolate harden at room temperature, and voilà—your spider cookies are ready to creep and crawl into your heart!
Pro Tips for Making Spider Peanut Butter Cookie Bites with Candy Eyes and Chocolate Legs Recipe
- Stickiness Solution: If your dough seems super sticky, chilling it before rolling helps a ton—it makes shaping so much cleaner and less messy.
- Even Baking: I learned to rotate the baking sheet halfway through baking to ensure all cookies brown evenly on the bottom.
- Piping Control: Use a small zip-top bag with just a tiny snip at the corner for precise chocolate legs; it’s easier than a piping bag for beginners.
- Avoid Overbaking: Taking the cookies out as soon as the bottoms turn light golden keeps them soft — the last thing you want are hard peanut butter cookie bites.
How to Serve Spider Peanut Butter Cookie Bites with Candy Eyes and Chocolate Legs Recipe
Garnishes
On special occasions, I like adding a sprinkle of flaky sea salt on the peanut butter cups right after pressing them into the cookie—oddly enough, it really enhances the chocolate and peanut butter combo. You can also dust them with a light cocoa powder if you want a little extra chocolate punch.
Side Dishes
Pair these spider cookie bites with a cold glass of milk or a warm latte for a perfect sweet snack. During Halloween, I love setting up a spooky dessert table with caramel apples and pumpkin muffins alongside these for a festive spread everyone dives into.
Creative Ways to Present
For Halloween parties, I’ve arranged these cookie bites on a platter lined with fake spider webs and scattered with plastic spiders for that extra creepy-cute effect. To make them gift-ready, wrap them in cellophane bags tied with orange and black ribbons—trust me, these make perfect party favors that guests will rave about.
Make Ahead and Storage
Storing Leftovers
I store leftover Spider Peanut Butter Cookie Bites in an airtight container at room temperature for up to 3 days. Make sure they’re completely cool before storing so the chocolate legs don’t melt or get sticky. If it’s humid, pop a silica gel packet or a small piece of bread in the container to help absorb moisture and keep them crisp.
Freezing
I’ve frozen these cookies successfully (without the candy eyes) by wrapping them individually in plastic wrap and placing them in a freezer-safe bag. When you’re ready to enjoy them, just thaw at room temperature. Add the candy eyes and pipe the chocolate legs after thawing for best results—this keeps everything fresh and the decorations intact.
Reheating
If you want that freshly-baked warmth, pop a couple of cookies on a microwave-safe plate for 10-15 seconds, but don’t overdo it or the chocolate will melt everywhere. Alternatively, warming them in a low oven (about 300°F) for 5 minutes works great to refresh that soft peanut buttery goodness without harming the decorations.
FAQs
-
Can I make Spider Peanut Butter Cookie Bites without Reese’s peanut butter cups?
Absolutely! You can substitute with any miniature peanut butter candy, or even a mini chocolate candy without peanut butter if you have allergies or preferences. Just be sure the candy is small enough to sit nicely atop the cookie and isn’t too heavy.
-
How do I keep the chocolate legs from smudging?
After piping the chocolate legs, let the cookies sit undisturbed at room temperature until the chocolate fully hardens. If your house is warm, place the tray in the fridge for about 10-15 minutes, but don’t leave them too long or the cookies can become tough.
-
Can I use crunchy peanut butter for this recipe?
You can, but the cookie texture will be slightly different—expect a bit more crunch and texture. My personal favorite is creamy peanut butter because it yields a softer, chewier cookie, but crunchy can add a fun nutty twist.
-
How long will Spider Peanut Butter Cookie Bites stay fresh?
When stored properly in an airtight container at room temperature, they’ll stay fresh for about 3-4 days. Beyond that, the cookies might lose their soft texture and the chocolate decorations could start to bloom.
Final Thoughts
This Spider Peanut Butter Cookie Bites with Candy Eyes and Chocolate Legs Recipe holds a special place in my heart because it’s not just a cookie — it’s a little project that spreads smiles, brings out creativity, and connects everyone around the kitchen table. Whether it’s for Halloween or just a fun weekend treat, I hope you enjoy making these as much as I do (and that they become a favorite in your home too). Go ahead, give it a try and watch these spidery bites crawl straight into your dessert hall of fame!
Print
Spider Peanut Butter Cookie Bites with Candy Eyes and Chocolate Legs Recipe
- Prep Time: 10 minutes
- Cook Time: 9 minutes
- Total Time: 19 minutes
- Yield: 12 cookies
- Category: Dessert
- Method: Baking
- Cuisine: American
Description
Spider Cookies are a fun and festive Halloween treat made with creamy peanut butter cookie dough, topped with miniature Reese’s peanut butter cups and decorated with candy eyes and melted chocolate to resemble spooky spiders. These easy-to-make cookies combine the rich flavors of peanut butter and chocolate for a perfect seasonal dessert.
Ingredients
Cookie Dough
- 1 cup creamy peanut butter
- 1/2 cup granulated sugar, plus extra for rolling
- 1 egg
Decoration
- 1/4 cup chocolate melting wafers
- 12 miniature Reese’s peanut butter cups
- 24 mini candy eyes
Instructions
- Make cookie dough: Preheat your oven to 350°F (175°C). Line one baking sheet with parchment paper or a baking mat and set it aside. In a medium bowl, mix together the peanut butter, 1/2 cup granulated sugar, and the egg until well combined. If the dough feels too sticky to work with, refrigerate it for 10 to 20 minutes to firm up.
- Roll in sugar: Use a medium cookie scoop or your hands to roll the dough into 12 balls, about 1 inch each. Roll each ball in extra granulated sugar to coat thoroughly, then place them on the prepared baking sheet. Press down gently on each ball with a fork to create a crosshatch pattern on top.
- Bake: Bake the cookies in the preheated oven for 8 to 10 minutes, or until the bottoms are very lightly browned. Remove the baking sheet from the oven and let the cookies rest on the pan for 2 minutes to set.
- Place peanut butter cups: While the cookies are still warm, gently press one miniature Reese’s peanut butter cup onto the center of each cookie. This helps the candy cups melt slightly and adhere well. Allow the cookies to cool completely on a wire rack.
- Decorate like spiders: Melt the chocolate melting wafers in a microwave-safe bowl by heating in 30-second increments, stirring between each until fully melted and smooth. Transfer the melted chocolate into a small zip-top bag, then snip a tiny corner off the bag to create a piping tip. Pipe two chocolate dots on top of each Reese’s cup and immediately attach two mini candy eyes on each dot. Next, draw four legs on each side of the peanut butter cup using the melted chocolate to complete the spider design. Let the chocolate harden before serving.
Notes
- These peanut butter spider cookies are perfect for Halloween celebrations and themed parties.
- If the dough is too soft, refrigerate it to make handling easier.
- You can substitute candy eyes with small white chocolate chips or other edible decorations.
- Keep cookies stored in an airtight container at room temperature for up to 3 days.
Nutrition
- Serving Size: 1 cookie
- Calories: 273 kcal
- Sugar: 20 g
- Sodium: 199 mg
- Fat: 17 g
- Saturated Fat: 4 g
- Unsaturated Fat: 12 g
- Trans Fat: 1 g
- Carbohydrates: 26 g
- Fiber: 2 g
- Protein: 8 g
- Cholesterol: 15 mg


