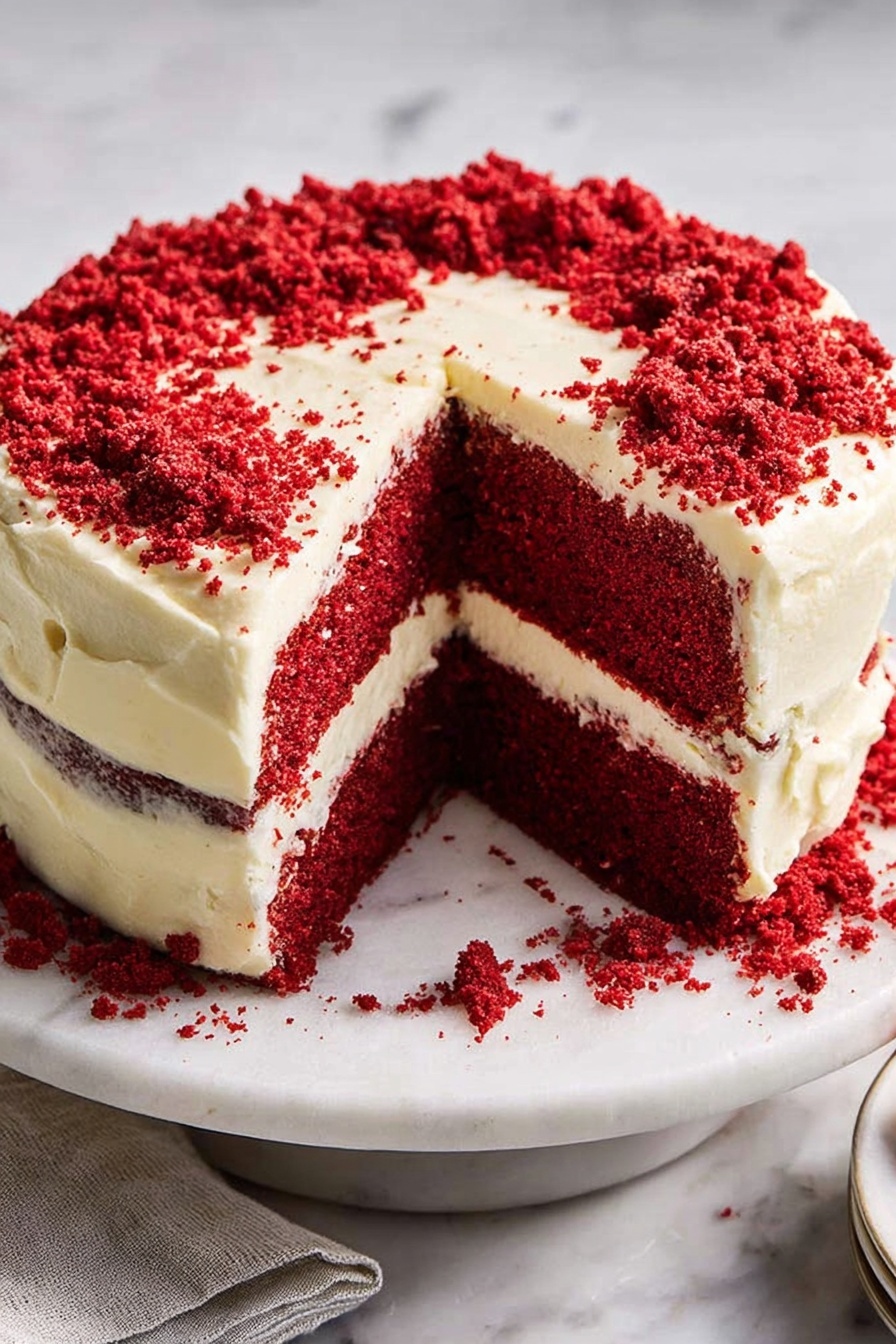
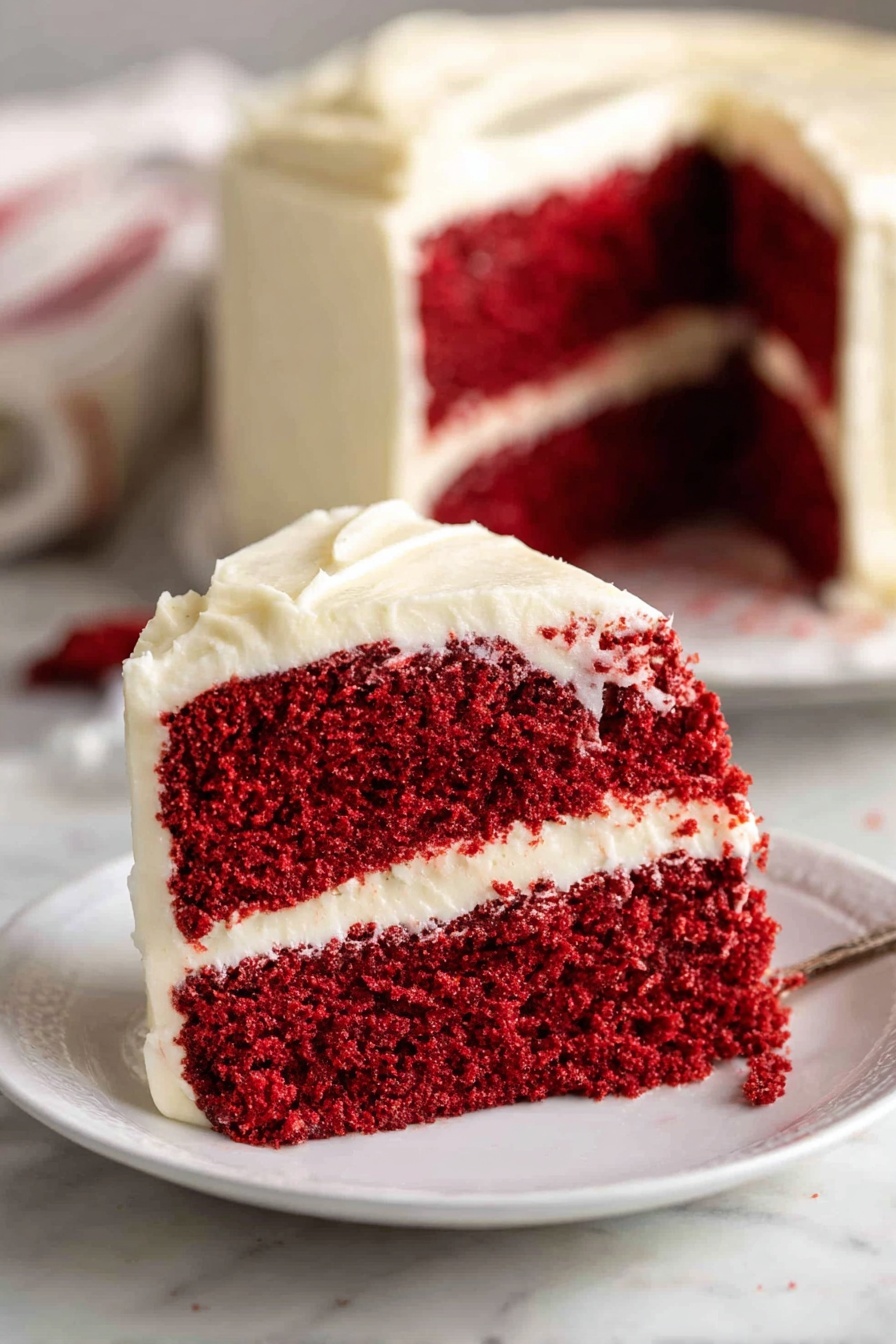
If you’ve ever wanted to wow your friends or treat yourself to a truly special dessert, I can’t recommend this Red Velvet Cake Recipe enough. It’s the perfect balance of moist, tender cake with that iconic red hue and a luscious cream cheese frosting that just melts in your mouth. When I first tried this recipe, I was hooked instantly — it became an absolute staple whenever I wanted to impress without spending all day in the kitchen. Stick around because this recipe is fan-freaking-tastic, and I’ve got plenty of tips coming your way to make sure your cake turns out beautifully every time.
Why You’ll Love This Recipe
- Velvety Texture: The combination of buttermilk and oil ensures the cake stays super moist and soft every single time.
- Classic Flavor Balance: You get just the right hint of cocoa and tangy buttermilk, making it uniquely delicious.
- Show-Stopping Look: That vibrant red color paired with creamy frosting is an absolute crowd-pleaser.
- Easy to Follow: Despite its elegant feel, the steps are straightforward — perfect for bakers of all levels.

Ingredients You’ll Need
Each ingredient in this Red Velvet Cake Recipe plays a special role — from the unsweetened cocoa that adds just a touch of chocolate, to the buttermilk that keeps the crumb super tender. Plus, I’ll share little tips for ingredients that make a big difference when you’re baking.
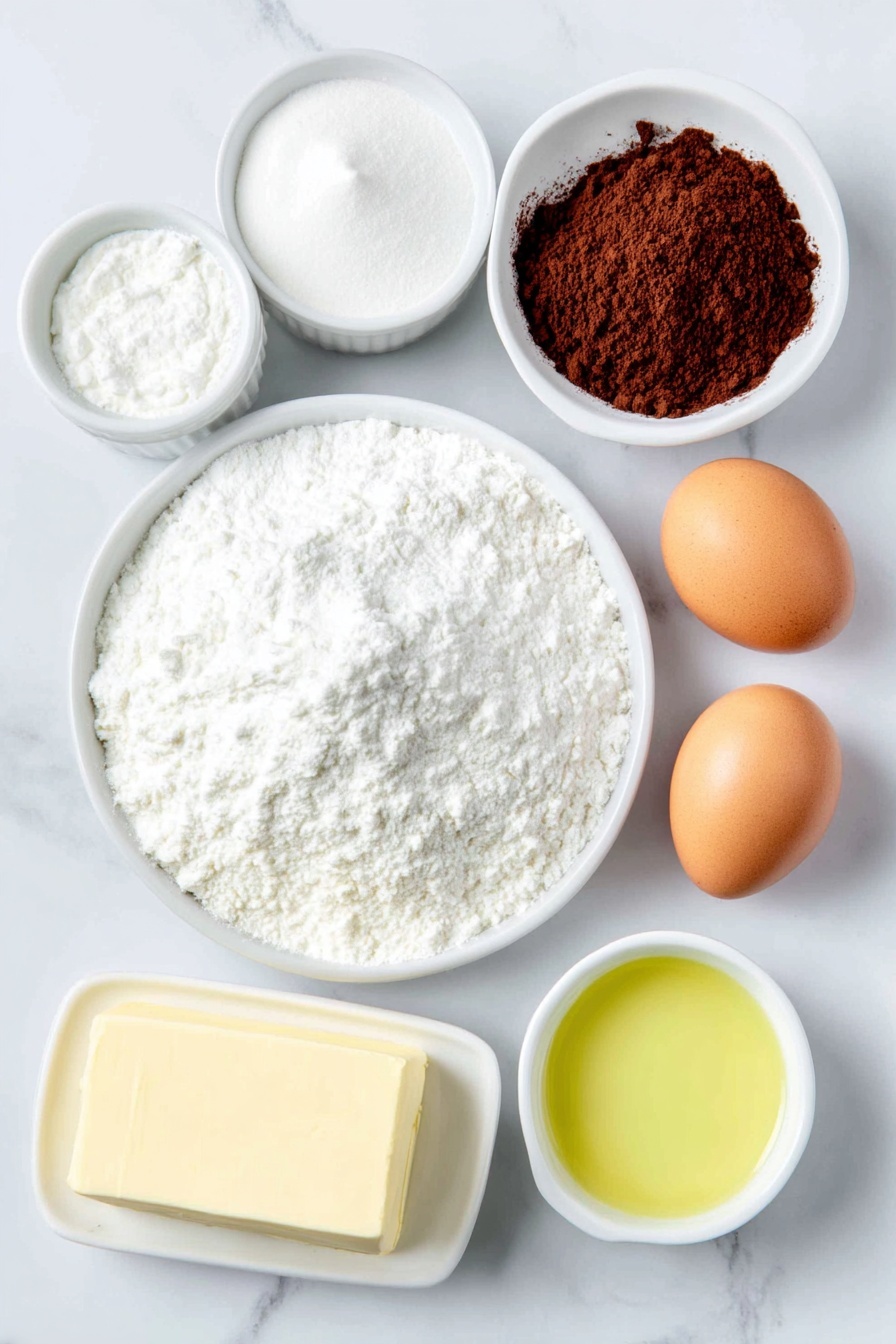
- Plain cake flour: Cake flour is key here because it has less protein than all-purpose flour, giving you that soft, delicate crumb you’re looking for.
- Cocoa powder (unsweetened): Use good-quality cocoa for a subtle chocolate flavor without overpowering the red color.
- Baking soda: Not baking powder — the soda reacts with the vinegar and buttermilk to give your cake that light and tender rise.
- Unsalted butter (softened): Room temperature butter creams up with sugar perfectly for an airy batter.
- Caster or superfine sugar: It dissolves faster, ensuring your cake is smooth and sweet without any graininess.
- Eggs (room temperature): Helps the cake batter emulsify better and rise evenly.
- Vegetable oil: This adds moisture that butter alone can’t provide, keeping your cake soft for days.
- White vinegar: This little acidic kick reacts with the baking soda, helping the cake rise and enhancing the red color.
- Vanilla extract: Brings warmth and balances the flavor perfectly.
- Buttermilk (room temperature): Essential for tenderness and that signature tangy note.
- Red food coloring (liquid or gel): Pick the kind you like best—gel tends to be more vibrant and less watery.
- Philadelphia cream cheese (softened): The foundation for that rich, smooth frosting — soft but not melted for best texture.
- Unsalted butter (for frosting, softened): Adds creaminess and body to the frosting.
- Sifted icing sugar: Sifting avoids lumps, making your frosting smooth and velvety.
Variations
I love giving this classic Red Velvet Cake Recipe my own twist now and then, and you should too! Whether you want to lighten it up, add seasonal flavors, or make it extra fancy, there’s plenty of room to experiment.
- Dairy-Free Version: I’ve swapped the buttermilk for coconut milk mixed with a tablespoon of lemon juice once, and it worked beautifully for my non-dairy friends.
- Chocolate Lover’s Delight: Adding a handful of mini chocolate chips into the batter took this to the next level during a birthday party.
- Spiced Red Velvet: Mixing a teaspoon of cinnamon or pumpkin spice in the dry ingredients gives it a cozy autumn vibe.
- Mini Cakes or Cupcakes: I often halve the recipe and bake cupcakes — they’re perfect for celebrations or easy portion control.
How to Make Red Velvet Cake Recipe
Step 1: Prep Your Pans and Dry Ingredients
Start by preheating your oven to 180°C (350°F). Butter two 8-inch round cake pans, both sides and base, then dust them lightly with cocoa powder — not flour. This subtle cocoa dusting prevents sticking and keeps the red color true. Next, sift together your cake flour, cocoa powder, baking soda, and a pinch of salt – and whisk them so everything’s evenly combined. This step ensures no lumps and distributes the rising agent perfectly, so your cake bounces up beautifully.
Step 2: Cream Butter and Sugar
In a separate large bowl, beat the softened butter and superfine sugar with an electric mixer until it’s pale, light, and fluffy. This takes about 3-5 minutes on medium speed, but don’t rush it—you want that air whipped into the batter to create the perfect crumb. Trust me, I used to skip this step properly and noticed my cakes were always denser. Patience here pays off!
Step 3: Add Eggs, One at a Time
Now add your eggs, but go slow — one egg at a time. Beat well after each addition. At first, it might look a little curdled or separated, but keep going until it becomes smooth again. This part always reminds me of baking with my mum, who’d tell me not to worry if the batter looks odd, as long as I keep mixing! It’s all part of building that silky structure for your cake.
Step 4: Incorporate Oil, Vinegar, Vanilla, Buttermilk & Food Coloring
Next, mix in the vegetable oil, white vinegar, vanilla extract, buttermilk, and the red food coloring. Beat everything together until your batter looks smooth and silky with that rich vibrant red color shining through. Using good-quality gel coloring really amps up the saturation without thinning your batter too much — I learned that the hard way when my first cake looked more pink than red!
Step 5: Combine Dry and Wet Ingredients
Gently add your sifted dry ingredients to the wet mix and beat just until combined. It’s okay if there are still a few small lumps — overmixing can make your cake tough, and we want soft and tender here! Remember when I tried to “fix” lumps by overbeating, and my cake turned rubbery? Learned that lesson the fun way so you don’t have to.
Step 6: Bake and Cool
Divide the batter evenly between your prepared pans, smoothing the tops with a spatula. Bake on the same shelf for about 25-30 minutes. Keep an eye on it after 25 minutes — you want a toothpick inserted in the center to come out clean or with just a few crumbs sticking. After baking, let the cakes rest in their pans for 10 minutes before turning them out onto a cooling rack. This helps them firm up a bit so they don’t break when you handle them.
Step 7: Make the Cream Cheese Frosting
While your cakes cool, whip together softened cream cheese and butter till smooth. Add in vanilla extract, then gradually fold in sifted icing sugar until the frosting is silky and spreadable. I always sift the sugar—no one wants gritty frosting! If your frosting feels too soft, a quick chill in the fridge will firm it up for easy spreading.
Step 8: Assemble and Frost
Place one cake layer on your serving plate, spread a generous amount of frosting on top, then add the second layer. Cover the entire cake with the remaining frosting, smoothing it out or piping little decorations if you’re feeling fancy. This part always makes me smile — there’s something so satisfying about transforming simple layers into a stunning cake.
Pro Tips for Making Red Velvet Cake Recipe
- Bring Ingredients to Room Temp: It really helps the batter come together smoothly, especially the eggs and buttermilk.
- Avoid Overmixing: Mix the dry and wet ingredients until just combined — a few lumps are better than a dense cake.
- Use Gel Food Coloring: It gives that trademark bright red color without thinning the batter.
- Don’t Skip Cocoa Dusting: It keeps your cake layers from sticking and preserves the red hue without the white flour spots.
How to Serve Red Velvet Cake Recipe
Garnishes
I often finish my Red Velvet Cake with a sprinkle of white chocolate shavings or a few fresh raspberries on top—they add a touch of elegance and a little fruity brightness that cuts through the richness. If you’re hosting a party, a handful of edible rose petals can also make it look stunning and extra special.
Side Dishes
Red Velvet Cake pairs wonderfully with a simple cup of coffee or a robust black tea to balance the sweetness. For a fun twist, I also like serving it alongside fresh berries or a dollop of lightly whipped cream to keep it feeling light and fresh.
Creative Ways to Present
For birthdays or special occasions, I like to double the recipe and build a tiered Red Velvet Cake, decorating with piped rosettes and edible glitter for a fabulous showstopper. Another time, I tried individual mason jar parfaits with crumbled Red Velvet Cake and cream cheese frosting layers—an adorable and mess-free option for gatherings.
Make Ahead and Storage
Storing Leftovers
I always store leftover cake in an airtight container in the fridge to keep the cream cheese frosting fresh. The cake stays moist for up to 4 days, but honestly, it rarely lasts that long in my house!
Freezing
If you want to freeze the cake, wrap the unfrosted layers tightly in plastic wrap and then in aluminum foil. When ready to serve, thaw overnight in the fridge, then frost as usual. This method keeps the cake’s texture spot-on without any freezer burn.
Reheating
Since this is a cream cheese frosted cake, I recommend not reheating it to preserve the frosting’s texture. Instead, bring slices to room temperature before serving—they’ll be soft, fresh, and perfect.
FAQs
-
Can I make this Red Velvet Cake Recipe without food coloring?
Yes, but keep in mind that the classic red velvet look comes from the food coloring reacting with the cocoa and buttermilk. Without coloring, your cake will be more of a light chocolate color and less vibrant, but it will still taste delicious.
-
Why do you use baking soda and vinegar in this recipe?
Baking soda reacts with the acidic vinegar and buttermilk to produce carbon dioxide, which helps the cake rise and keeps the texture tender. It also subtly enhances the flavor and color of the cake.
-
Can I use all-purpose flour instead of cake flour?
You can, but cake flour is preferred for a lighter, softer crumb. If you only have all-purpose flour, try replacing 2 tablespoons of flour per cup with cornstarch to mimic cake flour’s lower protein content.
-
How do I know when the cake is fully baked?
Insert a toothpick or skewer into the center of the cake. If it comes out clean or with just a few moist crumbs, your cake is done. If there’s wet batter on it, bake for a few more minutes and check again.
-
Can I make this cake ahead of time?
Absolutely! You can bake the cake layers a day or two ahead and store them wrapped in the fridge or freezer. Frost on the day you plan to serve for the freshest taste and best texture.
Final Thoughts
I absolutely love how this Red Velvet Cake Recipe turns out—every time, it brings smiles and compliments at family gatherings and celebrations. It’s not just a cake; it’s a little bit of joy you can bake in your own kitchen. Whether you’re a seasoned baker or trying your hand at a classic for the first time, I promise you’ll enjoy every step and every bite. So go ahead, gather your ingredients, and make this stunning, delicious Red Velvet Cake your next baking triumph!
Print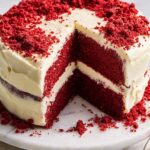
Red Velvet Cake Recipe
- Prep Time: 30 minutes
- Cook Time: 25 minutes
- Total Time: 55 minutes
- Yield: 10-12 servings
- Category: Dessert
- Method: Baking
- Cuisine: American
Description
This classic Red Velvet Cake recipe delivers a soft, velvety sponge with a buttery flavor, subtly enhanced by cocoa, vanilla, and the tang of buttermilk. Perfectly moist and rich, it’s layered with smooth cream cheese frosting and sure to impress for celebrations or as a decadent treat.
Ingredients
Dry Ingredients
- 2 2/3 cups (400 g) plain cake flour
- 2 tbsp (10 g) unsweetened cocoa powder
- 1 tsp (5 g) baking soda (not baking powder)
- Pinch of salt
Wet Ingredients and Batter
- 1/2 cup (115 g) unsalted butter, softened (1 US stick)
- 1 1/2 cups (330 g) caster/superfine white sugar
- 2 eggs, at room temperature (~60 g each)
- 1 cup (250 ml) vegetable oil
- 1 tsp white vinegar
- 2 tsp vanilla extract
- 1 cup (250 ml) buttermilk, at room temperature
- 2 1/2 tbsp red food colouring liquid (gel recommended for UK)
Cream Cheese Frosting
- 14 oz (400 g) Philadelphia Cream Cheese, block, softened but not too soft
- 1/2 cup (115 g) unsalted butter, softened but not too soft
- 1 1/2 tsp vanilla extract
- 4 cups (450 g) soft icing sugar/powdered sugar, sifted
Instructions
- Preheat and prepare pans: Preheat oven to 180C/350F (suitable for all oven types). Butter two 21cm (8 inch) round cake pans, covering both sides and base, then dust with cocoa powder to prevent sticking.
- Mix dry ingredients: Sift the cake flour, cocoa powder, baking soda, and salt together into a bowl and whisk to evenly combine.
- Cream butter and sugar: In a separate bowl, beat the softened butter and caster sugar using an electric mixer or stand mixer with paddle attachment until smooth and fully combined.
- Add eggs: Add eggs one at a time into the butter-sugar mixture, beating well after each addition. Although it may appear curdled at first, continue beating until the mixture becomes smooth.
- Add wet ingredients: Mix in vegetable oil, white vinegar, vanilla extract, buttermilk, and red food colouring. Beat the mixture until smooth and fully combined.
- Combine wet and dry ingredients: Add the sifted dry ingredients to the wet mixture. Beat just until combined; some small lumps are acceptable to prevent overmixing which could toughen the cake.
- Bake the cake: Divide the batter evenly between the two prepared pans. Bake on the same oven shelf for 25–30 minutes or until a toothpick inserted into the center comes out clean.
- Cool the cake: Let the cakes rest for 10 minutes in the pans, then invert onto a cooling rack and allow them to cool completely before frosting.
- Prepare cream cheese frosting: Beat softened cream cheese and butter together until creamy. Add vanilla extract, then gradually add sifted icing sugar and beat until smooth and fluffy.
- Assemble and frost: Once cakes are fully cooled, spread cream cheese frosting evenly over one layer, stack the second layer on top, and finish frosting the top and sides of the cake.
Notes
- This recipe is a classic representation of the iconic Red Velvet Cake, known for its soft, velvety crumb and moist, slightly tangy flavor.
- Do not substitute baking soda with baking powder, as it affects the cake rise and texture.
- Use caster or superfine sugar for the best texture; granulated sugar may affect the smoothness.
- Ensure buttermilk is at room temperature to aid proper mixing and texture.
- In the UK, gel red food coloring is preferred over liquid for deeper color without altering batter consistency.
- After baking, allow cakes to cool completely before frosting to prevent melting or sliding of the cream cheese frosting.
- For best results, measure ingredients by weight using a kitchen scale to maintain precision.
- The cake yields about 10 to 12 servings, suitable for parties or special occasions.
Nutrition
- Serving Size: 1 slice (1/12 of cake)
- Calories: 400
- Sugar: 35g
- Sodium: 250mg
- Fat: 22g
- Saturated Fat: 9g
- Unsaturated Fat: 11g
- Trans Fat: 0g
- Carbohydrates: 45g
- Fiber: 1g
- Protein: 4g
- Cholesterol: 55mg


