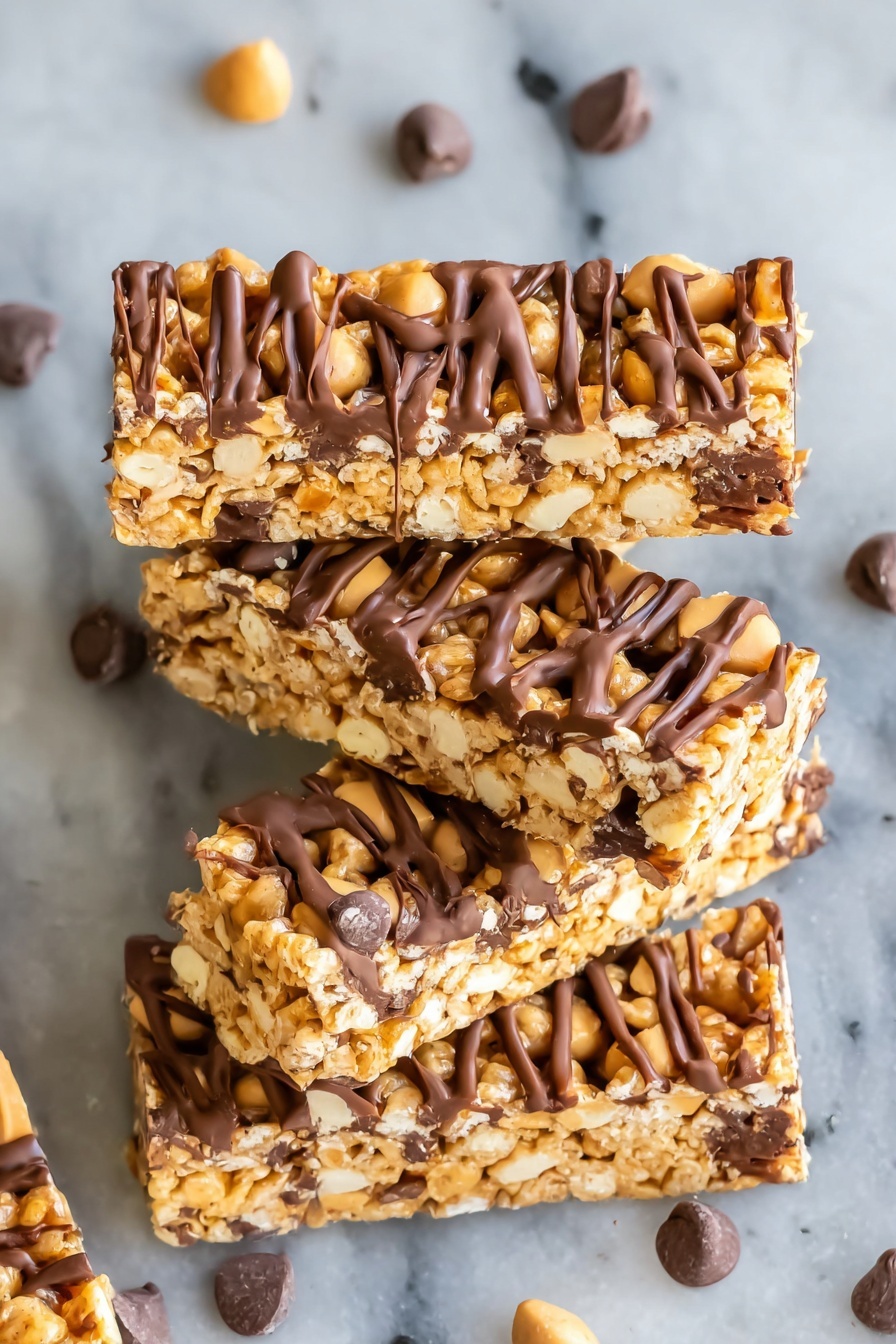
If you’re looking for a quick and delicious snack that you can whip up without turning on the oven, this No Bake Peanut Butter Granola Bars Recipe is totally your new best friend. I absolutely love how these bars come together with simple pantry staples, and they’re so chewy and satisfying that my whole family goes crazy for them. Stick around, and I’ll share everything you need to know to make these no fuss, peanut buttery treats perfectly every time.
Why You’ll Love This Recipe
- No Oven Needed: Perfect for hot days or when you want a fast snack without heating up the kitchen.
- Simple Ingredients: Using just peanut butter, honey, oats, and a few extras you probably already have.
- Customizable Add-Ins: Toss in chocolate chips, nuts, or dried fruit for your favorite flavor combo.
- Kid-Friendly: My kids love helping shape these bars — it’s a fun treat they helped create!

Ingredients You’ll Need
The magic of this No Bake Peanut Butter Granola Bars Recipe is how all the ingredients come together without any baking at all. I love using creamy peanut butter because it blends so smoothly, but chunky works if you want extra texture. Just make sure to use good-quality honey to get that perfect chewiness and sweetness balance.
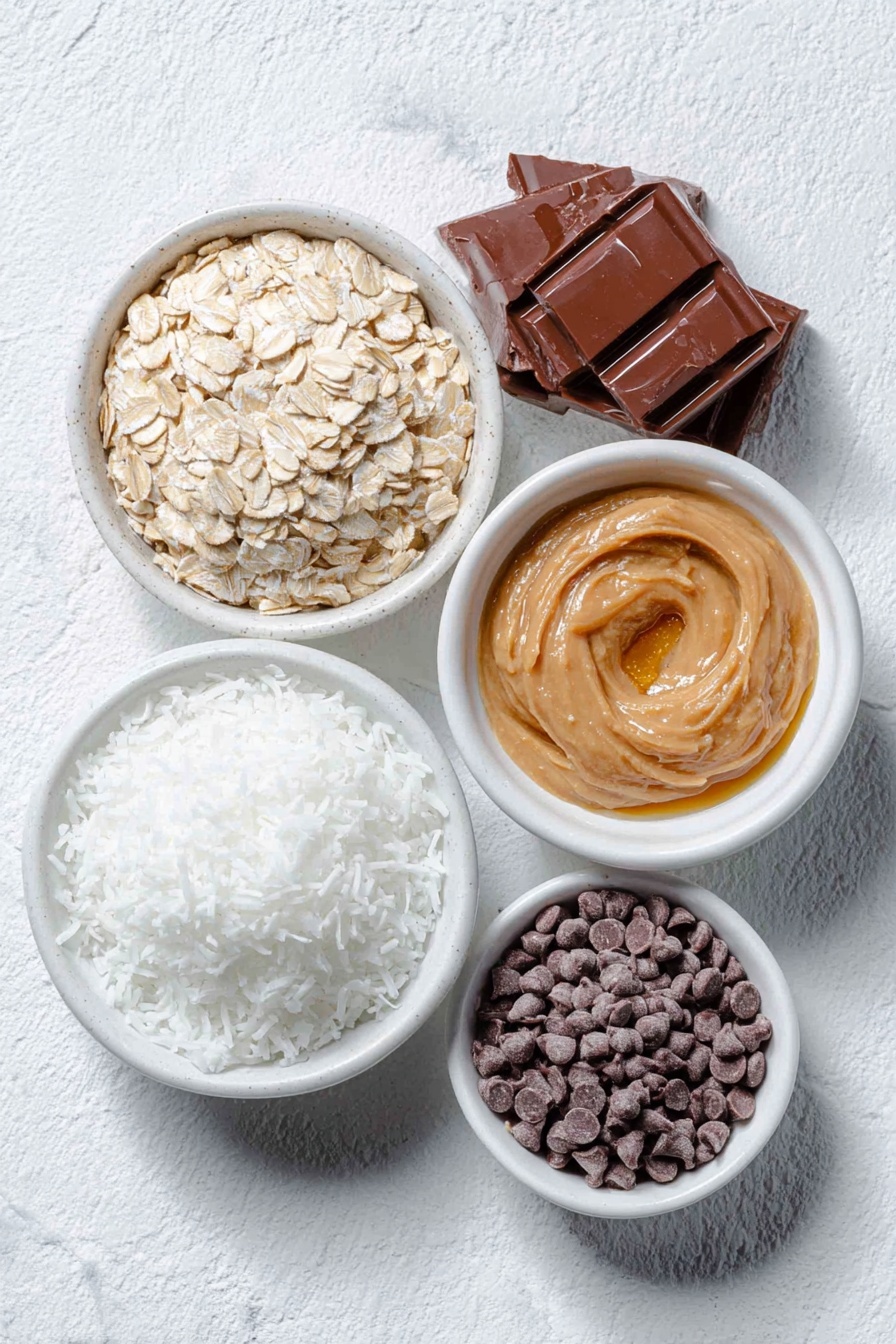
- Peanut butter: Creamy types melt and bind better, but chunky adds a nice crunch if you like a heartier texture.
- Honey: Acts as a natural sweetener and sticky binder; raw honey works wonderfully.
- Old fashioned rolled oats: These give the bars their chewy, hearty base – quick oats won’t hold up as well.
- Shredded coconut: Adds a subtle tropical flavor and some chewiness.
- Mini chocolate chips: A sweet surprise in every bite – I sometimes mix in peanut butter chips for extra yum.
- Melted chocolate (optional): For drizzling on top, making your bars look fancy and taste even better.
Variations
One of the things I love about this No Bake Peanut Butter Granola Bars Recipe is how easy it is to switch up for different tastes or diets. You’ve got a great base that’s ready for your creativity — let me share a few ideas I’ve tried that worked like a charm.
- Nut-Free Version: Swap the peanut butter for sunflower seed butter – it’s a lifesaver for allergy-friendly snacks, and just as tasty.
- Add Crunch: Toss in chopped nuts or seeds like almonds or chia for extra texture and nutrition. My family loves adding some sliced almonds for that little crunch.
- Fruit Boost: Mix in some dried cranberries or raisins for a tangy twist that balances the sweetness.
- Chocolate Lover’s Dream: Double the chocolate chips or drizzle with white chocolate for a rich treat that feels decadent without baking.
How to Make No Bake Peanut Butter Granola Bars Recipe
Step 1: Melt and Mix Your Sticky Ingredients
Start by combining your peanut butter and honey in a microwave-safe bowl. I like to heat it in 20-second bursts, stirring in between, until the peanut butter is fully melted and you have a smooth, luscious mixture. This step is key — if it’s not melted enough, the oats won’t bind properly. Don’t rush it!
Step 2: Stir in Oats and Coconut
Once your peanut butter and honey are perfectly blended, add in the rolled oats and shredded coconut. Mix thoroughly so every oat is coated in that sticky goodness — this helps the bars hold together without crumbling. I find it easiest to use a sturdy spoon or even my hands for this part.
Step 3: Add Chocolate Chips
Fold in your mini chocolate chips or any other add-ins you love. Here’s a fun little trick I discovered: using a mix of peanut butter chips and chocolate chips creates a perfect flavor balance that keeps your bars exciting with every bite.
Step 4: Press Into Pan and Chill
Line an 8×8 inch square pan with wax paper and dump in your granola mixture. Use your hands or the bottom of a measuring cup to press it down firmly and evenly. I learned that pressing tightly means bars won’t fall apart later — it’s worth the little effort. Cover with plastic wrap and pop it in the fridge overnight (or at least a few hours) until it’s nice and firm.
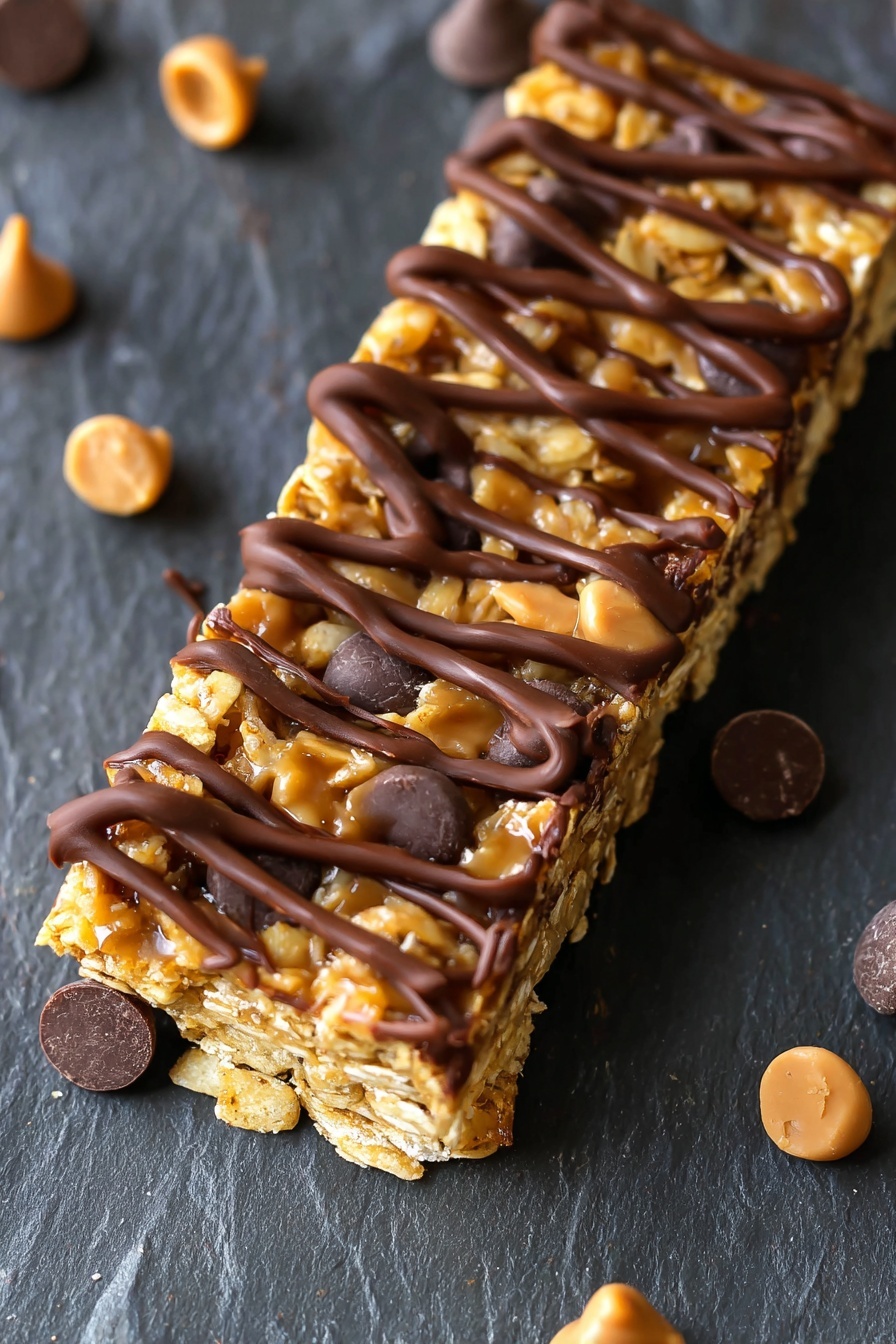
Step 5: Cut and Drizzle (Optional)
Once chilled, lift the slab out of the pan using the wax paper and slice into bars with a sharp knife. If you want to get fancy, melt some chocolate and drizzle it over each bar — this step always makes my family think I’ve spent way more time on them than I actually have! Let the chocolate set before digging in.
Pro Tips for Making No Bake Peanut Butter Granola Bars Recipe
- Use Creamy Peanut Butter: It melts smoother and binds everything better without lumps.
- Press Firmly: I press really tightly into the pan – it prevents crumbly edges and helps bars hold together when cut.
- Chill Long Enough: Don’t rush the fridge time; giving it enough chill makes slicing cleaner and bars easier to handle.
- Customize Wisely: When adding extras, keep the balance so the bars don’t become overly dry or difficult to slice.
How to Serve No Bake Peanut Butter Granola Bars Recipe
Garnishes
For a little flair, I like to sprinkle sea salt flakes over the melted chocolate drizzle — that salty-sweet combo is heavenly! Sometimes, just a few extra chocolate chips or a sprinkle of shredded coconut on top after drizzling keeps things pretty and gives a hint of texture.
Side Dishes
I often pair these granola bars with a fresh fruit salad or a simple yogurt parfait for breakfast or a mid-day snack. They hit the spot when you want something filling but not too heavy.
Creative Ways to Present
For parties or gift-giving, I like to cut these into bite-size squares and stack them in a pretty mason jar tied with a ribbon. They make a fantastic homemade treat that looks like you went the extra mile — without any extra effort.
Make Ahead and Storage
Storing Leftovers
I store leftover bars in an airtight container in the fridge where they stay fresh and chewy for up to a week. Just be sure to separate layers with parchment paper to avoid sticking.
Freezing
These bars freeze beautifully! I wrap individual bars in plastic wrap and place them in a freezer-safe bag. When I want a quick snack, I simply thaw one at room temperature or pop it into the microwave for about 20 seconds.
Reheating
Since they’re no bake, reheating is just about softening. I usually microwave a bar for 10-20 seconds to soften the peanut butter and give that fresh-baked feel without losing the chewiness.
FAQs
-
Can I use crunchy peanut butter for this no bake recipe?
Absolutely! You can use crunchy peanut butter if you like a bit of texture in your bars. Just keep in mind it might make the bars slightly chunkier, but it adds a nice contrast to the oats and chocolate chips.
-
What if I don’t have honey? Can I use another sweetener?
You can substitute honey with maple syrup or agave nectar, which will keep the bars sticky and sweet. However, liquid sweeteners are important since they help bind the oats together, so avoid dry sugars without adding extra wet ingredients.
-
How long do these granola bars last?
Stored in an airtight container in the fridge, these bars stay fresh for up to a week. If you want to keep them longer, freezing is the way to go — they’ll keep well for up to 3 months in the freezer.
-
Are these bars gluten-free?
They can definitely be gluten-free if you use certified gluten-free oats. Regular rolled oats might be cross-contaminated, so be sure to check your labels if you have gluten sensitivity or celiac disease.
Final Thoughts
This No Bake Peanut Butter Granola Bars Recipe has been a staple in my kitchen for years — it’s just one of those simple homemade snacks that feels wholesome and indulgent at the same time. Whether you’re packing lunches, fueling afternoon adventures, or just craving a quick bite, I truly recommend giving this recipe a try. Trust me, you’ll love how easy and crowd-pleasing it is, and you might even catch yourself making it again and again!
Print
No Bake Peanut Butter Granola Bars Recipe
- Prep Time: 10 minutes
- Cook Time: 0 minutes
- Total Time: 2 hours 10 minutes
- Yield: 10 bars
- Category: Snack
- Method: No-Cook
- Cuisine: American
- Diet: Gluten Free
Description
These Easy Homemade Granola Bars are no-bake, chewy, and packed with peanut butter and chocolate chips for a delicious snack or breakfast on the go. Made with simple, wholesome ingredients and naturally gluten-free, these bars are perfect for a quick energy boost without any oven time.
Ingredients
Wet Ingredients
- 1 cup Peanut butter (creamy or chunky)
- 1/2 cup Honey
Dry Ingredients
- 2 1/2 cups Old fashioned rolled oats
- 1/4 cup Shredded coconut
- 1/3 cup Mini chocolate chips (or any other add-ins of your choice)
Optional
- 1/4 cup Melted chocolate (for drizzling)
Instructions
- Melt Peanut Butter and Honey: In a microwave-safe mixing bowl, combine peanut butter and honey. Heat in the microwave in 20-second increments until the peanut butter has fully melted. Stir the mixture until it becomes smooth and well combined.
- Add Dry Ingredients: Add the rolled oats and shredded coconut to the melted peanut butter and honey mixture. Stir thoroughly until all the dry ingredients are evenly incorporated.
- Mix in Chocolate Chips: Stir in the mini chocolate chips or your preferred add-ins, ensuring they are evenly distributed throughout the mixture.
- Transfer to Pan: Pour the granola mixture into an 8×8 inch square pan lined with wax paper. Spread the mixture evenly.
- Press the Mixture Down: Use your hands or the flat bottom of a measuring cup to press the mixture firmly and evenly into the pan, compacting it tightly.
- Refrigerate: Cover the pan with plastic wrap or foil, then refrigerate overnight or until the granola mixture firms up completely.
- Cut into Bars: Remove the chilled granola from the pan and use a sharp knife to cut it into 10 bars.
- Optional Chocolate Drizzle: If desired, drizzle each bar with melted chocolate. Let the chocolate set and harden before serving.
Notes
- Quick and easy no-bake recipe perfect for snacks or breakfast.
- Gluten free and customizable with your favorite add-ins like nuts or dried fruits.
- Use creamy peanut butter for a smoother texture or chunky for added crunch.
- Refrigeration time can be adjusted but chilling overnight ensures bars firm up properly.
- Store bars in an airtight container in the refrigerator for up to one week.
Nutrition
- Serving Size: 1 bar
- Calories: 343 kcal
- Sugar: 23 g
- Sodium: 130 mg
- Fat: 18 g
- Saturated Fat: 5 g
- Unsaturated Fat: 13 g
- Trans Fat: 0 g
- Carbohydrates: 40 g
- Fiber: 4 g
- Protein: 9 g
- Cholesterol: 0 mg

