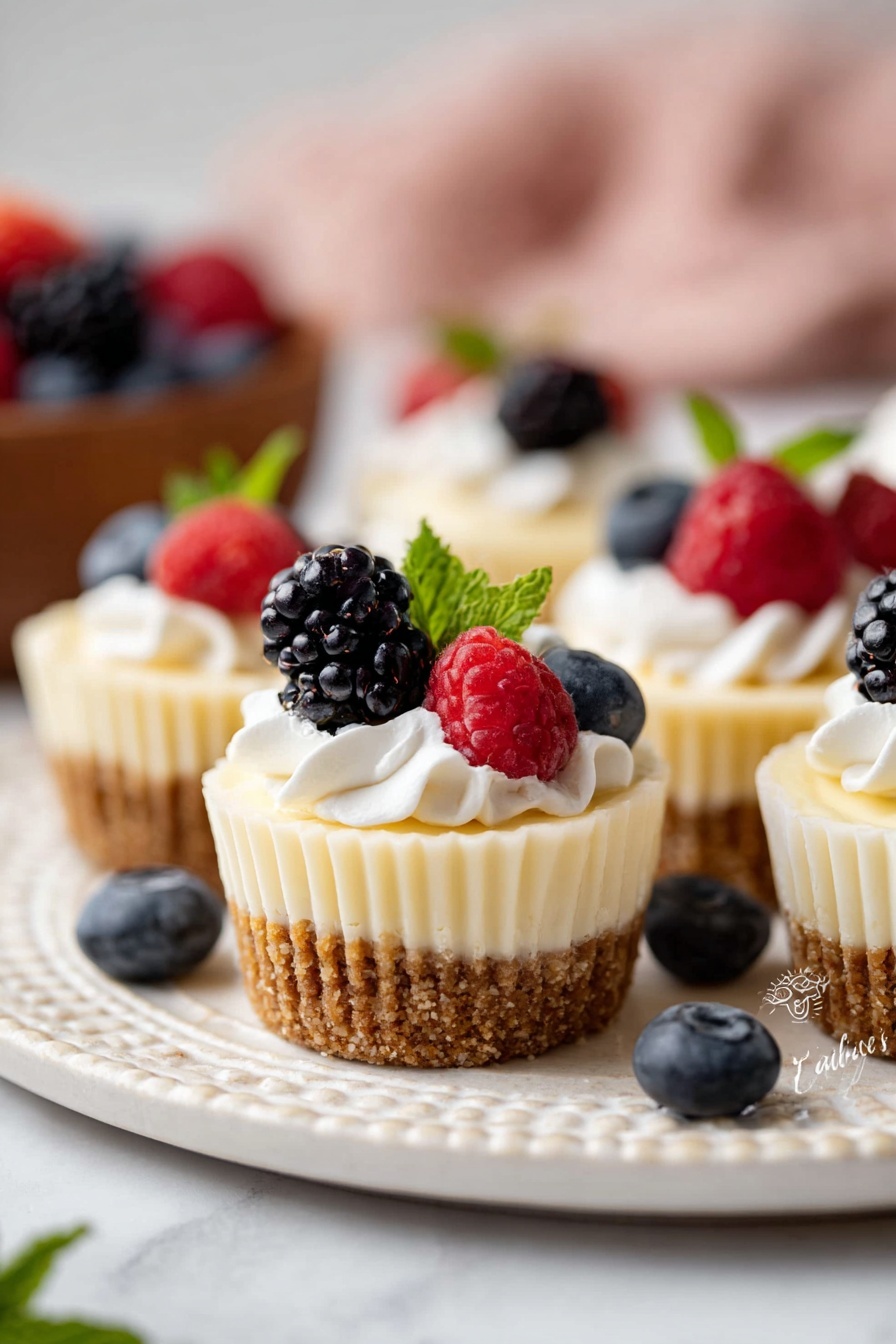
If you’re anything like me, you’re always looking for that perfect little dessert to satisfy a sweet craving without going overboard. That’s why I absolutely love this Mini Cheesecakes in Muffin Pan Recipe. These little delights are creamy, luscious, and perfectly portioned—no guilt, all joy! Plus, they’re unexpectedly easy to whip up, which I discovered back when I needed a crowd-pleaser for a last-minute party. Trust me, once you make these, your family and friends will go crazy for them too.
Why You’ll Love This Recipe
- Perfect Portion Control: Each mini cheesecake is individually sized so you can indulge without overdoing it.
- Easy to Make: Using a muffin pan and cupcake liners simplifies both baking and cleanup.
- Versatile Flavors: The simple base is perfect for adding your favorite toppings or mix-ins.
- Impressively Creamy: Despite the small size, these cheesecakes are rich and velvety, a true treat every time.

Ingredients You’ll Need
When you line up these ingredients, you’ll notice it’s a nice mix of pantry staples and fresh dairy that combine to create an irresistibly smooth cheesecake with a crisp, buttery crust. I always recommend full-fat cream cheese and sour cream for the best texture and flavor—trust me, it makes a big difference!
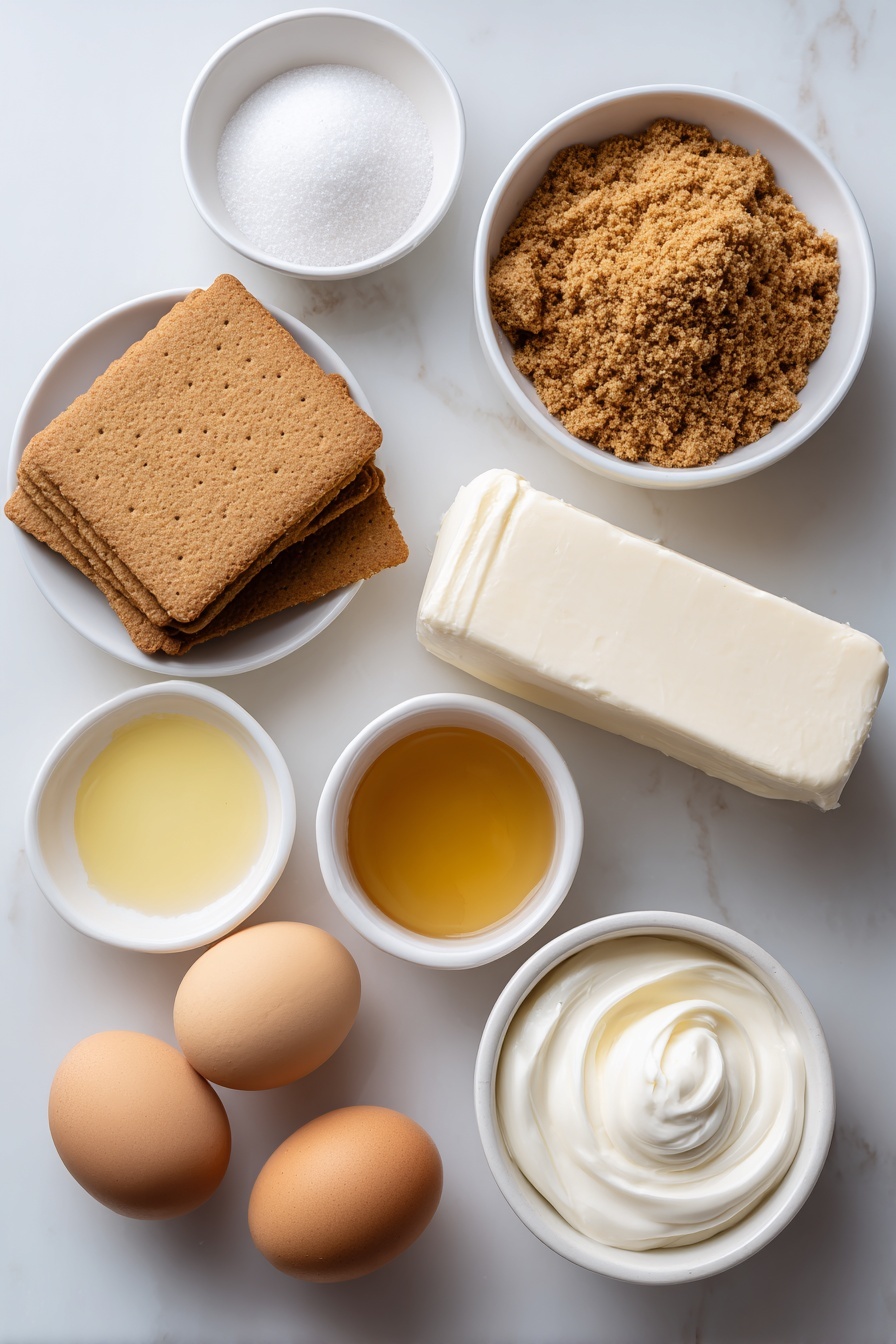
- Graham cracker crumbs: I like to crush whole sheets myself—it tastes fresher and you can control the texture.
- Granulated sugar: It sweetens both the crust and filling just right, nothing too overpowering.
- Unsalted butter: Melted butter binds the crust crumbs, adding that rich buttery flavor.
- Full-fat brick cream cheese: Essential for that creamy, dense cheesecake texture; room temp makes it easier to blend.
- Full-fat sour cream: Adds a subtle tang and velvety smoothness—don’t skip it!
- Pure vanilla extract: Brings out the flavor and compliments the tangy notes.
- Freshly squeezed lemon juice: Just a touch to brighten up the entire cheesecake.
- Large eggs: Make sure they’re at room temperature for smooth mixing and perfect bake consistency.
Variations
I love mixing things up with this Mini Cheesecakes in Muffin Pan Recipe because it’s so versatile. Sometimes I go classic with fresh berries, other times I fold in chocolate chips or swirl in raspberry jam for a fruity twist. Really, make it your own and have fun with it!
- Berry Swirl: Gently swirl raspberry or blueberry preserves into the batter before baking—my kids adore how it streaks through each mini treat.
- Chocolate Chip: Fold in a handful of mini chocolate chips to the batter for some chocolate surprises in every bite.
- Gluten-Free Crust: Swap graham crackers with almond flour or gluten-free cookie crumbs to keep it gluten-free without losing taste.
- Mini Muffin Sizes: For an even smaller version, use a mini muffin pan, but watch baking time closely as it will be shorter.
How to Make Mini Cheesecakes in Muffin Pan Recipe
Step 1: Prepare the Crust
Preheat your oven to 350°F (177°C) and line a 12-count muffin pan with cupcake liners. In a bowl, mix together graham cracker crumbs, sugar, and melted butter until you get a sandy texture that holds together when pressed. I find that using a spoon or your fingers to firmly press about a heaping tablespoon of the crust mix into each liner gives a sturdy base that bakes perfectly crisp. Bake the crusts for 6 minutes to set a little before adding the filling—this helps avoid a soggy crust.
Step 2: Whip Up the Creamy Filling
Using a stand mixer or handheld mixer fitted with a paddle or whisk attachment, beat softened cream cheese and sugar on medium-high speed for about 2 minutes until silky smooth. This step is super important to avoid lumps! Then, add sour cream, lemon juice, and vanilla extract—beat again until fully combined. Lastly, with the mixer on medium, add eggs one at a time, mixing just until incorporated each time—you don’t want to overmix here as it can cause cracking later.
Step 3: Fill and Bake
Fill each pre-baked crust liner all the way to the top with the cheesecake batter. It’s okay if the crust is still warm. Now, here’s where I like to use a little trick: place a roasting pan filled with an inch of boiling water on the bottom rack of your oven, and position your cheesecakes on the center rack above it. The steam keeps the oven moist and helps prevent the cheesecakes from cracking or sinking too much while baking. Bake for about 20 minutes, until edges are set but centers jiggle slightly when you gently tap the pan.
Step 4: Cool and Chill
Set the muffin pan on a cooling rack and let the mini cheesecakes cool completely for about 45 minutes at room temperature. Then, transfer them to the fridge for at least 2 hours, or up to 24 hours, to let them firm up fully. If you’re in a hurry, popping them into the freezer for about an hour works wonders too! Pro tip: loosely cover the cheesecakes in the fridge to keep them from drying out.
Pro Tips for Making Mini Cheesecakes in Muffin Pan Recipe
- Room Temperature Ingredients: I learned that letting the cream cheese, sour cream, and eggs come to room temp ensures a smoother batter and prevents lumps.
- Don’t Overmix: When adding eggs, mix just until combined to avoid incorporating too much air, which can cause cracks.
- Water Bath for Moisture: Using the steaming water bath trick helped me achieve creamy, crack-free cheesecakes every time.
- Use Cupcake Liners: They make removing cheesecakes so much easier—and the pan stays cleaner too!
How to Serve Mini Cheesecakes in Muffin Pan Recipe
Garnishes
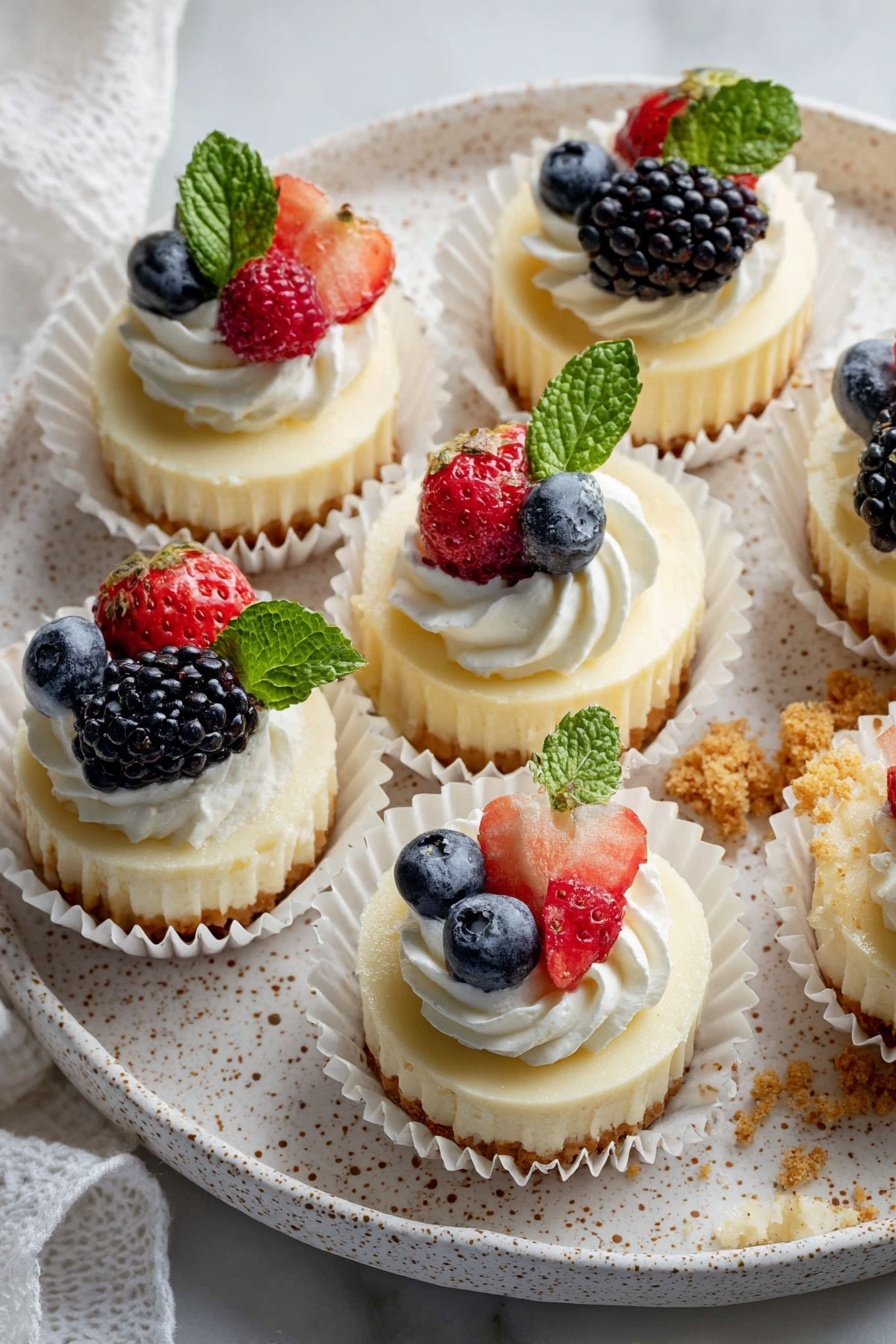
My go-to garnish for these mini cheesecakes is a light dollop of freshly whipped cream—piped on for a pretty touch—and a few fresh berries like strawberries, blueberries, or raspberries. The berries add a bright zing that balances the creamy richness perfectly. I also love a little sprig of fresh mint for color and aroma. If I’m feeling fancy, a drizzle of chocolate or caramel sauce adds a special flair.
Side Dishes
Since these mini cheesecakes are a dessert in themselves, I usually serve them after a light meal. But if you want to build a larger dessert table, cheesecake pairs wonderfully with fresh fruit platters, coffee, or a scoop of vanilla ice cream on the side.
Creative Ways to Present
For special occasions, I like to arrange these mini cheesecakes on a tiered dessert stand for a beautiful display that’s also easy for guests to grab. I’ve also wrapped each lined cheesecake in clear cellophane tied with a colorful ribbon—a great idea for party favors or gifts! Playing with seasonal toppings like pumpkin puree in fall or edible flowers in spring always wow my guests.
Make Ahead and Storage
Storing Leftovers
I keep leftover mini cheesecakes stored in an airtight container in the fridge, where they stay fresh and creamy for up to 5 days. The cupcake liners help maintain their shape and make it easy to take them on the go or to pack in lunch boxes.
Freezing
Freezing works great too! I usually freeze them on a baking sheet first until firm, then transfer to a freezer-safe container to avoid smashing. When properly wrapped, these mini cheesecakes freeze well for up to a month. Just thaw overnight in the fridge before serving.
Reheating
Cheesecake is best served chilled, so I recommend just thawing leftovers in the fridge rather than reheating. If you want to take off the chill, let them sit out at room temperature for 15-20 minutes to bring out the flavors wonderfully without risking texture changes.
FAQs
-
Can I make these mini cheesecakes without a water bath?
Absolutely! The water bath is optional but highly recommended as it helps keep the oven moist and prevents the cheesecakes from cracking or sinking too much. If you skip it, just be sure to watch the baking time closely and avoid overbaking.
-
What type of cream cheese should I use?
For the best texture and flavor, use full-fat brick cream cheese rather than the spreadable kind in tubs. Make sure it’s softened to room temperature before mixing to get a smooth batter.
-
Can I use a mini muffin pan instead of a standard one?
Yes, you can! Just be aware that baking time will be shorter since the cheesecakes will be smaller. Start checking for doneness around 10-12 minutes and adjust accordingly.
-
How do I prevent cracks on the cheesecakes?
Cracks usually happen from overmixing or baking at too high a temperature. Be gentle when adding eggs, don’t overbeat, and consider using the water bath method. Also, avoid opening the oven door during baking to maintain temperature stability.
-
How long can I store these mini cheesecakes?
Stored properly in the refrigerator, these mini cheesecakes will stay fresh for up to 5 days. For longer storage, freezing is a great option.
Final Thoughts
Honestly, this Mini Cheesecakes in Muffin Pan Recipe has become a staple in my kitchen for good reason. It’s the perfect blend of rich, creamy cheesecake and easy-to-handle portion sizes that work for any occasion—from casual weeknight desserts to special celebrations. I hope you enjoy making (and eating!) these as much as I do. Once you try this recipe, it’ll be one you come back to again and again, trust me on that. Happy baking, friend!
Print
Mini Cheesecakes in Muffin Pan Recipe
- Prep Time: 20 minutes
- Cook Time: 20 minutes
- Total Time: 3 hours 15 minutes
- Yield: 12 mini cheesecakes
- Category: Dessert
- Method: Baking
- Cuisine: American
- Diet: Vegetarian
Description
These Mini Cheesecakes are creamy, delicious individual desserts made in a standard 12-count muffin pan. Featuring a buttery graham cracker crust and a smooth, rich cream cheese filling, they bake up perfectly portioned and can be garnished with whipped cream and fresh berries for an elegant presentation. Ideal for portion control and easy to customize, these treats are perfect for any occasion.
Ingredients
Crust
- 1 cup (120g) graham cracker crumbs (about 8 full sheet graham crackers)
- 2 Tablespoons (25g) granulated sugar
- 3 Tablespoons (43g) unsalted butter, melted
Filling
- 16 ounces (452g) full-fat brick cream cheese, softened to room temperature
- 1/2 cup (100g) granulated sugar
- 1/4 cup (60g) full-fat sour cream, at room temperature
- 1 teaspoon pure vanilla extract
- 1 teaspoon freshly squeezed lemon juice
- 2 large eggs, at room temperature
Instructions
- Preheat and Prepare Pan: Preheat your oven to 350°F (177°C). Line a standard 12-count muffin pan with cupcake liners to prevent sticking and make removal easy.
- Make the Crust: In a medium bowl, combine the graham cracker crumbs, 2 tablespoons sugar, and melted butter. Mix until sandy and crumbly. Firmly press about a heaping tablespoon of this mixture into the bottom of each cupcake liner. Bake the crusts for 6 minutes to set.
- Prepare the Filling: Using a handheld or stand mixer with a paddle or whisk attachment, beat the softened cream cheese and 1/2 cup sugar on medium-high until completely smooth and creamy, about 2 minutes. Add the sour cream, lemon juice, and vanilla, mixing until fully incorporated.
- Add Eggs: With the mixer running on medium speed, add the eggs one at a time, beating just until combined after each addition to avoid overmixing.
- Fill Liners: Divide the batter evenly among the liners, filling each all the way to the top. It’s fine if the crust mixture is still warm.
- Optional Water Bath Setup: To minimize sinking, boil enough water to fill a large roasting pan to 1 inch deep. Place this pan on the lowest oven rack. Immediately after, place cheesecakes on the center rack and close the oven to trap steam, creating a gentle water bath environment without submerging the muffin pan.
- Bake: Bake the mini cheesecakes for about 20 minutes, or until the edges are set and the centers have a slight jiggle when the pan is touched.
- Cool: Set the pan on a cooling rack and allow cheesecakes to cool at room temperature for 45 minutes.
- Chill: Transfer the cheesecakes to the refrigerator to chill for at least 2 hours or up to 24 hours to allow them to fully set. Alternatively, freeze for 1 hour to speed up chilling. Cover loosely if chilling longer.
- Decorate and Serve: Optionally, pipe whipped cream on top using a Wilton 1M tip, then garnish with fresh berries and mint, or any toppings of your choice. Whipped cream can be prepared up to 24 hours beforehand. Keep cheesecakes refrigerated until serving.
- Store: Cover and store leftovers in the refrigerator for up to 5 days.
Notes
- Use a standard 12-count muffin pan for best results; for even smaller mini cheesecakes, try using a mini muffin pan.
- The optional water bath step helps prevent excessive sinking and cracking but can be skipped if desired.
- Allow cream cheese and eggs to come to room temperature before mixing for a smoother batter.
- Do not overmix after adding eggs to avoid incorporating too much air, which causes cracking.
- Garnish with fresh berries, whipped cream, mint, or other toppings to enhance presentation and flavor.
Nutrition
- Serving Size: 1 mini cheesecake
- Calories: 320 kcal
- Sugar: 20 g
- Sodium: 150 mg
- Fat: 25 g
- Saturated Fat: 15 g
- Unsaturated Fat: 8 g
- Trans Fat: 0 g
- Carbohydrates: 18 g
- Fiber: 1 g
- Protein: 5 g
- Cholesterol: 80 mg


