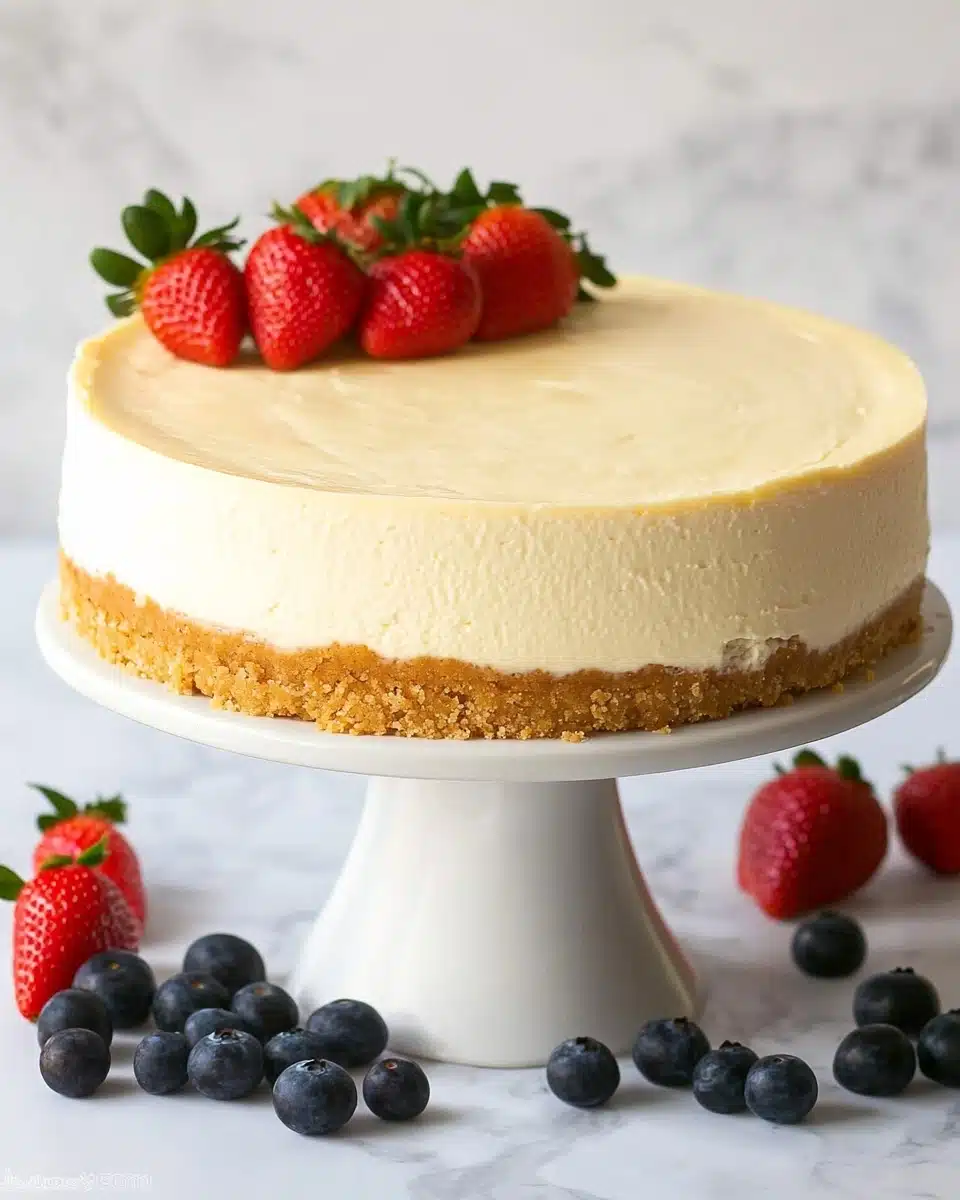
If you think the ultimate creamy cheesecake is only possible in a fancy bakery, get ready to be wowed in your own kitchen! This Instant Pot Cheesecake delivers the silkiest, most luscious slice you could dream of, all with the magic of your pressure cooker. It’s hands-down my favorite foolproof dessert, and I can’t wait to share all my secrets with you.
Why You’ll Love This Recipe
- No-Fuss & No Crack: The steam of the Instant Pot means a velvety, crack-free cheesecake every time – even for beginners!
- Rich, Creamy Texture: The pressure cooking process delivers that signature smooth and creamy bite we all crave in a classic cheesecake.
- Bakes in Half the Time: No need to babysit a water bath in the oven—this Instant Pot Cheesecake comes together fast and perfectly!
- Endless Customization: Keep it simple or dress it up with sauces, berries, or your favorite toppings—this recipe is your blank canvas for dessert creativity.

Ingredients You’ll Need
Let’s celebrate the simplicity here—each ingredient in this Instant Pot Cheesecake recipe is chosen to create exceptional flavor and that dreamiest, melt-in-your-mouth texture. Every item plays a starring role, so grab the best you can and watch how they come together to wow!
- Graham cracker crumbs: These form that classic, buttery crust—feel free to crush your own or buy pre-made crumbs.
- Melted butter: The binding magic for your crust, lending richness and dimension to each bite.
- Cream cheese (room temperature): The heart of the cheesecake—make sure it’s truly soft for a lump-free, velvety filling.
- Granulated sugar: Sweetens the filling just right and creates that smooth, irresistible texture.
- Sour cream or plain Greek yogurt: Either will add a lovely tang and an ultra luxurious, creamy body.
- Large eggs (room temperature): Bring everything together into that decadent custard—room temp eggs blend best.
- Vanilla extract: Adds warmth and rounds out every flavor note in your Instant Pot Cheesecake.
- Water: Essential for generating steam pressure in your Instant Pot, giving your cake that beautifully gentle bake.
Variations
The beauty of Instant Pot Cheesecake is just how easily it welcomes your personal touch. Whether you’re jazzing it up for dietary needs, a special occasion, or simply to fit what you have in the pantry, there are lots of delicious twists waiting to be explored!
- Chocolate Swirl: Drizzle melted chocolate into the batter, then swirl with a knife before cooking for a striking visual and a cocoa kick.
- Berry Burst: Sprinkle fresh raspberries or blueberries onto the crust before adding the filling for a juicy, fruity surprise in every slice.
- Gluten-Free Crust: Use gluten-free graham crackers or cookies instead—the method and flavor stay fabulous!
- Lighter Version: Swap in low-fat cream cheese and Greek yogurt for a cheesecake that’s just as dreamy but a tad lighter.
How to Make Instant Pot Cheesecake
Step 1: Prepare the Crust
Start by mixing your graham cracker crumbs and melted butter in a bowl until every crumb is coated and looks like wet sand. Press this mixture firmly into the bottom and about one inch up the sides of a 7-inch springform or push pan—really pack it in for that classic sturdy base. Bake at 350°F for 10 minutes until set and just golden, then let it cool while you prepare that luscious filling.
Step 2: Make the Cheesecake Filling
Beat your room temperature cream cheese in a large bowl until completely smooth and creamy (no lumps allowed!). On low speed, gently mix in the sugar. Keeping the mixer on low here is key—this prevents air bubbles so your cheesecake stays dense and velvety. Add in the sour cream (or Greek yogurt), then the eggs and vanilla, mixing just until blended after each addition.
Step 3: Fill and Prep the Pan
Pour the creamy filling into your cooled crust, then tap the pan gently on the counter to bring any trapped air bubbles to the surface—they’ll pop, leaving you with that signature smooth top. Tear off a long piece of foil and fold it into a sling so you can easily lift your cheesecake pan in and out of the Instant Pot later—trust me, this step is a lifesaver!
Step 4: Pressure Cook to Perfection
Add 1 ½ cups water to the Instant Pot and set the trivet inside. Place your foil sling on top, with the ends sticking up, then gently set the pan in the center. Fold the sling ends over the pan to keep them neat. Secure the lid, seal the valve, and set to Pressure Cook for 32 minutes—it’ll take about 10 minutes to build pressure. When the timer beeps, let the pressure release naturally… this is what gives your Instant Pot Cheesecake a stress-free finish!
Step 5: Cool and Chill
Carefully lift out the cheesecake using your foil sling and transfer the pan to a wire rack. Let it come to room temperature before transferring to the fridge—no shortcuts here—then chill for at least 8 hours or overnight. This waiting period is when the flavors meld and that magical firm-yet-creamy texture sets in perfectly. When you’re finally ready, slice and watch the ooohs and ahhhs roll in!
Pro Tips for Making Instant Pot Cheesecake
- Super Smooth Cream Cheese: Always start with fully room temperature cream cheese—cold blocks will resist blending and could leave lumps in your cheesecake.
- Unbeatable Crust Texture: Use the bottom of a flat measuring cup to press the graham mixture in for a perfectly compacted, bakery-worthy base.
- Foil Sling Magic: Don’t skip the foil sling—this simple trick makes removing your Instant Pot Cheesecake effortless and keeps your cake intact.
- Patience Pays Off: Letting the cheesecake fully chill overnight not only sets the texture but deepens the flavor. Trust me, it’s worth the wait.
How to Serve Instant Pot Cheesecake
Garnishes
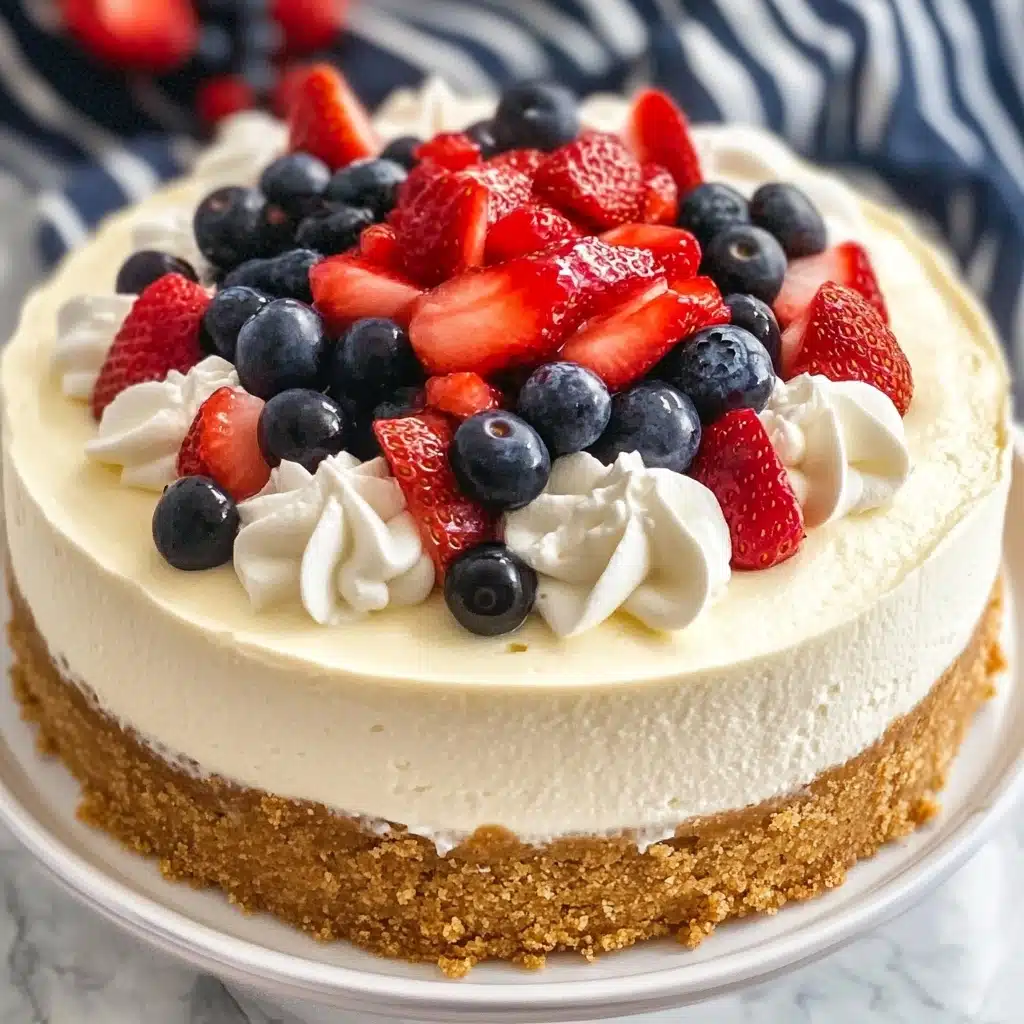
Dress up your Instant Pot Cheesecake with a vibrant array of toppings—think fresh strawberries, blueberries, or a scattering of raspberries for color and tang. A quick drizzle of chocolate or caramel sauce, a dollop of whipped cream, or a sprinkle of toasted nuts can take things to the next level. Let the garnishes reflect whatever you’re celebrating or craving!
Side Dishes
Because cheesecake is such a dreamy, rich dessert, I adore serving it with something light and fresh on the side. A simple fruit salad, a cup of fresh berries, or even a zingy citrus sorbet makes the perfect complement. For a festive touch, pair your slice with a tiny glass of sweet dessert wine or rich coffee.
Creative Ways to Present
This Instant Pot Cheesecake is stunning on its own, but you can go all out for a special occasion! Try slicing into elegant wedges and serving each plate with swirls of colorful fruit sauces, or cut into cubes and skewer with fresh berries for easy party bites. If you really want to amaze, use cookie cutters to create mini shapes for a dessert buffet.
Make Ahead and Storage
Storing Leftovers
To keep your Instant Pot Cheesecake tasting its best, store leftovers tightly wrapped or in an airtight container in the refrigerator. It’ll stay fresh and silky for up to 5 days, making it ideal for prepping ahead or sneaking slices throughout the week.
Freezing
Cheesecake actually freezes surprisingly well! Once it’s fully chilled, slice into portions, wrap each piece tightly in plastic wrap and then foil, and freeze for up to 2 months. Thaw in the fridge overnight and enjoy dessert on demand, any time you need a treat.
Reheating
Your cheesecake is best served chilled or at room temperature. If you like a softer texture, let your slice sit out for about 15 minutes before serving. Avoid the microwave—it will melt the creamy structure and lose its signature texture.
FAQs
-
Can I use a different size pan for Instant Pot Cheesecake?
Yes! This recipe works perfectly in a 7-inch springform or push pan. If you use a smaller or larger pan, you may need to adjust the cooking time—smaller pans might need a couple more minutes, while larger pans could be ready a little sooner. Just keep an eye on the center for a set but slightly jiggly texture.
-
Why is my cheesecake still jiggly when I take it out of the Instant Pot?
A bit of jiggle in the center is normal and desirable—it will firm up beautifully as it chills. If the edges are set but the middle gently wobbles, you’re right on track! Resist the urge to overcook, as the texture could turn dense or dry once chilled.
-
Can I double this Instant Pot Cheesecake recipe?
Doubling isn’t recommended in a standard 6-quart or 8-quart Instant Pot, as the pan will overflow and the cheesecake may not set properly. For a larger crowd, make two cheesecakes in separate pans, or use a larger pressure cooker if you have one with a custom-sized pan.
-
What can I substitute for sour cream in this cheesecake?
Plain Greek yogurt (full-fat or 2%) works wonderfully in place of sour cream and adds a subtle tang. This is a great option if you want a slightly lighter option without losing creaminess or flavor.
Final Thoughts
If you’re craving a dessert that’s ridiculously creamy, reliably impressive, and shockingly easy, I can’t recommend this Instant Pot Cheesecake enough. Give it a try and let it turn your next dinner, holiday, or quiet night in into an occasion to remember. Happy baking—you deserve every heavenly bite!
Print
Instant Pot Cheesecake Recipe
- Prep Time: 15 minutes
- Cook Time: 34 minutes
- Total Time: 8 hours 49 minutes
- Yield: 12 servings
- Category: Instant Pot
- Method: Pressure Cooking
- Cuisine: American
- Diet: Vegetarian
Description
This Instant Pot cheesecake recipe is a creamy and decadent dessert that is easy to make with the help of a pressure cooker. The rich and smooth texture of the cheesecake pairs perfectly with a graham cracker crust, making it a delightful treat for any occasion.
Ingredients
Graham Cracker Crust:
- 1 1/2 cups graham cracker crumbs
- 1/4 cup melted butter
Cheesecake Filling:
- 16 ounces cream cheese, room temperature
- 3/4 cup granulated sugar
- 1/2 cup sour cream or Greek yogurt (plain)
- 2 large eggs, room temperature
- 1 teaspoon vanilla extract
Water for Instant Pot:
- 1 1/2 cups water for Instant Pot
Instructions
- Preheat oven to 350°F. In a medium bowl, stir together graham crumbs and butter. Press into the bottom and about 1″ up the sides of a 7″ springform pan or push pan.
- Bake crust for 10 minutes, or until dry. Set aside to cool slightly.
- In a large bowl, beat cream cheese with an electric mixer on medium speed until smooth. Add sugar and beat on low speed until smooth. Using low speed helps to prevent adding unnecessary air bubbles to the batter.
- Add sour cream and beat on low speed just until smooth.
- Add eggs and vanilla and beat on low speed until smooth.
- Pour into prepared crust. Tap gently on the counter to bring air bubbles to the top and pop with a knife.
- Tear off a long piece of foil and fold it lengthwise to create a long narrow sling. Pour the water into the Instant Pot, then place the trivet in the pot. Put the sling on top of the trivet, bending it to lay flat on the bottom and stick up the sides, as shown in the image above.
- Place pan on top of the sling, and fold the ends of the sling over top the pan.
- Put the lid on, turn the valve to sealing, and select Pressure Cook for 32 minutes. It will take about 10 minutes to build pressure.
- When the cook time is over, turn the Instant Pot off and allow the pressure to release naturally before opening the valve and removing the lid.
- Remove the pan from the Instant Pot using the sling. Set on a wire rack to cool to room temperature before refrigerating for 8 hours or overnight.
- Slice and serve.
Nutrition
- Serving Size: 1 slice
- Calories: 344
- Sugar: 21g
- Sodium: 265mg
- Fat: 25g
- Saturated Fat: 14g
- Carbohydrates: 27g
- Fiber: 1g
- Protein: 5g
- Cholesterol: 108mg

