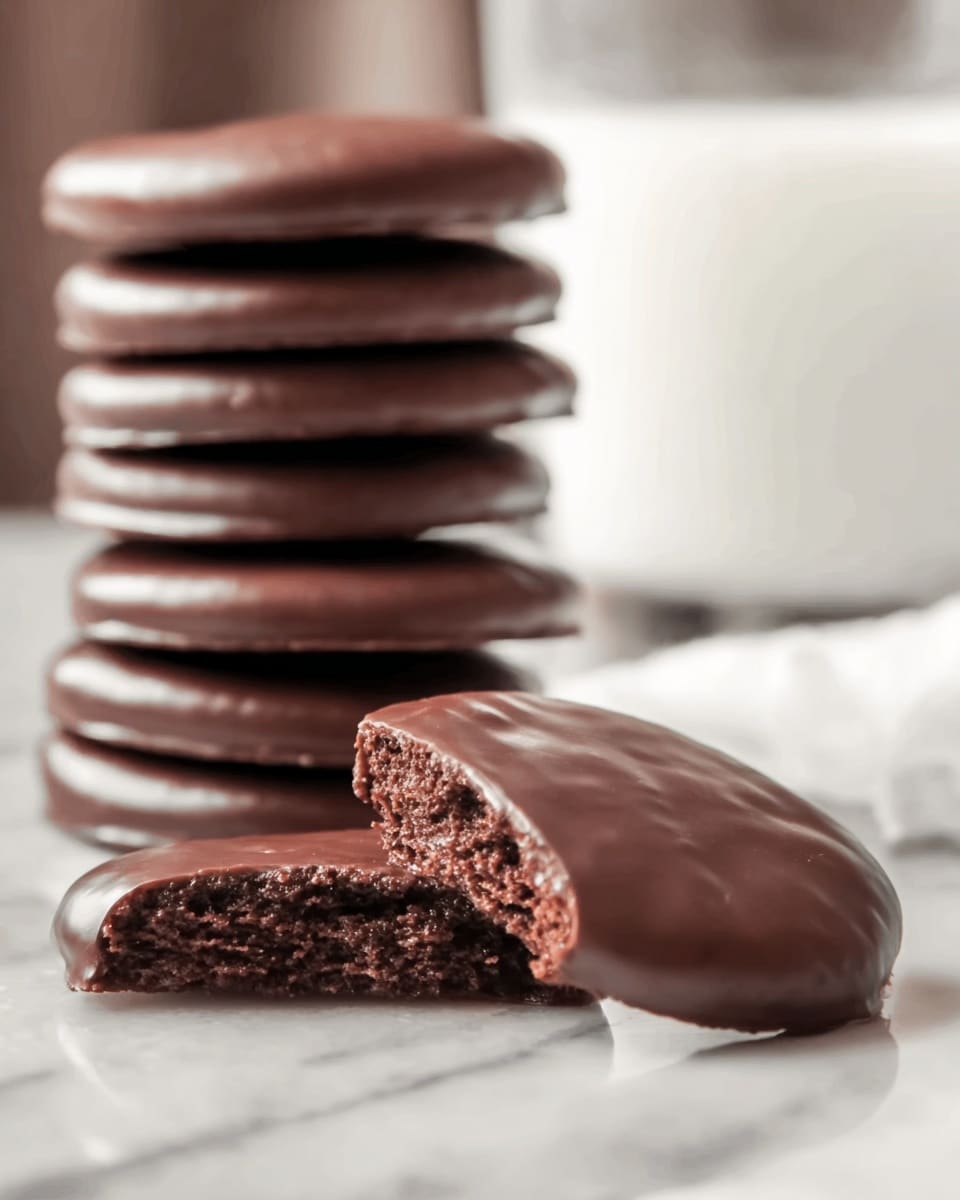
I absolutely love this Homemade Thin Mint-Inspired Cookies Recipe because it captures everything you adore about those classic Girl Scout cookies but with a fresh homemade twist. The combination of rich cocoa and refreshing peppermint is simply irresistible, and you’ll find that making them yourself lets you tweak the intensity of the mint and chocolate just the way you like it. Whether you’re baking for a holiday party or just craving a sweet, minty treat any time of year, these cookies are an easy crowd-pleaser.
When I first tried this recipe, I was surprised by how approachable it is—even if you don’t consider yourself a baker yet. The dough comes together quickly, and chilling it really helps with rolling out those perfectly thin, crisp cookies. Plus, dipping each cookie in chocolate is oddly satisfying and makes the whole experience feel gourmet without much effort. If you’ve been searching for that perfect “Homemade Thin Mint-Inspired Cookies Recipe” that’s both authentic and doable, I’m excited to share this one with you!
Why You’ll Love This Recipe
- Easy to Make at Home: This recipe uses simple ingredients and straightforward steps, perfect for bakers of all levels.
- Customizable Mint Flavor: You control the peppermint intensity, so everyone’s taste buds get their perfect cookie.
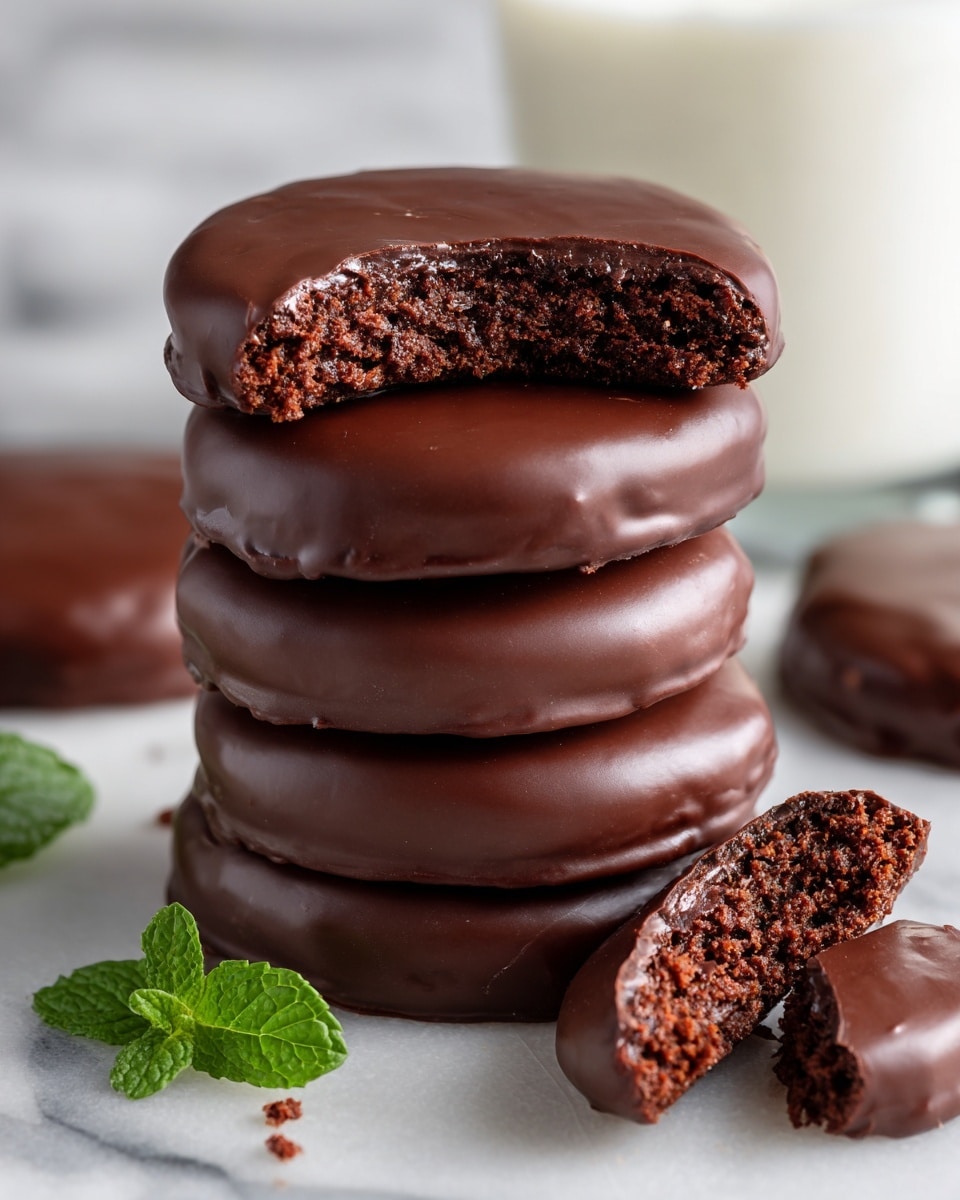
- Deliciously Crisp Texture: These cookies bake thin and firm up nicely, delivering that signature snap Thin Mints are known for.
- Perfect for Gifting or Snacking: They store well, travel easily, and always impress friends and family.

Ingredients You’ll Need
The ingredients for this Homemade Thin Mint-Inspired Cookies Recipe come together to create that nostalgic mint-chocolate combo. Make sure your butter is at room temperature for the best texture, and look for good-quality peppermint extract to get just the right flavor punch.
- All-purpose flour: Provides the structure for the cookies—sift or whisk it to avoid lumps.
- Unsweetened cocoa powder: Adds deep chocolate flavor without any sweetness, which balances well with the mint.
- Baking soda: Helps lighten the texture slightly for that delicate crispness.
- Salt: Enhances flavor and balances the sweetness.
- Unsalted butter: Use softened butter for easy mixing and a tender crumb that’s not greasy.
- Sugar: Sweetens the dough just enough to complement the mint and cocoa.
- Peppermint extract: The star flavor—start with the recommended amount and adjust to your liking.
- Dark chocolate: For dipping; choose a chocolate you enjoy because it’s the coating that makes these cookies truly special.
Variations
I like to switch things up with this Homemade Thin Mint-Inspired Cookies Recipe depending on the season or my mood. You can easily adjust the peppermint for a softer hint or go bold for a minty explosion. Some days I even experiment with different dipping chocolates or add a pinch of espresso powder to enhance the cocoa flavor.
- Mint Intensity Variation: When I want a milder mint flavor, I cut back the peppermint extract by half and find it’s still refreshing but not overpowering.
- Chocolate-Coating Tweaks: Using semi-sweet or even milk chocolate instead of dark chocolate gives a sweeter, creamier finish that some people prefer.
- Gluten-Free Option: Substituting all-purpose flour with gluten-free flour blends works well; just add a little extra folding to get the texture right.
- Extra Chocolate Crunch: Adding finely chopped mint candies into the melted chocolate makes for a fun surprise in every bite!
How to Make Homemade Thin Mint-Inspired Cookies Recipe
Step 1: Prep Your Oven and Baking Sheets
Start by preheating your oven to 350°F (175°C). Line two baking sheets with parchment paper or nonstick silicone mats to make cleanup a breeze and prevent your delicate cookies from sticking. Getting this ready upfront means no last-minute scrambling once your dough is done.
Step 2: Mix the Dry Ingredients
Grab a medium bowl and whisk together the flour, unsweetened cocoa powder, baking soda, and salt. Making sure these are well combined helps spread the flavors evenly and avoid any clumps, which is key since the cocoa powder can sometimes get lumpy.
Step 3: Cream Butter and Sugar
In your mixing bowl (I love using a stand mixer for this), beat the room temperature butter with the sugar until it’s light and fluffy—should take about five minutes. This step is crucial because it traps air that gives your cookies a lovely texture. Don’t forget to scrape down the sides of your bowl halfway through so everything incorporates evenly.
Step 4: Add Peppermint and Dry Ingredients
Once the butter and sugar are luscious and airy, stir in your peppermint extract. Next, add the flour and cocoa mixture in two batches, mixing until just combined but still slightly crumbly. Be gentle here—overmixing can make your cookies tough, and you want to keep that light texture.
Step 5: Chill the Dough
Gather your dough into a ball, flatten it a bit, and wrap tightly with plastic wrap. Refrigerate for 30 minutes. Chilling is a must for this recipe; it firms up the dough, making it easier to roll out and helps the cookies keep their shape during baking.
Step 6: Roll Out and Cut the Cookies
Once chilled, lightly flour your work surface and roll the dough out to about 1/4-inch thickness. Use a small round cutter—fluted edges if you want to mimic the classic Thin Mint shape—and cut out your cookies. Don’t worry if you have scraps; gather and reroll them, adding just a touch more flour if they get sticky. You should get around two dozen cookies from this batch.
Step 7: Bake and Cool
Place your cookies on prepared baking sheets and pop them in the oven for 20 minutes. When you take them out, they might feel a bit crumbly — I remember thinking mine looked underdone the first time! But trust me, they’ll firm up as they cool right on the pan, so just be patient. This cooling phase is when they develop that satisfying crispness we all love.
Step 8: Dip in Chocolate
After your cookies have fully cooled, melt your dark chocolate in a double boiler until smooth, then stir in additional peppermint extract to taste. I usually start with about a teaspoon and add more if I want a stronger mint kick. Using a fork, dip each cookie into the chocolate, coating both sides, and let the excess drip off.
Place them on a wire rack to dry — this keeps the chocolate coating nice and smooth all around. Once set, these are ready to be enjoyed or gifted!
Pro Tips for Making Homemade Thin Mint-Inspired Cookies Recipe
- Use Fresh Peppermint Extract: I learned that old or artificial peppermint extract can taste harsh, so choose a quality brand for a clean mint flavor.
- Don’t Skip Chilling: Chilling the dough makes rolling easier and prevents your cookies from spreading too much in the oven.
- Roll Evenly: I use a rolling pin with thickness rings to keep cookies uniform, which helps them bake evenly and look professional.
- Patience with Cooling: Though the cookies seem fragile right out of the oven, waiting for them to cool fully is key to achieving that perfect snap—don’t cut corners here!
How to Serve Homemade Thin Mint-Inspired Cookies Recipe
Garnishes
While I usually love these cookies on their own, sometimes I sprinkle a few crushed peppermint candies or edible glitter on top of the chocolate before it sets for a festive look. Fresh mint leaves on the serving platter can also add a pretty, aromatic touch that complements the cookies’ flavor.
Side Dishes
Homemade Thin Mint-Inspired Cookies go wonderfully with a simple cup of hot chocolate, espresso, or peppermint tea—perfect for cozy winter afternoons. I also like serving them alongside a scoop of vanilla ice cream for a refreshingly minty dessert experience.
Creative Ways to Present
For special occasions, I’ve arranged these cookies in layered jars or gift boxes tied with ribbons—makes a fabulous handmade gift! Another fun idea is creating a “cookie platter” with alternating rows of plain and mint-dipped cookies to show off their beautiful contrast.
Make Ahead and Storage
Storing Leftovers
I store leftover Homemade Thin Mint-Inspired Cookies in an airtight container at room temperature. They stay crisp and flavorful for about a week — if you’re like me, they rarely last that long! Just make sure the container is sealed tight to keep humidity out and avoid soggy chocolate coating.
Freezing
If you want to freeze these cookies (chocolate-coated or plain), wrap them individually in plastic wrap and place them in a freezer-safe bag or box. From my experience, they keep very well for up to 3 months. Thaw them at room temperature before serving for the best texture.
Reheating
When I reheat leftovers, I usually just let them come to room temperature naturally. If you want a quick refresh, a few seconds in a warm oven (about 300°F for 3-5 minutes) works great to bring back crispness without melting the chocolate.
FAQs
-
Can I make this Homemade Thin Mint-Inspired Cookies Recipe without peppermint extract?
While peppermint extract is key to getting that signature Thin Mint flavor, you could substitute it with vanilla extract for a chocolate cookie variant. However, the refreshing minty taste will be missing if you skip it completely.
-
Is there a vegan or dairy-free version of this recipe?
You can experiment with vegan butter and dairy-free chocolate, and use flax eggs or similar substitutes to make these cookies vegan. Just keep in mind texture and taste may differ slightly from the original.
-
How thin should I roll the dough for the best cookies?
Roll the dough to about one-quarter inch thick. This thickness ensures cookies bake evenly and become delightfully crisp without breaking too easily.
-
What’s the best way to melt chocolate for dipping?
I recommend melting chocolate over a double boiler, stirring frequently to prevent burning. This method gives you smooth, glossy chocolate that’s perfect for coating your cookies.
-
Can I store the cookies longer than a week?
While they’re best enjoyed within a week at room temperature, freezing the cookies extends their shelf life to a few months. Just thaw them properly before serving for optimal taste and texture.
Final Thoughts
I hope you’ll enjoy making this Homemade Thin Mint-Inspired Cookies Recipe as much as I do—there’s something so satisfying about crafting your own version of a beloved cookie that everyone knows and loves. Don’t be intimidated by the process; once you get the hang of rolling and dipping, you’ll be whipping these up for every holiday, gift, or cozy night in. From my kitchen to yours—happy baking!
Print
Homemade Thin Mint-Inspired Cookies Recipe
- Prep Time: 15 minutes
- Cook Time: 20 minutes
- Total Time: 1 hour 10 minutes
- Yield: 24 cookies
- Category: Dessert
- Method: Baking
- Cuisine: American
Description
These Homemade Thin Mint-Inspired Cookies offer a delightful combination of rich cocoa and refreshing peppermint flavors. Crisp, buttery cookies are dipped in smooth dark chocolate infused with peppermint, creating a perfect treat reminiscent of the classic Thin Mints but made fresh at home.
Ingredients
For the cookies
- 1 3/4 cups all-purpose flour
- 3/4 cup unsweetened cocoa powder
- 1/2 teaspoon baking soda
- 1 teaspoon salt
- 1 cup unsalted butter, at room temperature
- 1/2 cup granulated sugar
- 2 teaspoons peppermint extract
For the dipping chocolate
- 12 ounces dark chocolate, chopped
- 1 to 2 teaspoons peppermint extract (adjust to taste)
Instructions
- Preheat and prepare baking sheets: Preheat your oven to 350°F (175°C). Line two baking sheets with parchment paper or nonstick baking mats to ensure your cookies don’t stick during baking.
- Mix dry ingredients: In a medium bowl, whisk together the flour, cocoa powder, baking soda, and salt until fully combined. This will ensure even distribution of leavening and flavor throughout the dough.
- Cream butter and sugar: Using a stand mixer, beat the room temperature unsalted butter with the granulated sugar on medium speed for about five minutes until the mixture is light and fluffy. Scrape down the sides of the bowl as needed. Add the peppermint extract and mix to combine thoroughly.
- Combine dry and wet components: Add the dry flour and cocoa mixture to the butter mixture in two additions. Beat just until combined and the dough is still slightly crumbly. Scrape down sides of the bowl to ensure all ingredients are incorporated. Gather the dough into a ball, flatten it slightly, then wrap tightly in plastic wrap. Refrigerate for 30 minutes to firm up.
- Roll out and cut cookies: Once chilled, roll the dough out on a generously floured surface to a thickness of 1/4 inch. Use a small round cookie cutter, preferably with fluted edges for authenticity, to cut out about 24 small cookies. Gather scraps, re-roll, and cut more if needed, adding flour to prevent sticking.
- Bake the cookies: Place the cut cookies on the prepared baking sheets and bake them in the preheated oven for 20 minutes. They will appear fragile and crumbly upon removal but will firm up as they cool completely on the pans.
- Melt and flavor chocolate: After the cookies have cooled, melt the chopped dark chocolate in a double boiler over simmering water, stirring until smooth. Remove from heat and stir in 1 to 2 teaspoons of peppermint extract, adjusting according to your taste preference.
- Dip cookies and dry: Using a fork, dip each cookie into the peppermint-flavored melted chocolate, coating both sides well and letting excess chocolate drip off. Place dipped cookies on a wire rack to allow the chocolate to set and dry completely.
- Store the cookies: Once the chocolate is firm, store your Thin Mint-inspired cookies in an airtight container at room temperature. They will keep fresh for up to one week.
Notes
- For a stronger peppermint flavor, add more peppermint extract to the chocolate, but be cautious as it can become overpowering.
- Ensure the butter is at room temperature for easier creaming and better dough consistency.
- If you don’t have a double boiler, melt the chocolate in short bursts in the microwave, stirring often to avoid burning.
- Keep the dough chilled before rolling to make handling easier and to prevent sticking.
- You can substitute some or all of the all-purpose flour with gluten-free flour for a gluten-free version, but texture may vary.
- Store cookies in a cool place to prevent chocolate from melting or becoming sticky.
Nutrition
- Serving Size: 1 cookie
- Calories: 120
- Sugar: 8g
- Sodium: 110mg
- Fat: 8g
- Saturated Fat: 5g
- Unsaturated Fat: 2.5g
- Trans Fat: 0g
- Carbohydrates: 12g
- Fiber: 2g
- Protein: 1.5g
- Cholesterol: 20mg


