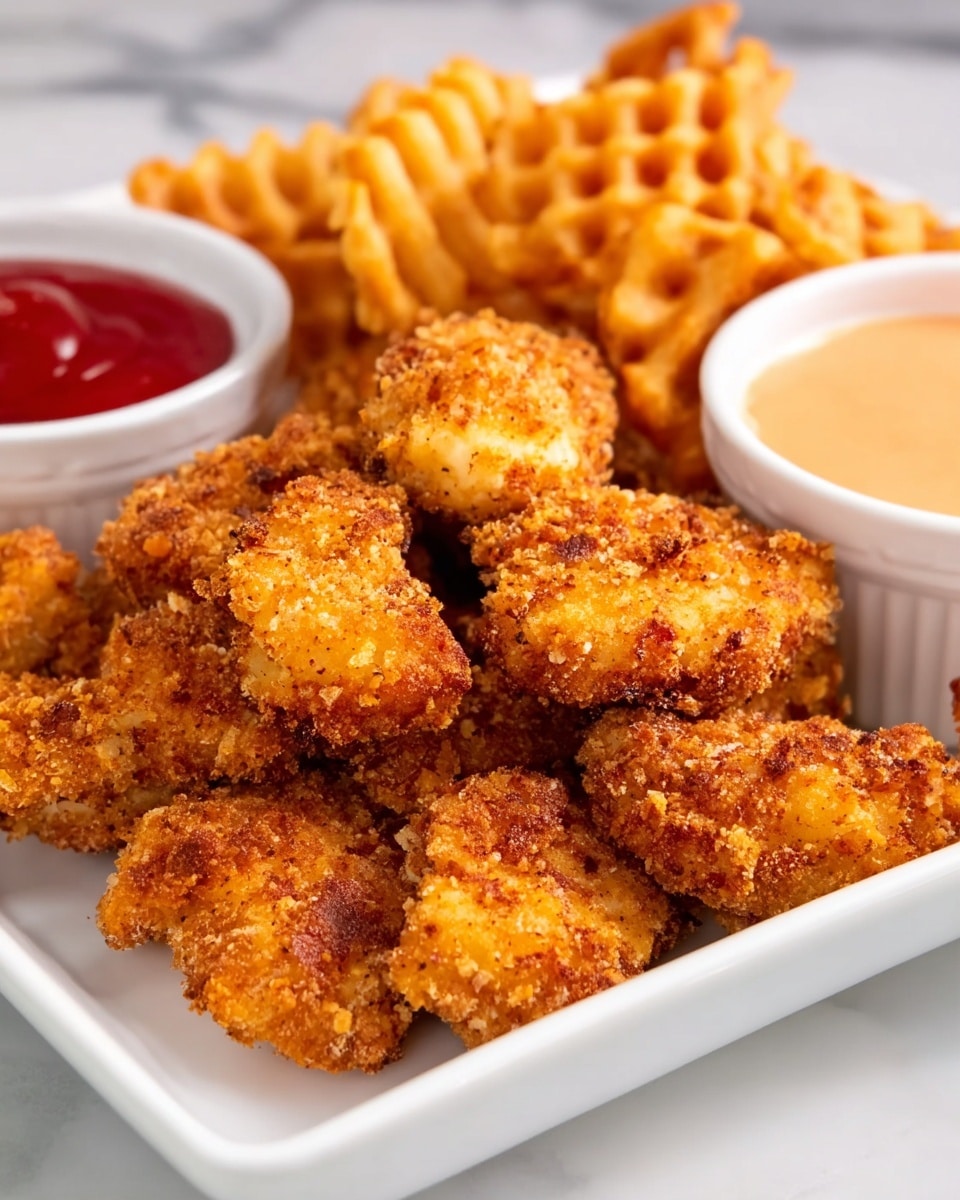
I’m so excited to share this Homemade Baked Chicken Nuggets with Crispy Panko Coating Recipe with you! It’s one of those dishes that feels like a real treat but comes together without too much fuss. I love this recipe because it nails that perfect crunchy texture on the outside with juicy, tender chicken inside—plus, it’s baked, so you skip the greasy mess of frying while still getting every bit of that crispy goodness.
Whenever I make these nuggets, they quickly become the star of the meal, especially on busy weeknights when I want something comforting yet easy. You’ll find that this Homemade Baked Chicken Nuggets with Crispy Panko Coating Recipe works beautifully for kids’ lunches, family snacks, or casual dinner plates. And trust me, once you try it, you’ll keep coming back because it’s just that good!
Why You’ll Love This Recipe
- Crispy Without Frying: Baking the nuggets gives you that golden crunch with way less oil and cleanup.
- Flavor-Packed Panko Coating: The seasoning blend in the panko crumbs adds a savory kick that’s anything but boring.
- Kid-Approved and Family-Friendly: My picky eaters are obsessed, and I love how simple it is to make.
- Super Versatile: Perfect for dinner, snacks, or meal prep—you can easily dress it up or down.

Ingredients You’ll Need
These ingredients come together to create that unbeatable crispy texture and flavorful punch. Nothing too fancy—just simple pantry staples you likely already have on hand.
- Panko bread crumbs: I love using panko for its light, airy crunch; it’s the secret behind that crispy coating.
- Vegetable oil: Helps toast the panko crumbs to golden perfection before coating the chicken.
- Garlic powder: Adds savory depth without overwhelming the nuggets.
- Onion powder: Complements the garlic with a subtle sweetness and warmth.
- Freshly ground black pepper: Just enough to give a little kick and balance the flavors.
- Paprika: For a mild smoky note and hint of color.
- Kosher salt: Divided—enhances the flavor at every step, so don’t skip it.
- Cooking spray: Keeps the wire rack slick so nuggets don’t stick and helps promote even baking.
- All-purpose flour: For that essential first dredge that helps the egg and panko stick better.
- Large egg: Acts as the binder between the flour and the panko coating.
- Boneless, skinless chicken breast: Cut into bite-sized pieces—this keeps nuggets tender and cooks evenly.
Variations
I’ve played around with this Homemade Baked Chicken Nuggets with Crispy Panko Coating Recipe a bit, and you can totally make it your own. Whether you want to spice things up or keep it super simple, there’s room to experiment and find your favorite version.
- Spice it up: I sometimes add a pinch of cayenne or chili powder to the panko mix, which gives a nice little heat surprise that my family enjoys.
- Herb lovers: Toss in some dried oregano or thyme with the breadcrumbs for an herby twist that’s fresh and delicious.
- Gluten-free option: Swap out the all-purpose flour and panko for gluten-free alternatives to keep the same crispy effect without gluten.
- Dipping sauces: Beyond classic honey mustard, try ranch, BBQ, or even a simple garlic aioli—I love switching it up based on the mood.
How to Make Homemade Baked Chicken Nuggets with Crispy Panko Coating Recipe
Step 1: Toast the Panko for Maximum Crunch
Preheat your oven to 400°F. Toss the panko bread crumbs with the vegetable oil in a large bowl, then spread them out evenly on a baking sheet. Pop the panko in the oven and keep a close eye on them, stirring every 2 minutes to get an even golden-brown toast—this usually takes about 3 to 5 minutes. Toasting the panko first is a little trick I discovered that really amps up the crunch factor!
Step 2: Season the Warm Panko
While still warm, transfer the toasted panko back into the bowl. Add garlic powder, onion powder, black pepper, paprika, and half a teaspoon of kosher salt. Toss everything together so the seasoning evenly coats each breadcrumb. This mix becomes the flavorful shell that makes these nuggets addictive.
Step 3: Prep Your Coating Station
Get a wire rack set inside a rimmed baking sheet—this lets air circulate all around the nuggets, making sure they bake crispy on all sides. Spray the rack lightly with cooking spray so the nuggets don’t stick. In one shallow dish, pour the flour. In another, beat the egg until it’s smooth and ready for dredging.
Step 4: Coat the Chicken Pieces
Season your chicken pieces all over with the remaining teaspoon of kosher salt. Working one by one, toss each piece in the flour first, then dip into the beaten egg, letting the excess drip off. Finally, roll the chicken in the seasoned panko breadcrumbs, pressing gently so the crumbs stick well. Arrange the coated nuggets neatly on the prepared wire rack.
Step 5: Bake to Crispy Perfection
Bake the nuggets in your 400°F oven until cooked through and golden brown—about 15 to 18 minutes. I always use an instant-read thermometer to check that they hit 165°F internally, ensuring juiciness without drying out. If you want extra crispiness, you can switch the oven to broil for the last 1-2 minutes, but watch closely to prevent burning!
Step 6: Finish and Serve
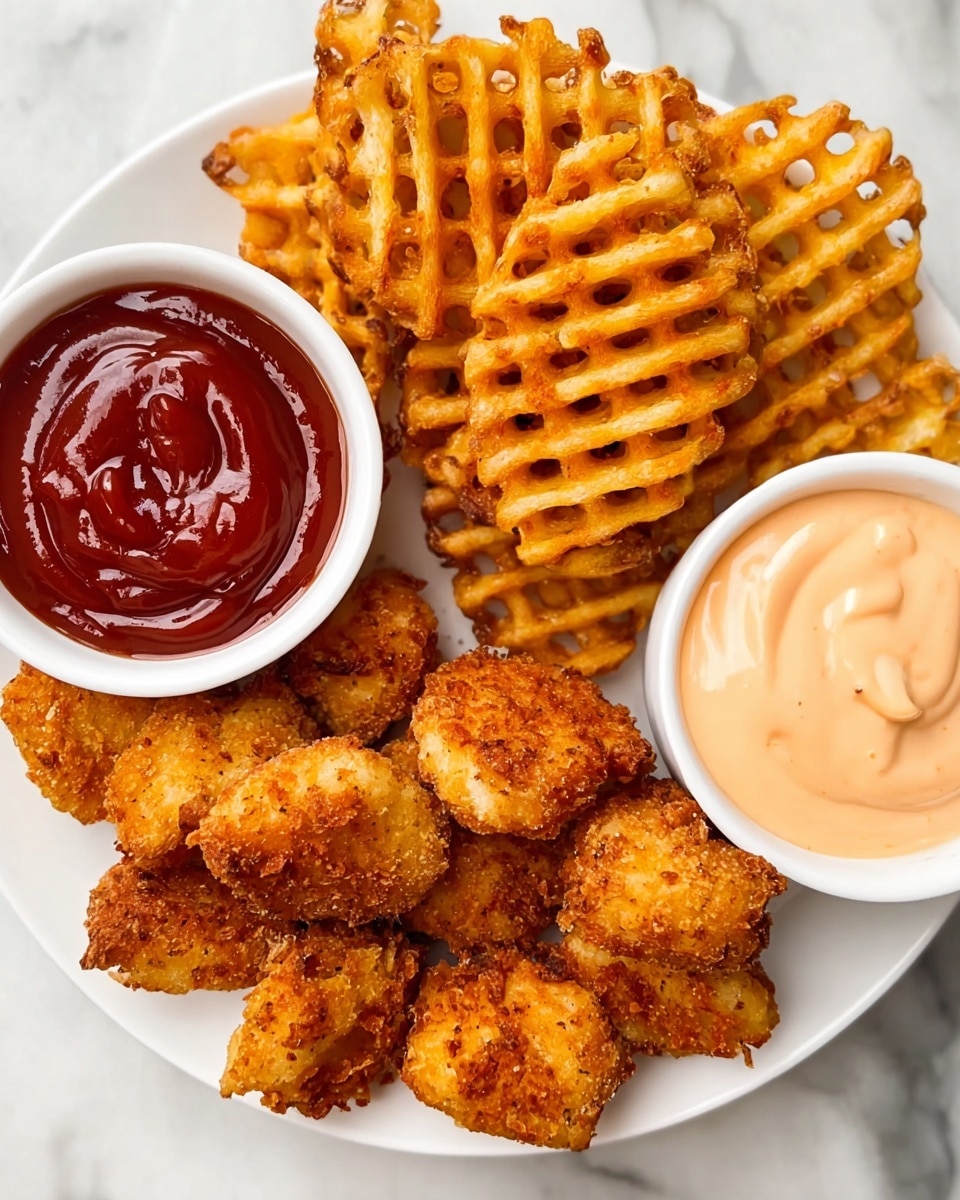
While the nuggets are still hot, sprinkle with a little more kosher salt if you like a bit more seasoning punch. Serve them right away with your favorite dipping sauces like Copycat Chick-fil-A Sauce or honey mustard. My family goes crazy for these dipped in anything tangy and a little sweet!
Pro Tips for Making Homemade Baked Chicken Nuggets with Crispy Panko Coating Recipe
- Toast the Panko: Toasting panko crumbs first locks in crunch and enhances their flavor—don’t skip this step!
- Use a Wire Rack to Bake: Baking on a rack lets heat circulate underneath, so your nuggets crisp up evenly on all sides.
- Don’t Overcrowd the Pan: Give each nugget some breathing room to crisp instead of steaming.
- Check Doneness with a Thermometer: Measuring 165°F inside the nuggets ensures they’re safe to eat but still juicy.
How to Serve Homemade Baked Chicken Nuggets with Crispy Panko Coating Recipe
Garnishes
I like to sprinkle just a little extra kosher salt right after baking to boost flavor. Sometimes I add a squeeze of fresh lemon or a dusting of chopped parsley to brighten the plate. It’s those small touches that make a simple nugget feel special.
Side Dishes
These nuggets pair fantastically with classic sides like crisp carrot sticks, celery, or a simple green salad. For heartier meals, I serve them alongside mashed potatoes, baked sweet potato fries, or warm mac and cheese. It’s comfort food heaven all the way!
Creative Ways to Present
For parties, I like to serve these nuggets on a large platter with a variety of dipping sauces in small bowls around the edges. You could also skewer them with toothpicks for fun finger foods at gatherings. My niece once decorated a “nugget bar” with different breadings and dips for a birthday—it was a huge hit!
Make Ahead and Storage
Storing Leftovers
After enjoying your nuggets, store any leftovers in an airtight container in the fridge. I find they keep well for up to 3 days. Placing a paper towel in the container helps absorb extra moisture so they stay a bit crispier when reheated.
Freezing
I’ve frozen cooked nuggets by laying them out on a baking sheet until firm, then transferring them to freezer bags. This keeps them from sticking together. They freeze nicely for up to 2 months—perfect for quick meals when you need a shortcut.
Reheating
To reheat, pop the nuggets in a preheated oven at 375°F for 8–10 minutes or until warmed through and crispy again. Avoid the microwave if you can; it makes the coating soggy. Using the oven really revives that fresh-baked crunch.
FAQs
-
Can I use dark meat chicken instead of breast for this recipe?
Absolutely! You can use boneless, skinless thigh meat if you prefer; it tends to be juicier and more forgiving during cooking. Just be sure to cut the pieces to roughly the same size so they cook evenly.
-
Is it possible to make these gluten-free?
Yes! Simply substitute gluten-free panko and flour alternatives. Just make sure your seasonings and other ingredients are gluten-free too for the best results.
-
Can I prep these nuggets ahead of time and bake later?
You can! Coat the chicken pieces fully, then place them on a baking sheet lined with parchment and freeze until firm. Transfer to a freezer bag for storage, then bake straight from frozen—adding a few extra minutes to the cook time.
-
What dipping sauces go best with these homemade nuggets?
Classic honey mustard, tangy BBQ sauce, creamy ranch, or a Copycat Chick-fil-A sauce are my top picks. You can even get creative with garlic aioli, spicy sriracha mayo, or a sweet chili dip depending on your mood.
Final Thoughts
This Homemade Baked Chicken Nuggets with Crispy Panko Coating Recipe has fast become a favorite go-to in my kitchen, and I’m confident you’ll feel the same way. It’s such a satisfying balance of crunchy, juicy, and flavorful without the hassle of frying. Next time you want a delicious, family-friendly meal that impresses without stress, give these nuggets a try—I promise they’ll bring smiles all around the table!
Print
Homemade Baked Chicken Nuggets with Crispy Panko Coating Recipe
- Prep Time: 5 mins
- Cook Time: 18 mins
- Total Time: 40 mins
- Yield: 2 – 4 servings
- Category: Main Course
- Method: Baking
- Cuisine: American
Description
Crispy and delicious homemade Chicken Nuggets baked to golden perfection with an aromatic panko breadcrumb coating seasoned with garlic, onion, and paprika. These nuggets are a healthier alternative to fried versions and perfectly paired with classic dipping sauces like Chick-Fil-A copycat sauce or honey mustard.
Ingredients
Bread Crumb Mixture
- 1 1/4 cups panko bread crumbs
- 1 Tbsp. vegetable oil
- 3/4 tsp. garlic powder
- 3/4 tsp. onion powder
- 1/2 tsp. freshly ground black pepper
- 1/4 tsp. paprika
- 1 1/2 tsp. kosher salt, divided
For Coating & Chicken
- Cooking spray
- 1/3 cup all-purpose flour
- 1 large egg
- 1 lb. boneless, skinless chicken breast, cut into 1 1/2″ pieces
For Serving (Optional)
- Copycat Chick-Fil-A Sauce or honey mustard
Instructions
- Toast Panko Bread Crumbs: Preheat the oven to 400°F. In a large bowl, toss the panko bread crumbs with vegetable oil until evenly coated. Spread the crumb mixture on a baking sheet and bake for 3 to 5 minutes, stirring every 2 minutes, until the crumbs turn golden brown and fragrant. Remove from the oven.
- Season the Bread Crumbs: While still warm, transfer the toasted crumbs back to the bowl. Add garlic powder, onion powder, black pepper, paprika, and 1/2 teaspoon of kosher salt. Toss well to combine and evenly distribute the seasoning throughout the crumbs.
- Prepare for Breading: Place a wire rack on top of a baking sheet and spray the rack with cooking spray to prevent sticking. Pour flour into a small shallow dish. In another shallow dish, beat the egg until fully blended.
- Coat the Chicken Pieces: Season the chicken pieces all over with 1 teaspoon kosher salt. One by one, toss each piece in the flour, shaking off the excess. Then dip into the beaten egg, letting the excess drip back into the dish. Finally, roll the chicken pieces in the seasoned panko mixture, pressing firmly to ensure the crumbs adhere well. Arrange the coated pieces on the prepared wire rack.
- Bake the Nuggets: Place the baking sheet with the chicken nuggets in the oven. Bake for 15 to 18 minutes, or until the chicken is fully cooked and an instant-read thermometer inserted into the thickest piece registers 165°F. The nuggets should be golden brown and crispy on the outside.
- Season and Serve: While the nuggets are still hot, season with additional salt if desired. Serve immediately with optional dipping sauces like copycat Chick-Fil-A sauce or honey mustard for a classic pairing.
Notes
- For extra crispiness, ensure the panko crumbs are well toasted before assembling the nuggets.
- You can substitute the chicken breast for chicken tenders or thighs if preferred.
- If preferred, use gluten-free flour and panko to make this recipe gluten-free.
- Make sure not to overcrowd the wire rack to allow even baking and crisp texture.
- Leftover nuggets can be reheated in a hot oven to maintain their crispiness instead of using a microwave.
Nutrition
- Serving Size: 1/4 of the recipe (~4-5 pieces)
- Calories: 320 kcal
- Sugar: 1 g
- Sodium: 600 mg
- Fat: 14 g
- Saturated Fat: 2 g
- Unsaturated Fat: 11 g
- Trans Fat: 0 g
- Carbohydrates: 22 g
- Fiber: 1 g
- Protein: 29 g
- Cholesterol: 80 mg
