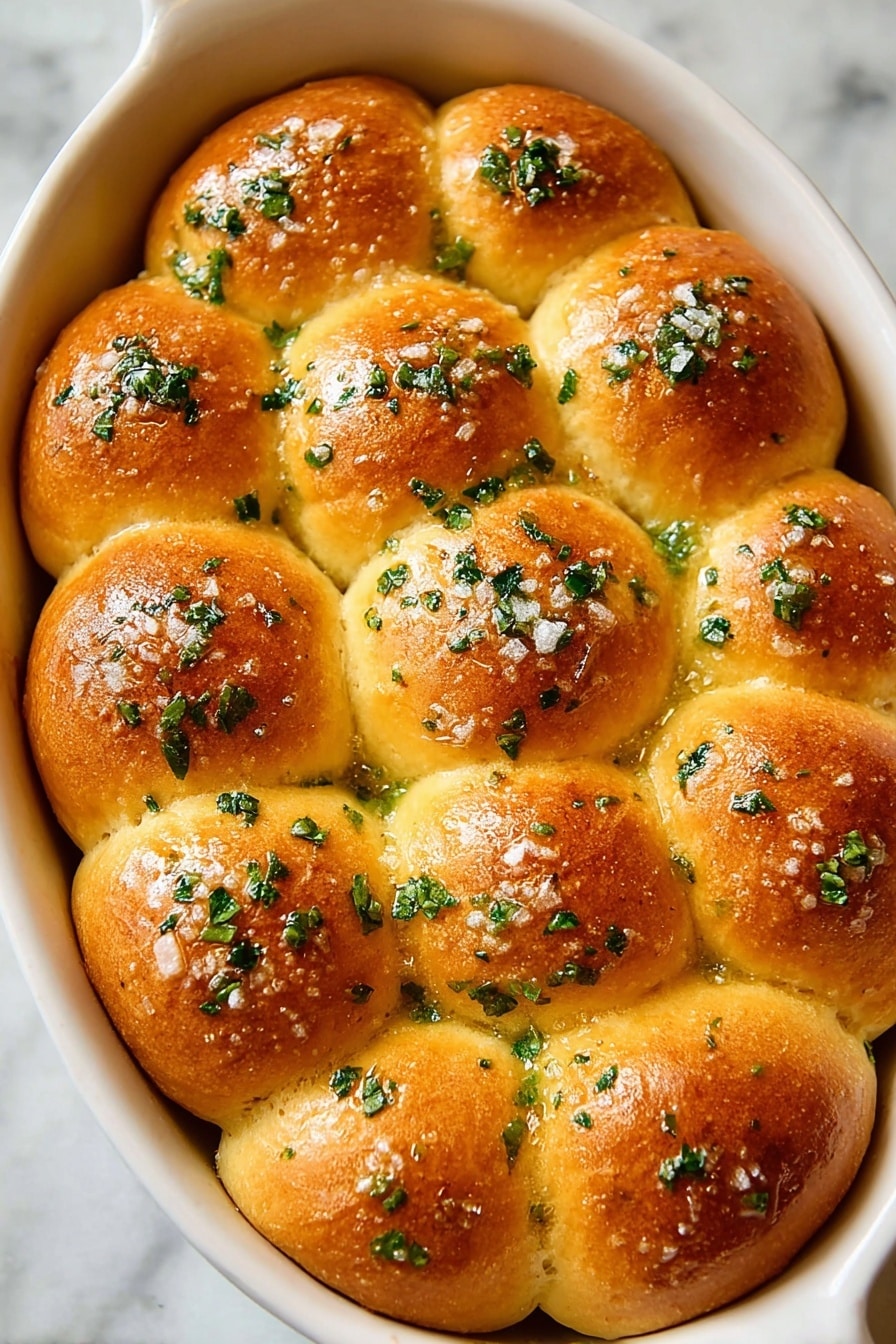
If you’re searching for that perfect, soft, and buttery bread to round out any meal, you’re going to love what I have for you today. This Garlic Butter Dinner Rolls Recipe is honestly one of my all-time favorites to bake because it hits that sweet spot of being fluffy, flavorful, and just downright irresistible. Whether you’re serving these for a holiday dinner or just a cozy family night, once you try this recipe, you’ll understand why everyone keeps asking for more.
Why You’ll Love This Recipe
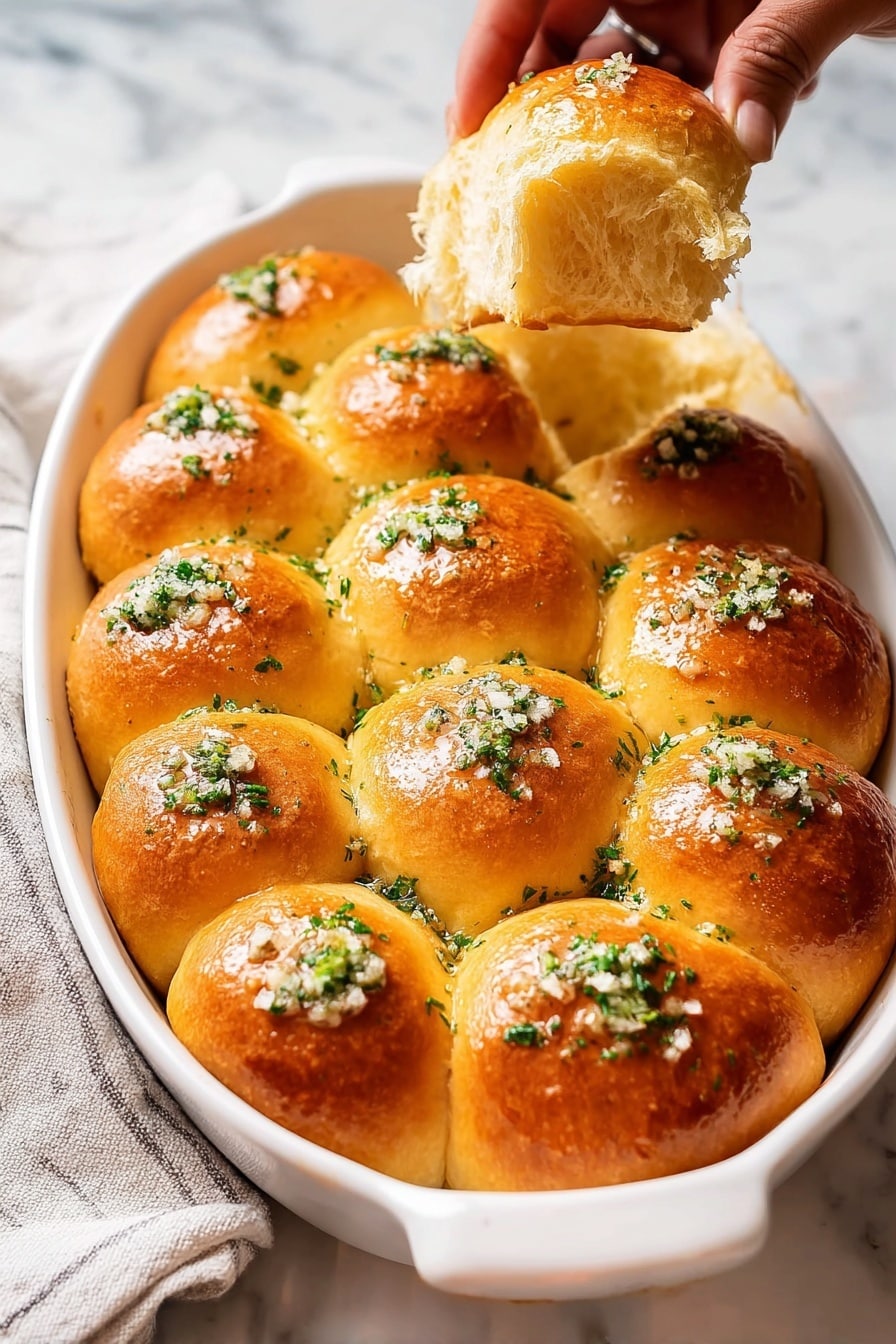
- Incredibly Soft Texture: Thanks to a simple kneading and rising method, these rolls come out light and fluffy every single time.
- Buttery Garlic Flavor: The melted garlic butter brushed on fresh-from-the-oven rolls adds a savory finish that makes your taste buds sing.
- Perfect for Any Occasion: Whether it’s a casual dinner or a festive gathering, these rolls fit right in and impress effortlessly.
- Easy to Make: Even if you’re new to bread baking, the step-by-step instructions make this approachable and fun.

Ingredients You’ll Need
All the ingredients here work harmoniously to create rolls that are soft inside and perfectly golden outside. Most of these are pantry staples, but I’ve found that fresh yeast and good quality butter really take this recipe up a notch. Let me walk you through what each brings to the table.

- Warm Milk: Use whole or skimmed, but make sure it’s warm to activate the yeast properly.
- Sugar: A touch of sweetness helps feed the yeast and enhances browning.
- Active Dry Yeast: The magic agent that makes the dough rise beautifully.
- Vegetable Oil: Adds moisture without weighing down the dough.
- Egg (for dough and brushing): Adds structure and gives the rolls that irresistible shininess when baked.
- Salt: Essential for flavor balance, don’t skip it!
- Bread Flour (or All-Purpose Flour): Bread flour yields chewier rolls; all-purpose works if that’s what you have.
- Butter: Melted and mixed with garlic and parsley to brush that heavenly glaze on fresh rolls.
- Garlic: Freshly pressed, for that punch of flavor in the butter.
- Fresh Parsley: Adds color and a fresh herbal note to finish.
Variations
I love experimenting with this Garlic Butter Dinner Rolls Recipe, and you can easily tweak it to suit your tastes or dietary needs without losing that signature softness. Here are some ideas I’ve tried and enjoyed.
- Herb Infusions: Mixing in rosemary or thyme with parsley in the garlic butter gives a lovely twist—I especially like this for holiday dinners.
- Cheesy Twist: Adding shredded cheese like cheddar or parmesan right into the dough before the first rise makes the rolls extra indulgent.
- Whole Wheat Upgrade: Swapping half the bread flour for whole wheat adds fiber and a nuttier flavor; just expect a slightly denser roll.
- Dairy-Free Option: Use plant-based milk and vegan butter to keep it allergy-friendly, and it still turns out delicious!
How to Make Garlic Butter Dinner Rolls Recipe
Step 1: Bloom the Yeast and Mix the Wet Ingredients
The key to a great rise starts here. Combine your warm milk (make sure it’s around 110°F/43°C) with the sugar and yeast in a small bowl. Give it five minutes, and you should see a frothy, bubbly layer—that’s your yeast waking up. Then stir in the vegetable oil, salt, and one egg with a fork until smooth. This liquid mixture brightens up the dough and helps everything come together.
Step 2: Combine and Knead Your Dough
Add the yeast mixture to your flour. At this stage, mix until a rough dough forms, then transfer it onto a floured surface. I used to rush the kneading, but now I make sure to knead for a full 8-10 minutes by hand until the dough feels smooth, soft, and elastic. If you’ve got a stand mixer, use the dough hook on low for a minute, then medium speed for 4 more minutes. You’ll feel the dough transform—this is when gluten develops giving you that amazing texture.
Step 3: First Rise – Let It Triple!
Once your dough is ready, give your bowl a good rub with some vegetable oil and pop the dough back in, turning it once to coat it lightly. Cover with plastic wrap and a towel, then place it somewhere warm. I often set mine in my oven with just the light on—perfect little proofing spot. Let it rise for 1 to 1.5 hours until it’s nearly tripled in size. Patience here pays off big time in softness.
Step 4: Shape Your Rolls
After the dough has risen, dump it out onto a floured surface and divide it into 16 equal parts. You don’t need to be super precise but even sizes help ensure consistent baking. I weigh mine and find it helpful, especially for presentation. Roll each piece into a tight ball and place them into a buttered 9×13-inch pan with about an inch of space between each ball so they can puff up nicely. Cover with a towel and let them rise again for 30 minutes.
Step 5: Brush, Bake, and Garlic Butter Magic
Now brush the rolls with a beaten egg to get that beautiful golden glow. Bake at 180°C (350°F) for 20-25 minutes, or until golden brown. While they bake, melt your butter and mix in freshly pressed garlic and chopped parsley. The aroma alone has me getting ready to pull these out! As soon as the rolls come out of the oven, generously brush them with this garlicky, buttery goodness. It’s honestly the best part—I swear you’ll notice family members hovering just waiting for that sticky, flavorful bite.
Pro Tips for Making Garlic Butter Dinner Rolls Recipe
- Yeast Activation: Always check your yeast is fresh; if it doesn’t bubble in warm milk, it’s time to get new yeast.
- Kneading Check: Test your dough’s elasticity by stretching a small piece—if it forms a thin membrane without tearing, it’s ready.
- Second Rise Space: Give enough space between rolls in the pan so they rise well without sticking too much; it also helps them brown evenly.
- Garlic Butter Timing: Brush the garlic butter right after baking so it soaks in while the rolls are still warm for maximum flavor.
How to Serve Garlic Butter Dinner Rolls Recipe
Garnishes
I love sprinkling a little extra chopped fresh parsley on top just before serving—adds a pop of color and freshness. Sometimes I add a tiny pinch of sea salt flakes after brushing the garlic butter; it’s that little crunch that makes eating these rolls even more satisfying.
Side Dishes
My family goes crazy for these rolls alongside creamy soups like tomato basil or hearty stews. They’re also fantastic with roasted chicken or grilled vegetables. Honestly, anytime you want to soak up sauces, these garlic butter rolls are your best friends.
Creative Ways to Present
For holiday dinners, I’ve arranged these rolls in a circular pattern on a platter with a bowl of garlic herb butter in the center—makes for a stunning presentation and sharing experience. You can also sprinkle a mix of fresh herbs on top or even top each roll with a bit of grated cheese before baking for a festive twist.
Make Ahead and Storage
Storing Leftovers
If you happen to have any leftovers (which is rare at my house), you can store them in an airtight container at room temperature for up to two days. I always recommend wrapping them with a clean kitchen towel inside the container to maintain moisture and softness.
Freezing
I freeze these rolls before the second rise—after shaping balls on the baking tray. Just flash freeze for a couple of hours, then transfer them to a freezer bag. When you want fresh rolls, thaw and let them rise for 45 minutes before baking. This method really helps when planning ahead.
Reheating
To revive the softness, I warm leftover rolls in a preheated oven at 300°F (150°C) wrapped in foil for about 10 minutes. Brushing a little extra melted garlic butter before warming gives them back their signature yumminess.
FAQs
-
Can I use all-purpose flour instead of bread flour for this Garlic Butter Dinner Rolls Recipe?
Absolutely! All-purpose flour can be used, but your rolls might turn out slightly less chewy and a bit less airy compared to using bread flour, which has higher protein content that helps develop gluten for that perfect texture.
-
How long do the Garlic Butter Dinner Rolls stay fresh?
These rolls are best eaten the day they’re made but will keep nicely at room temperature for about 2 days when stored properly in an airtight container or wrapped in plastic wrap with a kitchen towel.
-
Can I make the dough ahead of time?
Yes! You can prepare the dough, perform the first rise, then punch it down, cover, and refrigerate overnight. The next day, shape the rolls, let them rise again, and bake as usual. This slow fermentation actually develops great flavor.
-
What’s the best way to melt garlic butter without burning the garlic?
Gently melt the butter over low heat and add freshly pressed garlic. Remove from heat as soon as the garlic flavor infuses—usually a minute or less—to avoid bitterness from burned garlic.
Final Thoughts
Honestly, this Garlic Butter Dinner Rolls Recipe has become a staple in my kitchen because it’s simple, delicious, and always impresses. I remember the first time I pulled these rolls out of the oven—the aroma was unbelievable, and the taste even better. They make any meal feel special, and I hope you enjoy making and sharing them as much as I do. Give this recipe a try and watch it quickly become a favorite on your dinner table!
Print
Garlic Butter Dinner Rolls Recipe
- Prep Time: 25 minutes
- Cook Time: 20 minutes
- Total Time: 1 hour 45 minutes
- Yield: 16 rolls
- Category: Bread
- Method: Baking
- Cuisine: American
Description
These soft and fluffy Garlic Butter Dinner Rolls are a perfect homemade bread accompaniment, brushed with a flavorful blend of melted butter, garlic, and fresh parsley. They’re ideal for dinner, parties, or any occasion needing a comforting, aromatic bread side.
Ingredients
Dough Ingredients
- 220ml / 1 cup warm milk (whole or skimmed)
- 1½ tsp sugar
- 7g / 1 tbsp active dry yeast
- 3 tbsp vegetable oil
- 1 large egg
- ½ tsp salt
- 400g / 3 cups bread flour (or all-purpose flour)
Topping Ingredients
- 1 egg (for brushing)
- 1 tbsp butter (melted)
- 1 clove garlic (pressed)
- 1 tbsp fresh parsley (chopped)
Instructions
- Activate Yeast: In a small bowl, combine warm milk, active dry yeast, and sugar. Let it stand for 5 minutes until the yeast blooms and becomes frothy.
- Mix Wet Ingredients: Add vegetable oil, salt, and one large egg to the yeast mixture. Mix well with a fork until combined.
- Form Dough: Pour the wet ingredients into the bread flour and mix until a rough dough forms. Transfer dough to a floured surface and knead by hand for 8-10 minutes until smooth and elastic. Alternatively, use a stand mixer with a dough hook, kneading 1 minute on low speed then 4 minutes on medium speed.
- First Rise: Lightly oil a large bowl and place the dough in it. Cover with plastic wrap and a towel, then let it rise in a warm place for 1 to 1.5 hours until it triples in volume. Meanwhile, preheat the oven to 180°C (350°F).
- Shape Rolls: Once risen, punch down the dough and transfer it to a floured surface. Divide the dough evenly into 16 pieces, rolling each into a ball. Arrange the balls in a well-buttered 9×13 inch baking pan spaced about 1 inch apart.
- Second Rise: Cover the pan with a tea towel and let the rolls rise for another 30 minutes until puffed and almost doubled.
- Prepare for Baking: Brush the tops of the rolls evenly with a beaten egg for a golden shine.
- Bake: Bake in the preheated oven for 20 to 25 minutes or until the rolls are golden brown on top.
- Make Garlic Butter: While baking, melt the butter and stir in the pressed garlic and chopped parsley to create a fragrant garlic butter mixture.
- Brush Rolls: As soon as the rolls come out of the oven, brush them generously with the garlic butter mixture for a rich, savory finish.
Notes
- For best results, ensure your milk is warm but not hot to avoid killing the yeast.
- Kneading dough by hand requires some effort, but it helps develop gluten for a better texture.
- Brushing with beaten egg before baking promotes a beautiful golden crust.
- The garlic butter brushed on fresh from the oven makes these rolls irresistibly aromatic and flavorful.
- You can store leftover rolls in an airtight container for up to 2 days, and reheat before serving.
Nutrition
- Serving Size: 1 roll
- Calories: 116 kcal
- Sugar: 1 g
- Sodium: 92 mg
- Fat: 2 g
- Saturated Fat: 1 g
- Unsaturated Fat: 1.3 g
- Trans Fat: 0.03 g
- Carbohydrates: 19 g
- Fiber: 1 g
- Protein: 4 g
- Cholesterol: 24 mg


