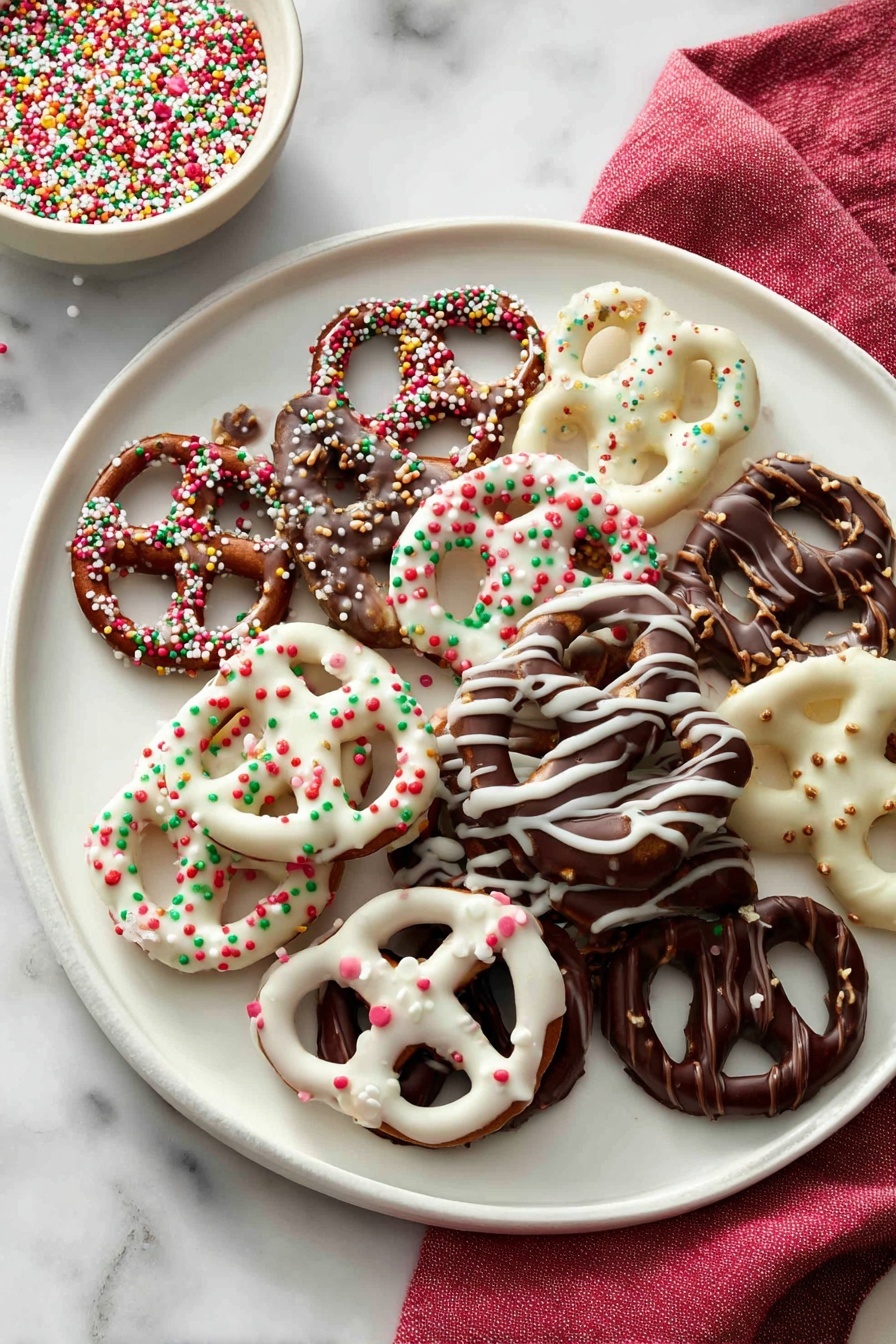
If you’re looking for a treat that’s as fun to make as it is delicious to eat, you’re going to want to try this Easy Chocolate Covered Pretzels Recipe. Seriously, this recipe is one of my all-time favorites because it balances salty and sweet in the most addictive way possible—and it’s super straightforward, too. Whether you’re prepping snacks for a party or just craving something simple and satisfying, these chocolate-covered pretzels hit the spot every single time.
Why You’ll Love This Recipe
- Simply Irresistible: The perfect blend of salty crunch and creamy chocolate makes everyone come back for more.
- No Fancy Tools Needed: You can whip this up with basic kitchen gear—microwave, a bowl, and some parchment paper.
- Customizable and Fun: Add your favorite toppings or switch up chocolate types to match your mood.
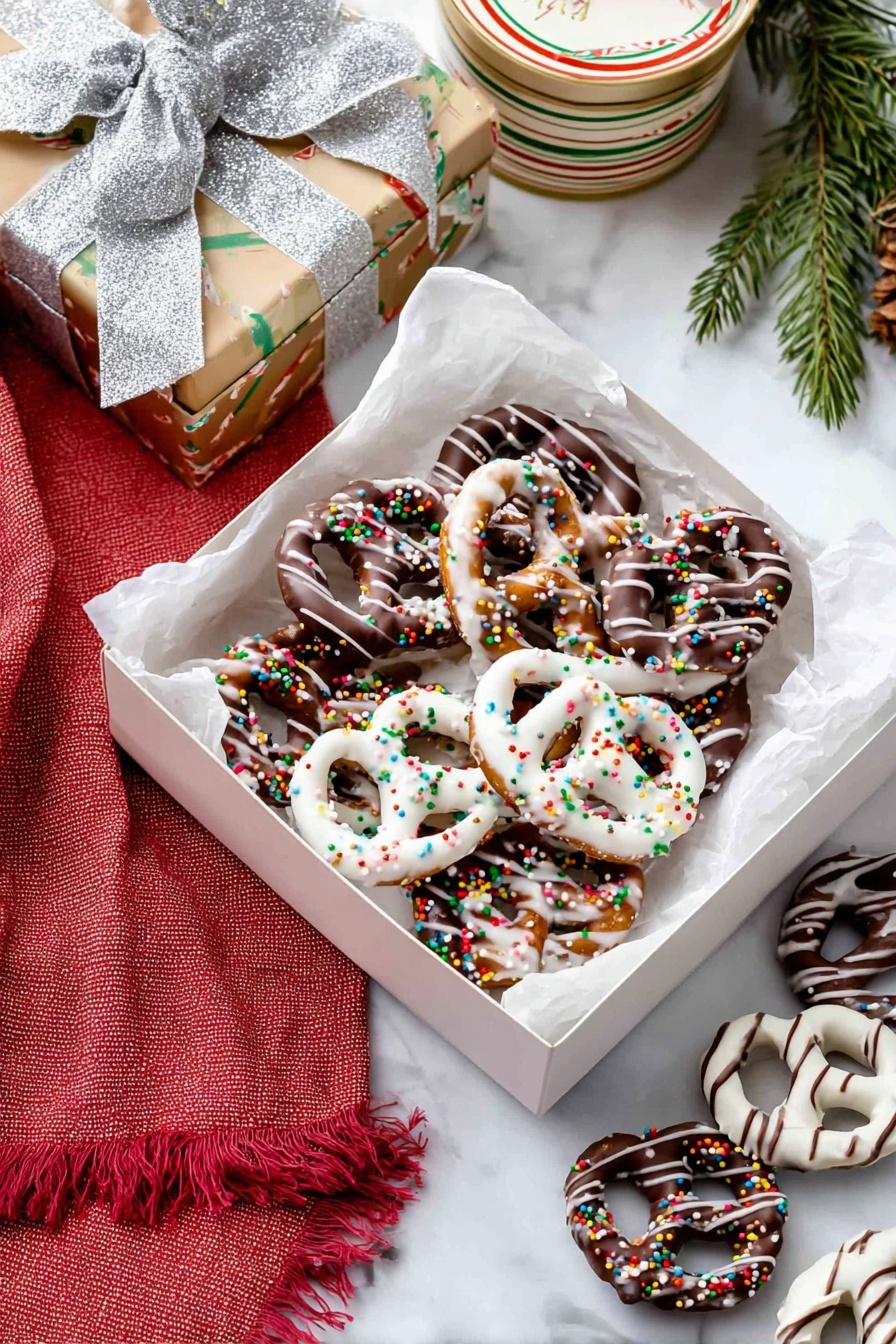
- Great for Gifting or Snacking: Makes a charming homemade gift or an easy party treat that always impresses.

Ingredients You’ll Need
The ingredients here are super simple but so effective—they come together beautifully to create that classic sweet-and-salty combo we all crave. When shopping, opt for good-quality chocolate because it really makes a difference in the final flavor and texture.
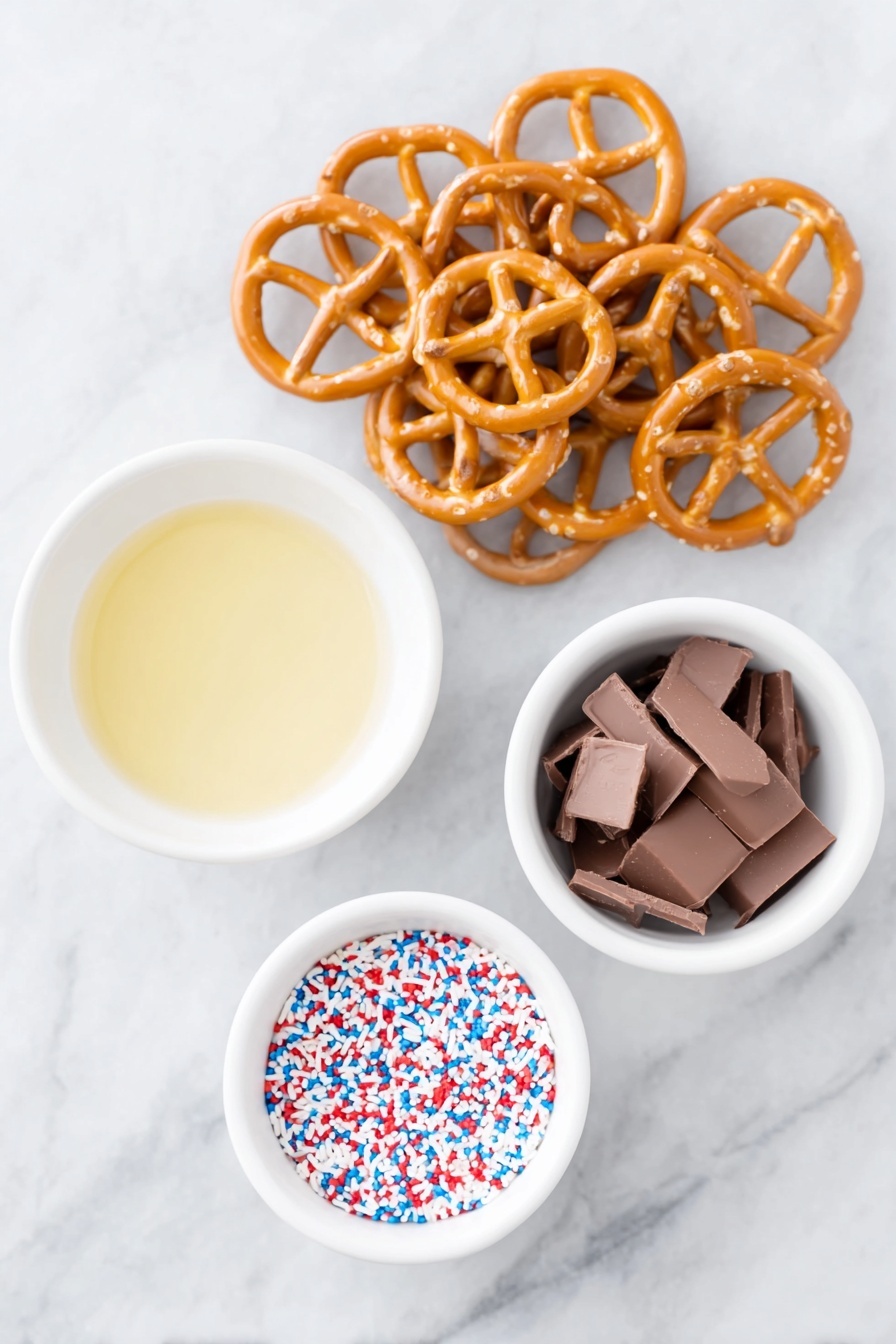
- Semi-sweet or white chocolate: Choose either depending on your sweet tooth and preference; I love mixing both for a fun look.
- Vegetable oil or coconut oil: This helps the chocolate melt smoothly and gives a nice, glossy finish.
- Pretzels: Regular pretzel twists work great; you can experiment with rods or nuggets for different bites.
- Optional sprinkles: Use these to add color and texture, especially if you’re making these for parties or holidays.
Variations
One of my favorite things about this Easy Chocolate Covered Pretzels Recipe is how you can make it your own. I often swap in different chocolates or toppings to keep things exciting, and I’ll share some of my tried-and-true customizations below so you can find your favorite combo.
- Mixing Chocolate Types: I love using white and semi-sweet chocolate together—dip half the pretzels in one, drizzle the other on top; it’s so pretty and tasty!
- Sprinkle Fun: From holiday sprinkles to crushed candy canes or even mini Oreos, topping your pretzels is an easy way to dress them up for any occasion.
- Nutty Twist: Adding chopped nuts just before the chocolate sets gives a great texture contrast that my family goes crazy for.
How to Make Easy Chocolate Covered Pretzels Recipe
Step 1: Prep and Melt Your Chocolate
Start by lining a large baking sheet with parchment paper—trust me, it makes cleanup so much easier! For melting, I usually use a microwave because it’s quick and less fuss. Put your chopped chocolate and half a teaspoon of vegetable or coconut oil in a heat-proof bowl (I swear by a glass 2-cup measuring cup here, it makes dipping a breeze). Microwave in 20-second bursts, stirring between each until the chocolate is silky smooth. If you don’t have a microwave, a double boiler works great too—just be patient and gentle with your heat.
Step 2: Dip and Decorate
This is the fun part! Take a pretzel and dip it fully into the melted chocolate, then lift it out using a fork. Tap the fork lightly on the bowl’s rim so excess chocolate drips off—this keeps your pretzels from being too messy. Then, with a toothpick, gently slide the pretzel off and onto the parchment paper. If you want to get fancy, sprinkle toppings on immediately while the chocolate is still wet. I like to keep a little extra melted chocolate handy to drizzle over the pretzels for a decorative touch.
Step 3: Chill and Set
Pop your baking sheet in the fridge for about 20-30 minutes to let the chocolate firm up. Patience here is key—if you try to move the pretzels too soon, the chocolate can smudge or smear. Once set, they’re ready to enjoy or store.
Pro Tips for Making Easy Chocolate Covered Pretzels Recipe
- Use Quality Chocolate: I’ve learned that good chocolate really elevates the flavor and smoothness, so avoid baking chips and go for bars made specifically for melting.
- Add Oil for Shine: Mixing in a little oil helps the chocolate melt to a glossy finish and prevents it from getting too thick or grainy.
- Control Chocolate Thickness: If your chocolate is too thick to dip easily, add a tiny bit more oil, but don’t go overboard or it can get greasy.
- Work Quickly: Chocolate sets fast once off heat, so have your pretzels and toppings ready before you start dipping to avoid lumps.
How to Serve Easy Chocolate Covered Pretzels Recipe
Garnishes
I often keep things classic with colorful sprinkles or sea salt on top, but I’ve also gone wild with crushed peppermint for the holidays or mini rainbow nonpareils for birthday parties. It’s all about making these look as fun as they taste!
Side Dishes
These pretzels are great on their own, but if you want to level up your snack spread, try pairing them with fresh fruit or a cheese board to balance sweet and savory elements. For parties, a cup of hot cocoa or coffee on the side is a cozy combo.
Creative Ways to Present
For special occasions, I like to stack the pretzels in decorative mason jars tied with ribbons or arrange them on tiered trays. Wrapping small bundles with clear cellophane and a bow makes for charming homemade gifts that friends adore.
Make Ahead and Storage
Storing Leftovers
After chilling, I keep the chocolate-covered pretzels in an airtight container at room temperature—if your kitchen gets warm, the fridge works too. They stay crunchy and delicious for up to a week this way, which is perfect for snacking over time without losing that fresh-batch taste.
Freezing
I haven’t found freezing necessary because they’re so quick to make, but if you want to freeze extras, lay them flat in a single layer on parchment, freeze until solid, then transfer to a sealed container. When you’re ready, thaw at room temperature for about 30 minutes before serving.
Reheating
Reheating isn’t usually needed since these are best cold or at room temp. But if your chocolate loses its shine, you can quickly warm them just enough using a warm (not hot) oven or microwave in very short bursts to avoid melting the pretzel.
FAQs
-
Can I use dark chocolate instead of semi-sweet?
Absolutely! Dark chocolate will add a richer, less sweet flavor to your pretzels. Just make sure to use good-quality chocolate to keep that smooth melt and glossy finish.
-
How do I prevent the chocolate from seizing while melting?
Make sure your bowl and utensils are completely dry—water is the enemy of melting chocolate. Also, use gentle heat and stir frequently, adding a little oil if the chocolate gets too thick.
-
What’s the best way to drizzle chocolate for decoration?
I like using a squeeze bottle or piping bag with a tiny tip for precise drizzles. If you don’t have those, a fork dipped in chocolate and waved over the pretzels works fine, too.
-
Can I store these pretzels at room temperature?
Yes! When stored in an airtight container away from heat and direct sunlight, they stay fresh and crunchy for about a week at room temperature.
Final Thoughts
I absolutely love how this Easy Chocolate Covered Pretzels Recipe comes together with minimal fuss but maximum satisfaction. It’s one of those recipes I always keep in my back pocket for last-minute gifts or when friends pop by unexpectedly. If you want something that’s fun to make, easy to customize, and totally delicious, give this a try—you’ll be hooked, I promise!
Print
Easy Chocolate Covered Pretzels Recipe
- Prep Time: 30 minutes
- Cook Time: 30 minutes
- Total Time: 1 hour
- Yield: 4 cups of chocolate-covered pretzels
- Category: Snack
- Method: No-Cook
- Cuisine: American
Description
Classic Chocolate Covered Pretzels combine the salty crunch of pretzels with the rich, smooth sweetness of melted chocolate. This easy-to-make treat is perfect for parties, gifts, or a delightful snack. Featuring semi-sweet or white chocolate options and customizable toppings like sprinkles, these pretzels are sure to satisfy any sweet and salty craving.
Ingredients
Chocolate Coating
- 8 ounces (226g) semi-sweet or white chocolate (two 4-ounce bars), finely chopped
- 1/2 teaspoon vegetable oil or coconut oil
Pretzels
- 4 cups pretzels
Optional Toppings
- Sprinkles for topping (optional)
Instructions
- Prepare Baking Sheet: Line a large baking sheet with parchment paper and set aside to prevent the chocolate-covered pretzels from sticking.
- Melt Chocolate: Melt the chopped chocolate and oil together either in a double boiler or in the microwave. If microwaving, place the chocolate and oil in a medium heat-proof bowl or a glass 2-cup measuring cup and heat in 20-second increments, stirring after each, until the chocolate is completely melted and smooth.
- Dip Pretzels: Dip each pretzel into the melted chocolate, ensuring it is evenly coated. Use a fork to lift the pretzel out and tap the fork on the side of the bowl to let excess chocolate drip off.
- Transfer and Decorate: Use a toothpick to carefully slide the coated pretzel off the fork onto the lined baking sheet. While the chocolate is still wet, add sprinkles or other toppings if desired. If there is leftover melted chocolate, reheat it gently as needed and drizzle it over the coated pretzels for added texture and appearance.
- Set the Chocolate: Place the baking sheet in the refrigerator for about 20 to 30 minutes or until the chocolate has fully set and hardened.
- Storage: Once set, store the chocolate-covered pretzels in an airtight container at room temperature for up to one week or in the refrigerator for up to two weeks.
Notes
- Chocolate-covered pretzels are versatile: try different pretzel shapes and various chocolate types such as white or semi-sweet.
- Experiment with toppings like sprinkles, crushed candy canes, Oreo crumbs, or colored sugar for festive variations.
- Using a glass measuring cup for melting chocolate helps with easy dipping due to its depth.
- Reheat leftover melted chocolate carefully to keep it fluid for additional drizzling.
- Store pretzels in an airtight container to maintain freshness and crispness.
Nutrition
- Serving Size: 1/4 cup
- Calories: 150
- Sugar: 12g
- Sodium: 200mg
- Fat: 8g
- Saturated Fat: 5g
- Unsaturated Fat: 3g
- Trans Fat: 0g
- Carbohydrates: 18g
- Fiber: 1g
- Protein: 2g
- Cholesterol: 0mg


