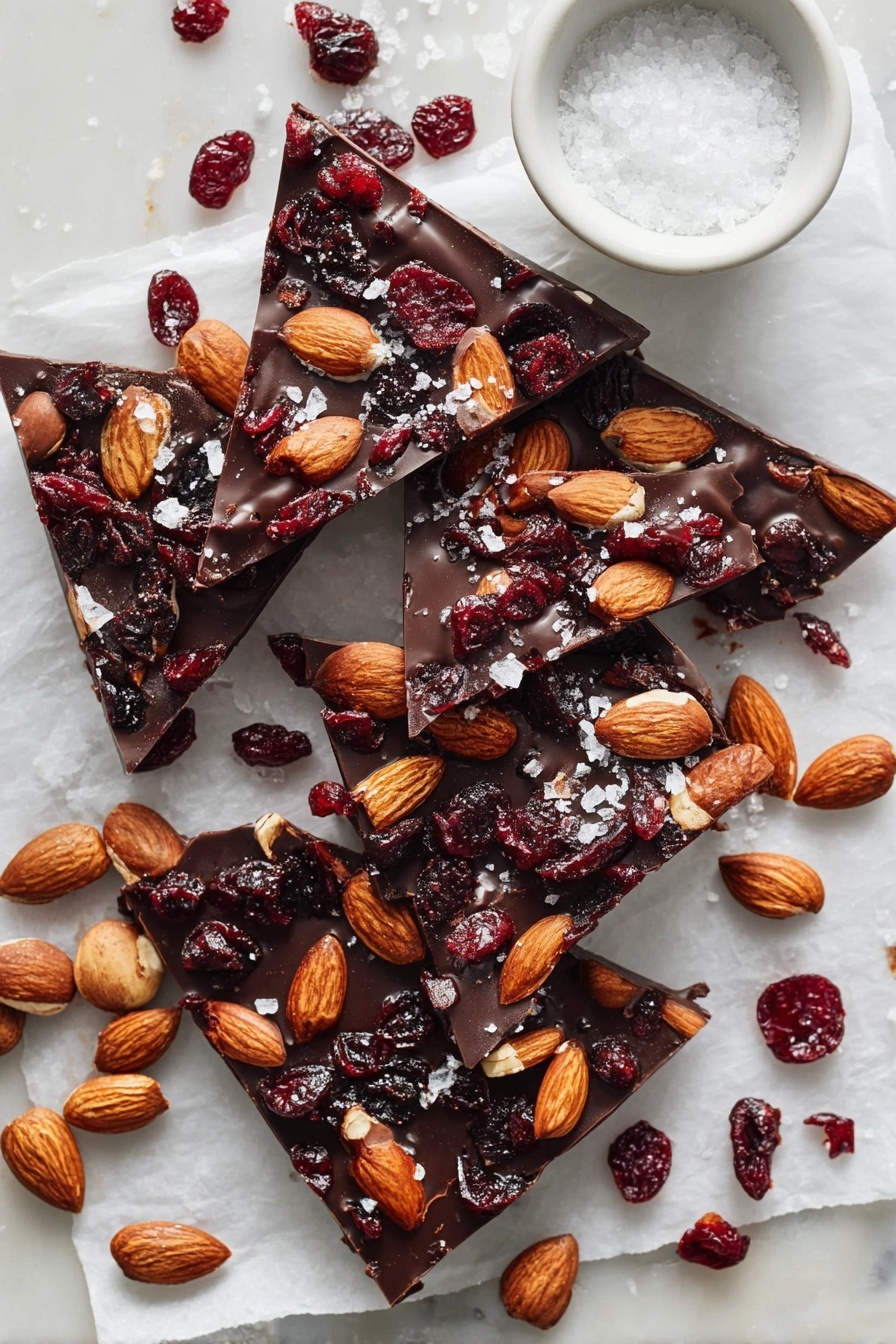
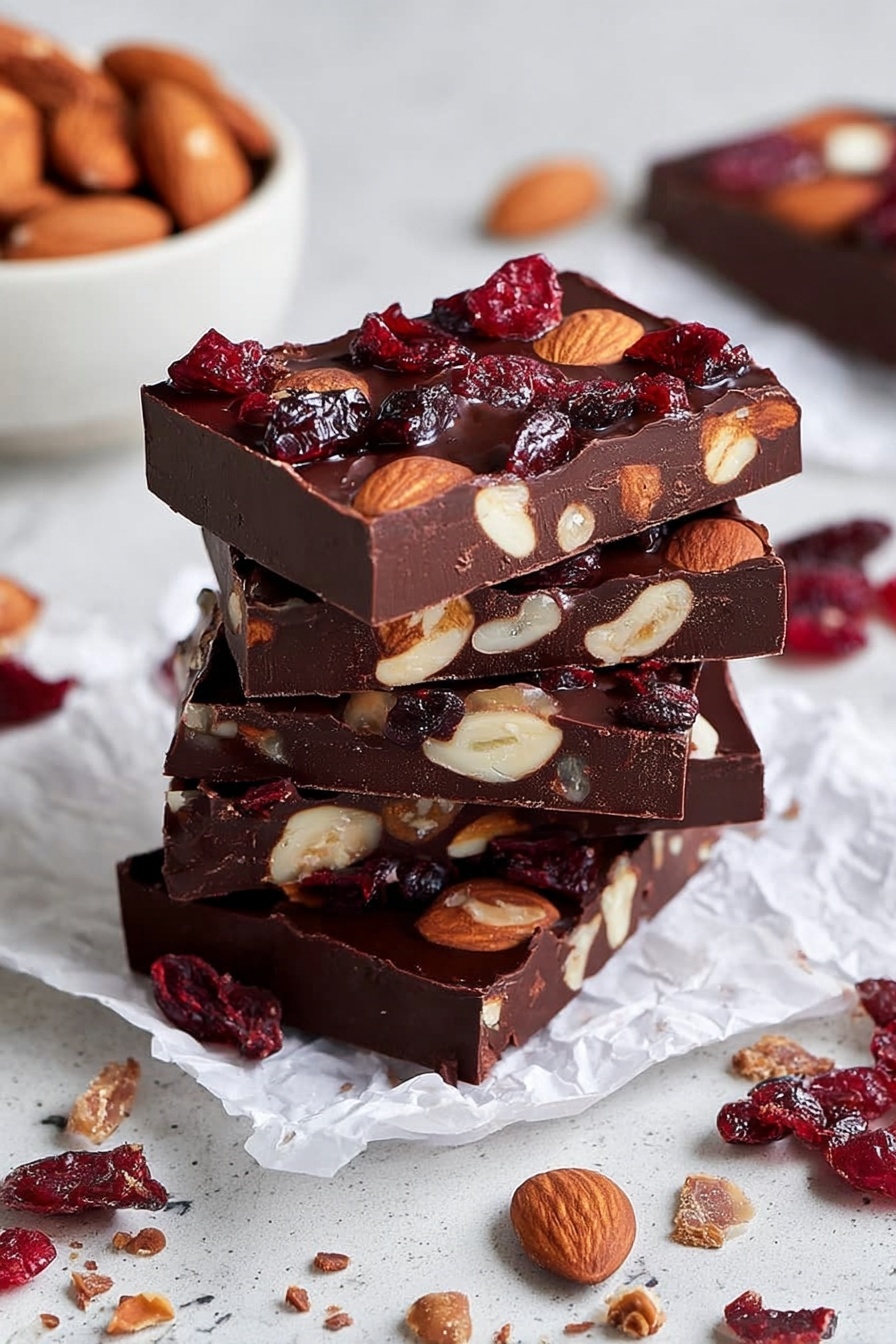
If you’re looking for a sweet treat that’s both easy to make and utterly delicious, you’re going to adore this Easy Chocolate Bark Recipe with Nuts and Fruit Recipe. I absolutely love how simple it is to whip up, yet it looks so impressive when serving friends or family. Plus, the combination of crunchy nuts, chewy dried fruit, and rich chocolate makes every bite a little moment of joy. Stick with me — I’ll share all my tips and tricks so you nail this recipe without a hitch!
Why You’ll Love This Recipe
- Easy and Quick: You can have this chocolate bark ready in under 10 minutes plus cooling time, perfect for last-minute gifts or cravings.
- Versatile Flavors: Mix and match nuts, dried fruit, and even candies to suit your taste or occasion.
- No Special Equipment Needed: A simple double boiler setup and basic kitchen tools are all you need.
- Always a Crowd Pleaser: Whether it’s holiday parties or everyday treats, this bark gets rave reviews every time.

Ingredients You’ll Need
Getting the ingredients just right is a big part of why this Easy Chocolate Bark Recipe with Nuts and Fruit Recipe turns out so amazing. I usually grab good quality dark and semi-sweet chocolate — the smoother, the better. Fresh nuts and dried fruit add the perfect texture and flavor pop.

- 72% cocoa dark chocolate: Look for finely chopped bars or chop it yourself for easy melting and a rich chocolate base.
- Semi-sweet chocolate: Balances bitterness with sweetness for a well-rounded chocolate flavor.
- Ground cinnamon (optional): Adds a warm, cozy note that elevates the chocolate without overpowering it.
- Roasted almonds: Provide a satisfying crunch and nutty depth — toast them lightly if you want a more intense flavor.
- Dried cherries: Their tartness contrasts beautifully with the sweet chocolate.
- Dark chocolate (for peppermint): Use a fresh batch if you want to try the peppermint twist; the richness pairs perfectly with cool mint.
- Peppermint extract: A small splash adds that festive minty zing when using candy canes.
- Crushed candy canes: Gives a crunchy texture and bright peppermint flavor—great for holidays.
- Unsalted shelled pistachios: Their buttery flavor and green hue make the bark look extra special.
- Dried cranberries: Sweet, tart, and chewy — another lovely match to chocolate.
- Toffee bits: Adds a buttery crunch that makes each bite irresistible.
Variations
I love playing around with the toppings on this Easy Chocolate Bark Recipe with Nuts and Fruit Recipe. It’s honestly a super flexible canvas, so you should feel free to make it your own — switch up the nuts, try different dried fruits, or even add a sprinkle of sea salt for a little salty-sweet magic.
- Nut-free version: Tried swapping nuts for toasted coconut flakes with great success — my niece is nut allergic and still devoured it!
- Spicy kick: Adding a pinch of cayenne or chili powder into the melted chocolate gives the bark a surprising warmth my family loves.
- White chocolate twist: Use white chocolate instead of dark for a creamier, sweeter flavor and contrast it with tart dried fruit.
- Seasonal fruits: In the summer, I swap dried cherries for freeze-dried raspberries for a fresh fruity pop.
How to Make Easy Chocolate Bark Recipe with Nuts and Fruit Recipe
Step 1: Prepare Your Baking Pan Like a Pro
This step might seem basic, but using two layers of parchment paper that overlap on the sides makes all the difference when it’s time to lift the bark out cleanly. Think of the extra paper edges as handles that save you from struggling to get sticky chocolate off your pan later.
Step 2: Set Up Your Double Boiler
Fill a saucepan about a third full with water and bring it to a gentle simmer. Place a heatproof bowl snugly on top, making sure the water doesn’t touch the bowl’s bottom. This gentle heat melts the chocolate slowly, preventing scorching. I learned this the hard way when my chocolate got grainy — low, indirect heat is key.
Step 3: Melt Chocolate and Flavor It
Add the chopped dark and semi-sweet chocolates to the bowl along with cinnamon if you want that cozy warmth. Stir occasionally with a silicone spatula until the chocolate is silky smooth. If you’re making the peppermint version, swap cinnamon for a quarter teaspoon of peppermint extract here — it makes the kitchen smell amazing!
Step 4: Spread and Top Quickly
Remove the bowl carefully, making sure no water sneaks into the chocolate. Pour it evenly into your prepared pan, then immediately sprinkle on your nuts, dried fruits, candy canes, or toffee bits. Doing this while the chocolate’s still warm means everything sticks perfectly. Trust me, waiting too long will make the toppings slide off later.
Step 5: Let It Set
Set your pan aside at room temperature for about 3 hours or until the bark is completely firm. Resist the temptation to speed things up by refrigerating; rapid cooling can cause the chocolate to develop that dull white “bloom.” Once set, slice it into generous 3-inch chunks with a sharp knife and get ready for rave reviews.
Pro Tips for Making Easy Chocolate Bark Recipe with Nuts and Fruit Recipe
- Quality Chocolate Matters: I always recommend using chocolate bars rather than chips since bars melt more smoothly and have better flavor.
- Dry Your Toppings: Make sure nuts and dried fruits are completely dry so they don’t introduce moisture that can affect the chocolate’s texture.
- Room Temperature Finish: I let the bark firm at room temp because the flavor and texture stays more balanced than chilling in the fridge.
- Use a Sharp Knife for Clean Cuts: Wiping the knife between slices stops the chocolate from cracking or sticking as you cut.
How to Serve Easy Chocolate Bark Recipe with Nuts and Fruit Recipe
Garnishes
I love finishing my chocolate bark with a sprinkle of flaky sea salt or even a drizzle of white chocolate on top for that extra wow factor. Sometimes I toast a few extra almonds and scatter them over the bark right before serving to amp up the aroma and crunch.
Side Dishes
This sweet treat pairs wonderfully with a hot cup of espresso or a glass of cold milk. I’ve also served it alongside fresh fruit for a light dessert board that impresses guests without fuss.
Creative Ways to Present
For special occasions, I like breaking the bark into bite-sized pieces, then gifting them in little cellophane bags tied with festive ribbons. It makes for a beautiful homemade gift that looks like you spent hours—when really, it’s so easy!
Make Ahead and Storage
Storing Leftovers
I store leftover bark in an airtight container at room temperature. It keeps perfectly for up to two weeks if away from heat and humidity. Just make sure to layer parchment paper between pieces so they don’t stick together.
Freezing
If you want to save bark for longer, freezing works great. Wrap pieces tightly in plastic wrap, then pop them in a freezer-safe bag. When you’re ready to enjoy, thaw at room temperature for 30 minutes, and it’s just as good as fresh.
Reheating
Because this bark is best enjoyed firm, I don’t recommend reheating it — but if you want a bit melted, pop it in the microwave for 5-10 seconds at a time, watching carefully so it doesn’t burn.
FAQs
-
Can I use milk chocolate for this Easy Chocolate Bark Recipe with Nuts and Fruit Recipe?
Absolutely! Although milk chocolate is sweeter and less intense than dark chocolate, it melts just as well and pairs nicely with nuts and fruit. I like to combine milk and dark chocolate for a balanced flavor.
-
How do I prevent my chocolate from seizing when melting?
Make sure no water droplets get into the chocolate while melting, as even tiny amounts cause seizing. Using a double boiler with gentle heat and stirring slowly helps keep the chocolate smooth and glossy.
-
Can I customize the toppings in this Easy Chocolate Bark Recipe with Nuts and Fruit Recipe?
Yes! One of my favorite things about this recipe is how flexible it is. You can swap nuts, dried fruit, or add candy and spices to suit your preferences or the season.
-
Is the bark suitable for gifting?
Definitely! Wrapped in parchment and placed inside decorative boxes or bags, this bark makes a thoughtful and elegant homemade gift that people really appreciate.
Final Thoughts
This Easy Chocolate Bark Recipe with Nuts and Fruit Recipe has become my go-to for holidays, last-minute desserts, or anytime I want a snack that feels special. It’s foolproof, flavorful, and fun to make with kids or friends. Give it a try—you’ll love how effortlessly it transforms simple ingredients into something truly delightful. Plus, the smiles when you share it? Totally worth it.
Print
Easy Chocolate Bark Recipe with Nuts and Fruit Recipe
- Prep Time: 5 minutes
- Cook Time: 5 minutes
- Total Time: 3 hours 10 minutes
- Yield: 12 pieces
- Category: Dessert
- Method: Stovetop
- Cuisine: American
- Diet: Vegetarian
Description
This easiest chocolate bark recipe ever is a simple, no-bake treat that combines rich dark and semi-sweet chocolates with a variety of delightful toppings like roasted almonds, dried cherries, peppermint, candy canes, pistachios, dried cranberries, and toffee bits. Perfect for holiday gifting or a sweet snack, this customizable bark is ready in just a few hours after melting the chocolate and setting it to firm up.
Ingredients
Chocolate Base
- 9 ounces 72% cocoa dark chocolate, finely chopped
- 9 ounces semi-sweet chocolate, finely chopped
- 1/2 teaspoon ground cinnamon (optional)
Toppings Option 1
- 1/3 cup roasted almonds
- 1/3 cup dried cherries
Toppings Option 2 (Candy Cane Peppermint)
- 18 ounces dark chocolate
- 1/4 teaspoon peppermint extract
- 1/2 cup crushed candy canes
Toppings Option 3
- 18 ounces dark chocolate
- 1/3 cup unsalted shelled pistachios
- 1/3 cup dried cranberries
- 1/4 cup toffee bits
Instructions
- Prepare the Pan: Line a 9×9-inch baking pan with 2 layers of parchment paper, allowing the parchment to overlap on both sides. This will serve as handles to easily lift the chocolate bark out once set.
- Simmer Water: Fill a saucepan about one-third full with water and bring it to a gentle simmer over moderate heat. Avoid boiling to ensure gentle melting.
- Set Up Double Boiler: Place a heatproof bowl securely on top of the saucepan, ensuring it fits snugly and that the simmering water does not touch the bottom of the bowl. This setup gently melts the chocolate without burning.
- Melt Chocolate: Add the chopped chocolate and optional cinnamon (or peppermint extract for the candy cane version) to the bowl. Stir occasionally with a silicone spatula until the chocolate is fully melted and smooth.
- Remove from Heat: Carefully lift the bowl off the pan without allowing any water to come in contact with the chocolate, which could cause it to seize or become grainy.
- Pour Chocolate: Pour the melted chocolate into the prepared baking pan, spreading it evenly with a spatula if needed.
- Add Toppings: Immediately sprinkle your choice of toppings evenly over the wet chocolate—such as roasted almonds and dried cherries or crushed candy canes and toffee bits.
- Set the Bark: Allow the chocolate to set at room temperature for about 3 hours or until it is very firm and hardened.
- Cut and Serve: Lift the set chocolate out of the pan using the parchment paper handles. Cut the bark into 3-inch pieces using a large, sharp knife, and serve at room temperature.
Notes
- This chocolate bark recipe is highly adaptable and great for holidays or gifts.
- Substitute or add other dried fruits like cranberries or apricots and nuts such as walnuts or peanuts as desired.
- You can add flavor variations by including peppermint extract or cinnamon as well as crushed candy canes, toffee bits, or a sprinkle of sea salt.
- Be careful to avoid water contact when melting chocolate to maintain smooth texture.
- Store bark in a cool, dry place to prevent melting.
Nutrition
- Serving Size: 1 piece (approximately 30g)
- Calories: 180
- Sugar: 15g
- Sodium: 20mg
- Fat: 12g
- Saturated Fat: 7g
- Unsaturated Fat: 4g
- Trans Fat: 0g
- Carbohydrates: 18g
- Fiber: 3g
- Protein: 2g
- Cholesterol: 0mg


