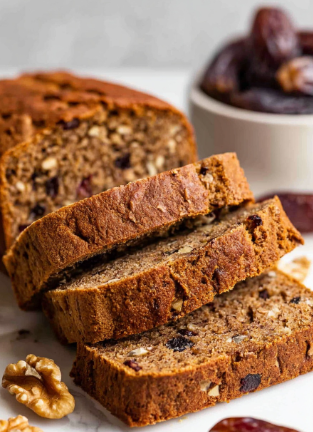
If you’re anything like me and adore a good, cozy loaf to cozy up with a cup of tea, then this Date Nut Bread Recipe is going to be your new best friend. It’s wonderfully moist on the inside with bursts of sweet dates and a satisfying crunch from toasted walnuts. When I first tried this, I was hooked – it’s one of those recipes that feels both comforting and fancy, and you can whip it up easily on a lazy afternoon. Stick around, and I’ll walk you through every step to make sure your loaf turns out absolutely delicious!
Why You’ll Love This Recipe
- Easy to Make: You don’t need fancy equipment or exotic ingredients—just simple pantry staples and a bit of time.
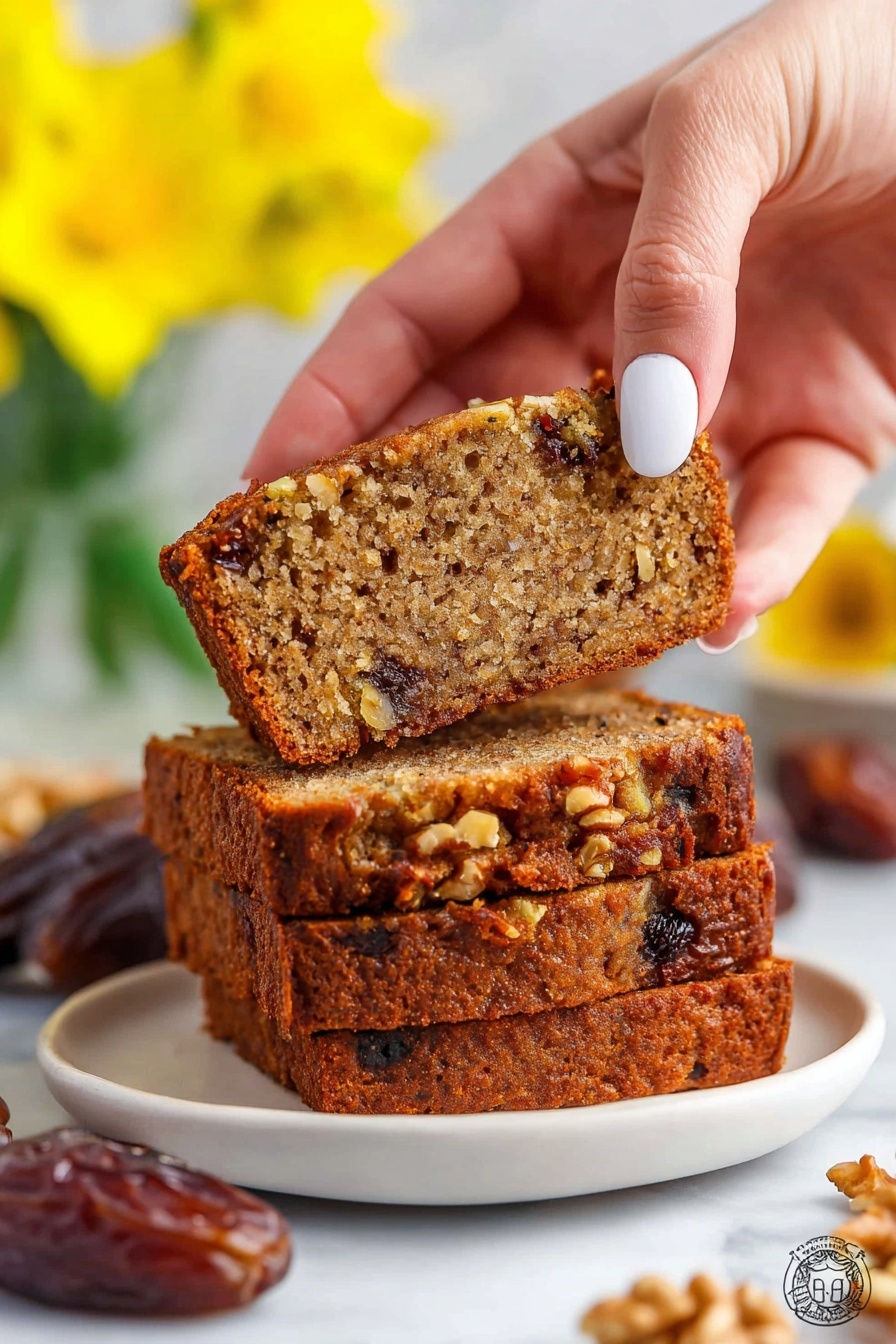
- Perfect Texture: It strikes the ideal balance between gooey dates and crunchy walnuts for a satisfying bite.
- Versatile Snack or Breakfast: Whether it’s paired with morning coffee or an afternoon tea, it always hits the spot.
- Crowd-Pleaser: My family goes crazy for this bread—it’s a recipe I always get asked to bring to gatherings.
Ingredients You’ll Need
The ingredients in this Date Nut Bread Recipe work together to create such a lovely bread—moist, flavorful, with just the right sweetness. I always recommend using good-quality Medjool dates because their natural caramel-like flavor really shines. Also, do toast the walnuts for an extra layer of depth; it’s a game changer!

- All-purpose flour: The classic choice for quick breads, giving structure without heaviness.
- Baking powder: Helps the bread rise nicely and stay fluffy.
- Salt: Just a pinch to balance all the sweetness.
- Boiling water: This is used to soak the dates, softening them perfectly.
- Medjool dates (pitted and diced): Sweet, naturally caramel-like dates add a wonderful chew and sweetness.
- Baking soda: Reacts with the dates and helps tenderize the bread.
- Extra virgin olive oil: Keeps the bread moist without being greasy—plus, it adds a subtle fruity richness.
- Light or dark brown sugar: Adds caramel notes and moisture for that perfect crumb.
- Large eggs (room temperature): Helps bind everything and adds richness.
- Pure vanilla extract: A little extra flavor magic in every bite.
- Chopped walnuts: Toasting these amps up their flavor and crunch, so don’t skip this step!
Variations
I love playing around with this Date Nut Bread Recipe depending on the season or what I have handy. You can easily make it your own, so don’t hesitate to swap or add ingredients that suit your taste buds or dietary needs.
- Swap the nuts: If walnuts aren’t your favorite, pecans or almonds work beautifully and add a different crunch.
- Go dairy-free: This recipe is naturally dairy-free since it uses olive oil instead of butter.
- Add warm spices: Cinnamon, nutmeg, or allspice can add cozy flavors I love especially in cooler months.
- Mix in dried fruit: Toss in some raisins or chopped dried apricots for extra texture and bursts of sweetness.
How to Make Date Nut Bread Recipe
Step 1: Toast the Nuts and Prepare Dry Ingredients
First things first: preheat your oven to 350°F (or 160°C if you’re using a fan oven). While it heats up, spread your walnuts on a sheet pan and toast them for about 7 minutes. Toasting really wakes up their flavor—don’t skip this! After they’re golden and fragrant, set them aside to cool before chopping into smaller pieces. Meanwhile, in a bowl, whisk together the flour, baking powder, and salt. Getting your dry ingredients ready upfront makes the mixing process smooth and avoids overworking the batter later.
Step 2: Soak the Dates
This step is a little trick I discovered that totally changes the texture of the bread. Pour boiling water over your chopped dates and let them soak until cool. This softens them and helps distribute their sweetness evenly throughout the bread. Once cooled, stir in the baking soda—it reacts with the acidity in the dates and keeps the loaf tender.
Step 3: Mix Wet Ingredients and Combine
Add olive oil, brown sugar, eggs, and vanilla extract to the cooled date mixture. Whisk everything until smooth and well combined; the batter at this point is rich and aromatic. Slowly add the dry flour mixture into the wet mixture, stirring gently until just combined. Be careful not to overmix—you want the bread tender and soft, not dense. Lastly, fold in your toasted walnut pieces for that wonderful crunch.
Step 4: Bake to Perfection
Grease and line a 9×5-inch loaf pan with parchment paper for easy removal. Pour in the batter and smooth out the top with a spatula. Pop the pan into your preheated oven and bake for about 40-45 minutes. You’ll know it’s ready when a toothpick inserted in the center comes out clean, and the internal temperature hits around 200°F (93°C). Let it cool in the pan for 10 minutes before transferring to a wire rack to cool completely. Trust me, cooling is important here – it finishes setting the bread so your slices hold together nicely.
Pro Tips for Making Date Nut Bread Recipe
- Use Room Temperature Eggs: I learned the hard way that cold eggs make the batter lumpy; letting them warm to room temp helps everything blend smooth.
- Don’t Skip Toasting Nuts: It seriously enhances their flavor and adds a satisfying crunch to every bite.
- Watch Your Mixing: Stir just until the batter comes together. Overmixing can make the bread tough – and that’s no fun.
- Cooling Makes a Difference: Wait for the loaf to cool completely before slicing to keep the slices from crumbling.
How to Serve Date Nut Bread Recipe
Garnishes
Personally, I like to keep the garnishes simple and let the bread shine. A light spread of softened butter or a smear of cream cheese really takes it up a notch. If you’re feeling fancy, a drizzle of honey or a sprinkle of cinnamon sugar brings a bit of extra sweetness and warmth that pairs perfectly with the dates.
Side Dishes
This bread is so rich and flavorful that I often enjoy it on its own, but it pairs wonderfully with fruit salads, a tangy yogurt parfait, or even alongside a bowl of warm soup for a light yet satisfying meal.
Creative Ways to Present
For holiday brunches or special gatherings, I like slicing the bread into smaller pieces and serving it with an assortment of nut butters and fruit preserves. Another fun idea is to lightly toast the slices and top them with ricotta and fresh figs or sliced pears—trust me, your guests will love it.
Make Ahead and Storage
Storing Leftovers
I usually store leftover Date Nut Bread wrapped tightly in plastic wrap or in an airtight container at room temperature. It stays fresh and moist for about three days. If your kitchen is warm or humid, I find refrigeration extends freshness by a couple more days without drying it out noticeably.
Freezing
One great trick I discovered is to slice the bread before freezing. I wrap individual slices in plastic wrap, then place them in a freezer bag. This way, I can grab a slice or two whenever I want without thawing the whole loaf. It keeps beautifully for up to 3 months.
Reheating
To bring your frozen bread slices back to life, I pop them in a toaster oven or regular toaster for a few minutes until warm and slightly crisp. If you prefer reheating a whole loaf, cover it loosely with foil and warm in a 325°F oven for about 15 minutes. This restores that fresh-baked feel.
FAQs
-
Can I substitute Medjool dates with another type of date?
Yes! While Medjool dates are the creamiest and sweetest, you can use other varieties like Deglet Noor if that’s what you have on hand. Just make sure to chop and soak them well to soften, as some dates can be drier.
-
What if I don’t have olive oil—can I use butter instead?
You can substitute melted butter for the olive oil if you prefer, but keep in mind it will slightly change the flavor and texture. Olive oil lends a subtle fruity note and keeps the bread moist, so if swapping, try to use unsalted butter.
-
How do I know when the Date Nut Bread is done baking?
Aside from the toothpick test—looking for it to come out clean or with a few moist crumbs—using a kitchen thermometer is helpful. Your bread should reach about 200°F (93°C) inside to ensure it’s fully baked but still moist.
-
Can I make this bread gluten-free?
Absolutely! Try swapping the all-purpose flour with a gluten-free blend designed for baking. Just keep an eye on the texture, as gluten-free flours absorb liquids differently, so you might need to adjust the soaking time or hydration.
-
Why do I need to soak the dates in boiling water?
Soaking softens the dates, making them easier to blend into the batter and prevents dry, chewy chunks. The heat also helps loosen natural sugars, which adds sweetness and moistness to your bread.
Final Thoughts
Making this Date Nut Bread Recipe has become one of those joyful kitchen moments for me—I love how it fills the house with a warm, inviting aroma and the way its tender crumb feels like a hug in every slice. It’s surprisingly easy but feels like a special treat, perfect for sharing or savoring quietly with your favorite beverage. I can’t recommend it enough, and I hope you enjoy baking and eating it as much as I do. Trust me, once you give it a try, it’ll find a permanent spot in your rotation.
Print
Date Nut Bread Recipe
- Prep Time: 20 minutes
- Cook Time: 40 minutes
- Total Time: 60 minutes
- Yield: 10 slices
- Category: Quick Bread
- Method: Baking
- Cuisine: American
Description
This Date Nut Bread is a moist and flavorful quick bread loaded with sweet Medjool dates and crunchy toasted walnuts. Perfectly spiced and lightly sweetened, it makes a delightful breakfast treat or an afternoon snack. The combination of soaking dates in hot water and baking soda ensures a soft, tender crumb while the toasted walnuts add a satisfying crunch.
Ingredients
Dry Ingredients
- 1 ½ cups all-purpose flour
- 2 teaspoons baking powder
- ½ teaspoon salt
- ½ teaspoon baking soda
- 1 cup chopped walnuts (toasted and cooled)
Wet Ingredients
- ¾ cup boiling water
- 1 ½ cups Medjool dates (pitted and diced)
- 2 tablespoons extra virgin olive oil
- ⅓ cup light or dark brown sugar
- 3 large eggs (at room temperature)
- 1 teaspoon pure vanilla extract
Instructions
- Preheat and Toast Walnuts: Preheat your oven to 350°F (180°C), or 160°C for fan ovens. Spread the raw walnuts on a sheet pan and toast them for 7 minutes until fragrant. Remove from the oven, let cool, and chop into smaller pieces.
- Mix Dry Ingredients: In a medium bowl, whisk together the all-purpose flour, baking powder, and salt. Set this mixture aside for later use.
- Soak Dates: Place the diced Medjool dates in a separate bowl and pour the boiling water over them. Allow the dates to soak until the water cools to room temperature. Stir in the baking soda to this mixture once cooled, which helps soften the dates and tenderize the bread.
- Combine Wet Ingredients: To the soaked date mixture, add the extra virgin olive oil, brown sugar, eggs, and vanilla extract. Whisk these ingredients thoroughly until fully combined and smooth.
- Mix Wet and Dry Ingredients: Gradually add the dry flour mixture to the wet date mixture, stirring gently until just combined to avoid overmixing. Then fold in the toasted and chopped walnuts evenly through the batter.
- Prepare Baking Pan: Grease and line a 9×5-inch (23×13 cm) loaf pan with parchment paper to prevent sticking. Pour the batter into the pan and smooth the top evenly with a spatula.
- Baking: Bake the loaf in the preheated oven for 40-45 minutes, or until a toothpick inserted in the center comes out clean and the internal temperature reaches 200°F (93°C).
- Cooling: Allow the bread to cool in the pan for 10 minutes. Then carefully transfer it to a wire rack to cool completely before slicing to maintain its structure and moisture.
Notes
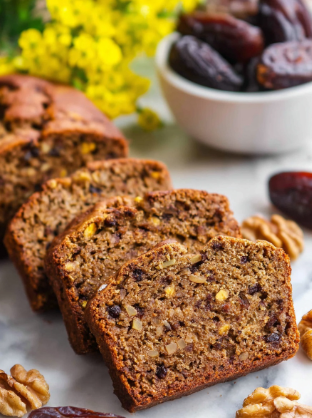
- Date Nut Bread is wonderfully moist and gooey with the natural sweetness of dates balanced by the crunchy toasted walnuts.
- This bread is ideal for breakfast, brunch, or as a sweet snack any time of day.
- You can substitute walnuts with pecans if desired for a different nutty flavor.
- Make sure to let the bread cool completely for cleaner slices and better texture.
Nutrition
- Serving Size: 1 slice (75 g)
- Calories: 281 kcal
- Sugar: 22 g
- Sodium: 196 mg
- Fat: 12 g
- Saturated Fat: 2 g
- Unsaturated Fat: 10 g
- Trans Fat: 0.01 g
- Carbohydrates: 40 g
- Fiber: 3 g
- Protein: 6 g
- Cholesterol: 56 mg


