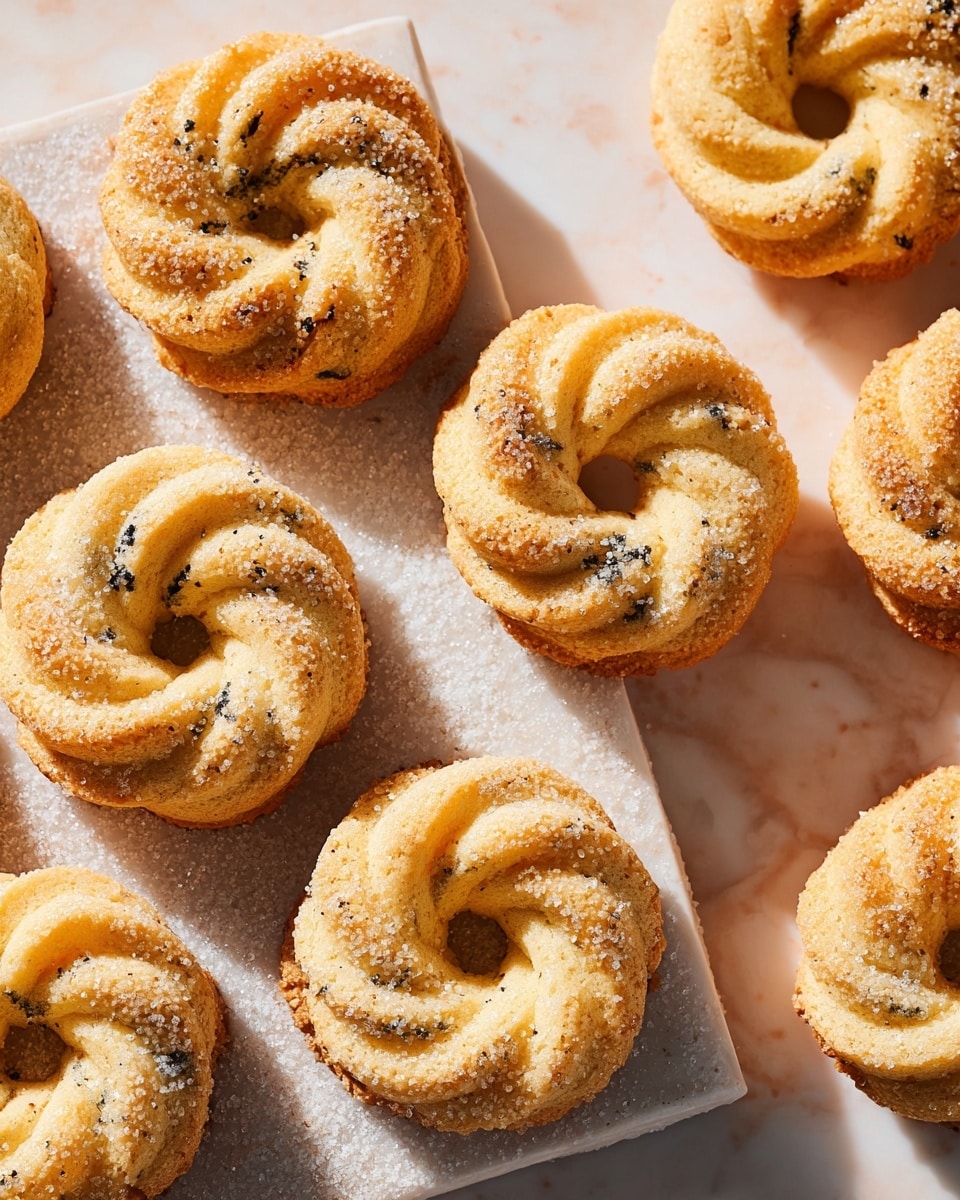
If you’re anything like me, you’ll absolutely adore these Danish Butter Cookies with Currants and Lemon Zest Recipe. They’re buttery, tender, and wonderfully aromatic, thanks to the fresh lemon zest that brightens each bite, and those little bursts of sweetness from the currants give them such a delicious twist. I love how these cookies bring a perfect balance of classic buttery richness with just enough fruity tang to keep things interesting.
These cookies work wonderfully for everything from casual afternoon tea to holiday cookie trays. I first discovered this recipe when I wanted something familiar yet a bit special for a friends’ gathering, and it quickly became a favorite. Trust me, once you try this Danish Butter Cookies with Currants and Lemon Zest Recipe, you’ll find countless excuses to bake them again and again.
Why You’ll Love This Recipe
- Classic Meets Unique: The lemon zest and currants add a fresh, fruity surprise to the traditional buttery cookie.
- Simple & Impressive: Few ingredients, easy steps, yet irresistibly tasty—perfect for any skill level.
- Great Make-Ahead Option: You can bake or freeze these cookies in advance, making them ideal for parties or gifts.
- Family Favorite: My family goes crazy for these, and I bet yours will too!

Ingredients You’ll Need
Each ingredient here has a role in creating that perfect soft yet slightly crisp texture, with flavors that sing in harmony. I usually recommend sticking to good quality butter and fresh lemon zest to really make this Danish Butter Cookies with Currants and Lemon Zest Recipe shine.
- Unsalted Butter: Room temperature butter creams best with sugar to create that fluffy, tender texture.
- Granulated Sugar: Provides sweetness and helps with browning during baking.
- Egg: Adds structure and richness; make sure it’s at room temperature for easy incorporation.
- Lemon Zest: Use freshly grated lemon zest for the brightest, freshest flavor.
- Vanilla Extract: Enhances the buttery flavor and pairs beautifully with lemon.
- All-Purpose Flour: The base for structure; be careful not to overmix after adding.
- Dried Currants: Tiny bursts of chewy sweetness—love their texture here.
- Baking Soda: A small amount helps with slight lift and tenderness.
- Kosher Salt: Balances sweetness and enhances flavor depth.
- Sanding Sugar: For that pretty sparkle and slight crunch on the outside.
Variations
I love to mix things up with this Danish Butter Cookies with Currants and Lemon Zest Recipe depending on the season or mood, and I encourage you to do the same. It’s a great base for creative tweaks that enhance flavors or suit dietary preferences.
- Add Nuts: I sometimes toss in chopped toasted almonds or pecans for a little crunch; it’s a fantastic texture contrast.
- Swap Currants for Raisins or Cranberries: If you can’t find currants, dried cranberries add a lovely sweetness and tartness.
- Gluten-Free Version: Substitute the flour with a good gluten-free baking blend—just be mindful crumbs might be a bit more delicate.
- Spice it Up: Adding a pinch of cinnamon or cardamom gives the cookies a warm, cozy twist I adore for fall.
How to Make Danish Butter Cookies with Currants and Lemon Zest Recipe
Step 1: Creaming the Butter and Sugar
Start by beating the room temperature butter and granulated sugar together using an electric mixer on medium speed. This takes about 3 minutes until the mixture is light and creamy — it’s the secret to a tender texture. Don’t rush here because a properly creamed base gives your cookies that melt-in-your-mouth feel.
Step 2: Adding the Flavorful Extras
Once your butter and sugar are ready, add the egg, freshly grated lemon zest, and vanilla extract. Beat them together until just combined. The lemon zest is the star of this recipe, so be sure to zest the lemon finely to evenly disperse that beautiful flavor.
Step 3: Gently Mixing in the Dry Ingredients and Currants
Next, beat in the all-purpose flour, dried currants, baking soda, and salt — but don’t overdo it! You want everything just combined to avoid developing gluten, which can make your cookies tough. I like to fold in the currants carefully to keep them evenly distributed.
Step 4: Piping and Chilling the Cookies
Now, grab a piping bag fitted with a ½-inch star tip and pipe small rings about 1¾ inches in diameter onto a baking sheet lined with parchment paper. This step is so satisfying—you get those delicate ridges on your cookies. Pop the tray into the freezer for about 20 minutes to firm them up before baking; this helps maintain their shape and gives a better texture.
Step 5: Sugar Coating and Baking
Heat your oven to 350°F (180°C). Quickly dip each frozen cookie into sanding sugar for a sparkly, sweet coating, then place them on a parchment-lined baking sheet about 1 inch apart. Bake for 13 to 18 minutes, rotating the sheets halfway through, until the edges are just golden. It’s important to watch closely to keep that tender center intact.
Step 6: Cooling and Storing
Once baked, transfer your cookies to a wire rack to cool completely. Cooling on the rack prevents sogginess and keeps the texture perfect. These cookies store wonderfully in an airtight container at room temperature for up to 3 days, or freeze if you want to keep them longer.
Pro Tips for Making Danish Butter Cookies with Currants and Lemon Zest Recipe
- Use Room Temperature Ingredients: Butter and egg at room temp blend more smoothly, giving a better dough consistency.
- Don’t Skip Chilling: Freezing the cookie shapes helps them keep their lovely ring shape during baking.
- Pipe Even Sizes: Try to keep your rings uniform so cookies bake evenly — this makes a huge difference!
- Watch the Baking Time: Keep an eye on the edges turning golden to avoid over-baking and dry cookies.
How to Serve Danish Butter Cookies with Currants and Lemon Zest Recipe
Garnishes
I like to sprinkle a tiny extra pinch of lemon zest over the cooled cookies before serving to enhance that citrus aroma. Sometimes, a light dusting of powdered sugar adds a pretty, delicate finish—especially when serving for guests or holidays.
Side Dishes
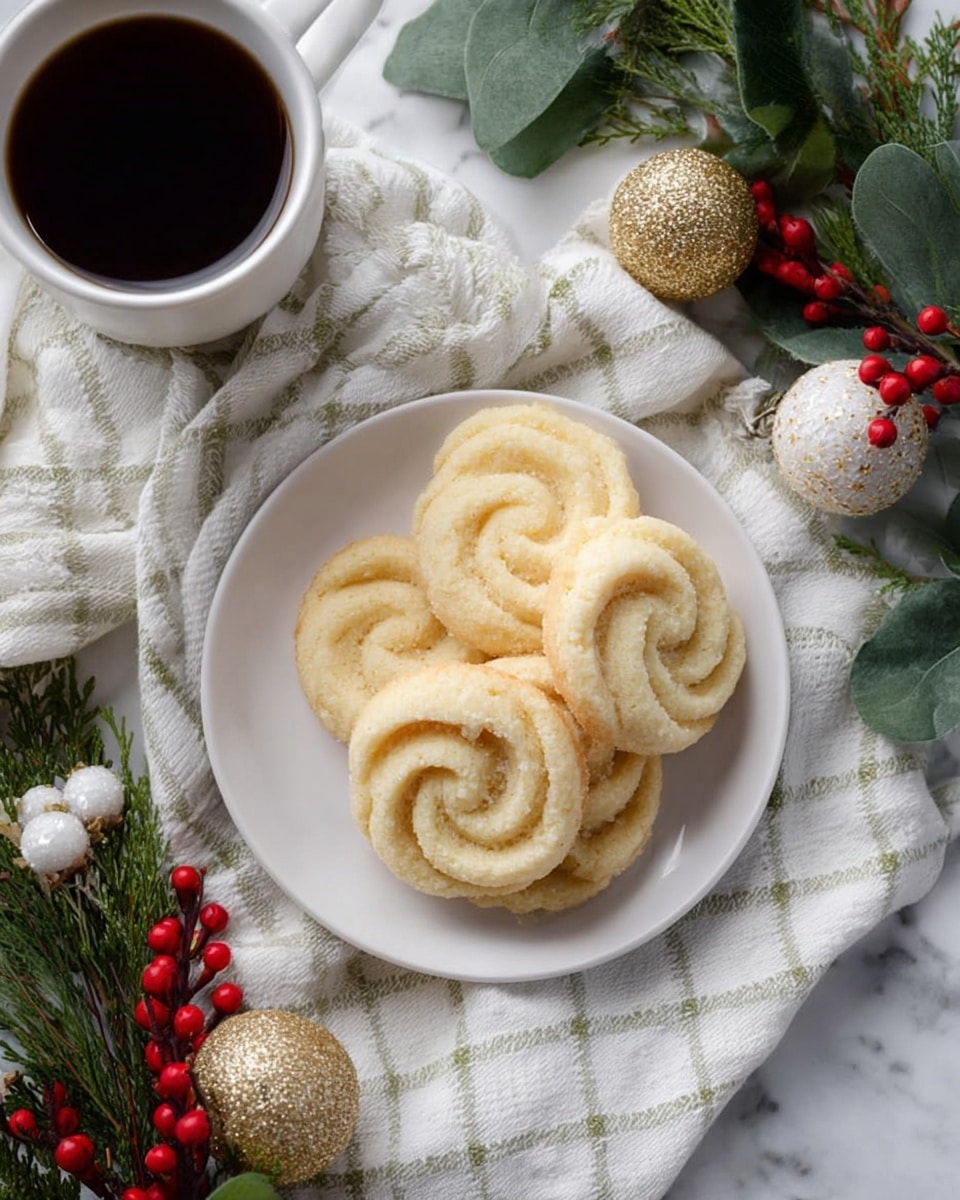
These cookies pair perfectly with a simple cup of black tea or mild coffee to balance their sweetness. I’ve also served them alongside fresh fruit salad or a light cream cheese dip for a fun variation at parties.
Creative Ways to Present
For holiday gatherings, I arrange these cookies in pretty tins layered with wax paper and ribbons—everyone always asks for the recipe. Another fun idea: stack them with alternating layers of lemon curd or jam for a playful cookie sandwich treat.
Make Ahead and Storage
Storing Leftovers
Store leftovers in an airtight container at room temperature, and they’ll stay fresh for about 3 days. I find the cookies maintain their crisp edges and soft centers nicely when stored this way.
Freezing
You can freeze both the shaped cookie dough and the baked cookies. I like to freeze the dough rings on a baking sheet before transferring to a zip-lock bag—this way, they keep their shape and you can bake fresh cookies anytime you want.
Reheating
Reheat baked cookies for 5-7 minutes in a 300°F oven to refresh their crispness without drying them out. Avoid microwaving, as it tends to make cookies chewy or overly soft.
FAQs
-
Can I use other dried fruits instead of currants?
Absolutely! Dried cranberries, raisins, or chopped dried apricots all work wonderfully as substitutes. Just keep in mind that currants have a slightly tart and chewy texture that complements the butteriness nicely, so other dried fruits might slightly change the flavor profile.
-
Why do I need to chill the cookie dough before baking?
Chilling the dough firms it up, which prevents the cookies from spreading too much while baking. It also helps the flavors meld and contributes to the overall texture—soft centers with a slightly crispy edge.
-
Can I make these cookies gluten-free?
You sure can! Swap the all-purpose flour for a high-quality gluten-free baking blend. Just keep an eye on the texture of the dough, which might be a bit more delicate, and handle it gently. Baking times may vary slightly.
-
How long can I store these cookies?
Stored in an airtight container at room temperature, these cookies stay fresh for up to 3 days. If you want to keep them longer, freezing baked cookies for up to two months is a great option.
Final Thoughts
I absolutely love how this Danish Butter Cookies with Currants and Lemon Zest Recipe turns out every single time—there’s something so satisfying about the delicate balance of buttery richness and bright citrus notes with little bursts of chewy currants. I’ve shared this recipe with friends and family, and it never fails to bring smiles and requests for seconds. If you want a cookie that feels a little special but isn’t complicated, this one’s a winner. I hope you enjoy making and sharing it as much as I do!
Print
Danish Butter Cookies with Currants and Lemon Zest Recipe
- Prep Time: 30 Minutes
- Cook Time: 20 Minutes
- Total Time: 50 Minutes
- Yield: About 35 cookies
- Category: Dessert
- Method: Baking
- Cuisine: Danish
Description
Classic Danish Butter Cookies made with rich unsalted butter, sweet currants, and a hint of lemon zest. These delicate, buttery cookies are piped into elegant rings and baked to golden perfection, perfect for gifting or enjoying with tea.
Ingredients
Cookie Dough
- 1 cup (2 sticks, ½ pound, or 227 grams) unsalted butter, room temperature
- 1/2 cup (100 grams) granulated sugar
- 1 large egg, room temperature
- 1 tablespoon finely grated lemon zest
- 1 teaspoon pure vanilla extract
- 2 cup (250 grams) all-purpose flour
- 5 ounce (142 grams) dried currants
- 1/2 teaspoon baking soda
- 1/2 teaspoon kosher salt
Topping
- 1 handful sanding sugar
Instructions
- Prepare the dough: In a large bowl, using an electric mixer on medium speed, beat the unsalted butter and granulated sugar for about 3 minutes until the mixture is combined and creamy. Add the egg, finely grated lemon zest, and pure vanilla extract, then beat until well combined. Gradually beat in the all-purpose flour, dried currants, baking soda, and kosher salt until just combined, forming the cookie dough.
- Pipe the cookies: Line a rimmed baking sheet with parchment paper. Transfer about one-quarter of the dough to a piping bag fitted with a ½-inch (1.2-centimeter) star tip. Pipe small rings approximately 1¾ inches (3.6 centimeters) in diameter onto the prepared baking sheet. Repeat this process with the remaining dough. Place the baking sheet in the freezer for about 20 minutes, allowing the cookies to firm up for easier handling and better shape retention during baking.
- Preheat and sugar coat: While the dough firms, preheat the oven to 350°F (180°C). Line two rimmed baking sheets with parchment paper. Pour some sanding sugar into a small bowl. Quickly dip each cookie ring into the sanding sugar to coat, then transfer them onto the prepared baking sheets, spacing them about 1 inch apart. Return any remaining cookies to the freezer until ready to bake.
- Bake the cookies: Bake the cookies in the preheated oven for 13 to 18 minutes, rotating the baking sheets halfway through baking for even color. Bake until the edges turn golden brown. Once done, transfer the baking sheets to wire racks to cool completely.
- Storage and serving: These cookies can be made up to 3 days in advance. Store them in an airtight container at room temperature to maintain freshness or freeze them for up to 2 months for longer storage. Serve with tea or coffee as a delightful treat.
Notes
- Make sure the butter and egg are at room temperature for easier mixing and a smoother dough.
- Freezing the piped dough before baking helps the cookies keep their shape and texture.
- Sanding sugar adds a lovely sparkle and slight crunch to the cookies.
- Rotate baking sheets halfway during baking to ensure even browning.
- Store cookies in an airtight container to prevent them from becoming stale or soft.
Nutrition
- Serving Size: 1 cookie
- Calories: 90
- Sugar: 5g
- Sodium: 75mg
- Fat: 6g
- Saturated Fat: 4g
- Unsaturated Fat: 2g
- Trans Fat: 0g
- Carbohydrates: 9g
- Fiber: 0.3g
- Protein: 1g
- Cholesterol: 20mg

