If you’re anything like me, you sometimes crave that rich, cozy pumpkin flavor without the fuss of a crust. That’s exactly why this Crustless Pumpkin Pie Recipe has become a staple in my kitchen — it’s incredibly simple, naturally dairy-free, and packs all the warm, spiced goodness you expect from a classic pumpkin pie. Whether it’s a last-minute Thanksgiving dessert or just a cozy fall afternoon treat, this pie will give you those seasonal vibes without the extra work.
What I absolutely love about this recipe is how smooth and custardy it turns out, thanks to the combination of coconut milk and eggs, with a hint of lemon zest brightening everything up. You don’t miss the crust at all — instead, you get pure, silky pumpkin filling that’s easy to portion and serve. Once you try this Crustless Pumpkin Pie Recipe, you’ll find yourself reaching for it every fall (and beyond!).
Why You’ll Love This Recipe
- Super Easy to Make: No crust means less prep and cleanup, perfect for busy days.
- Creamy, Dairy-Free Delight: The coconut milk adds richness without any dairy, great for sensitive stomachs.
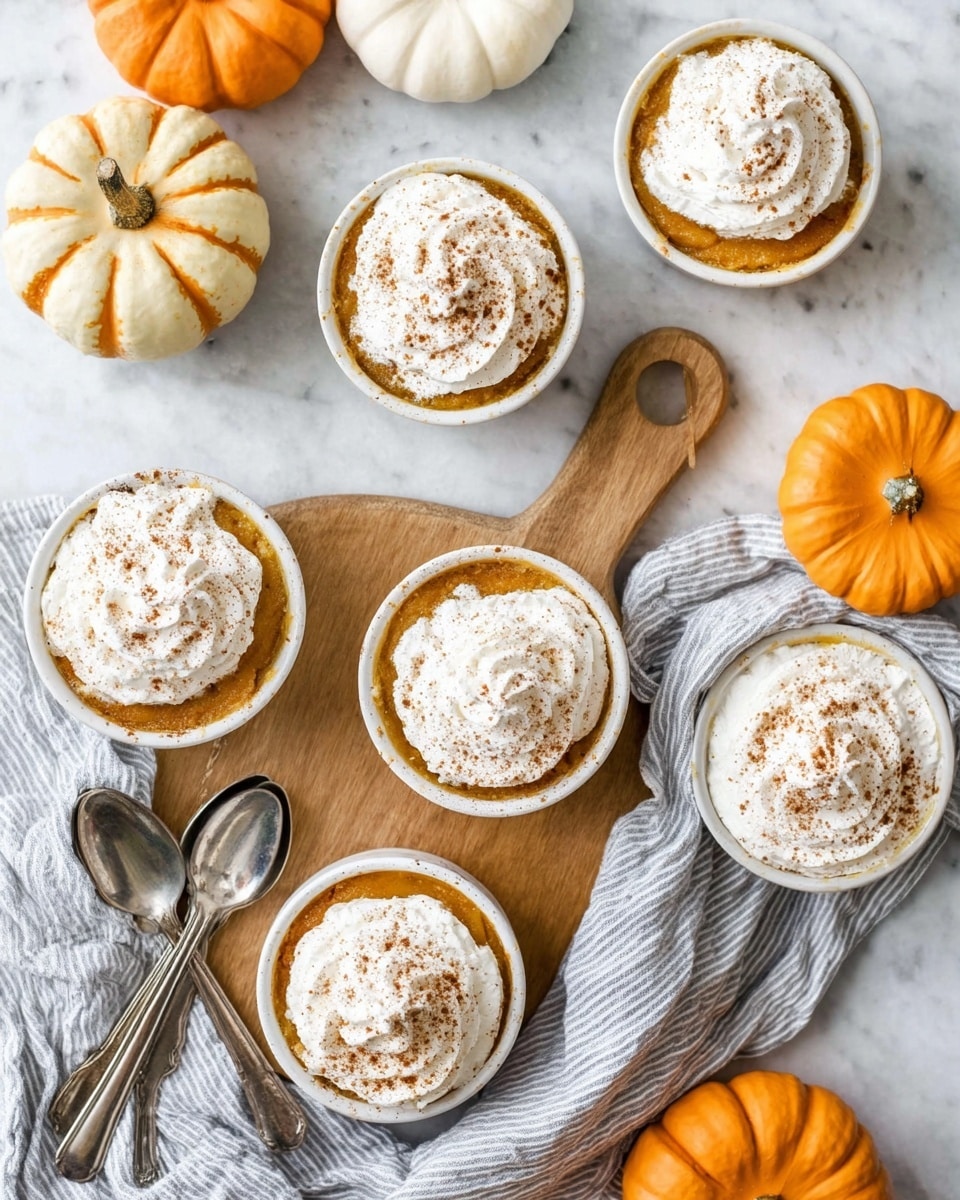
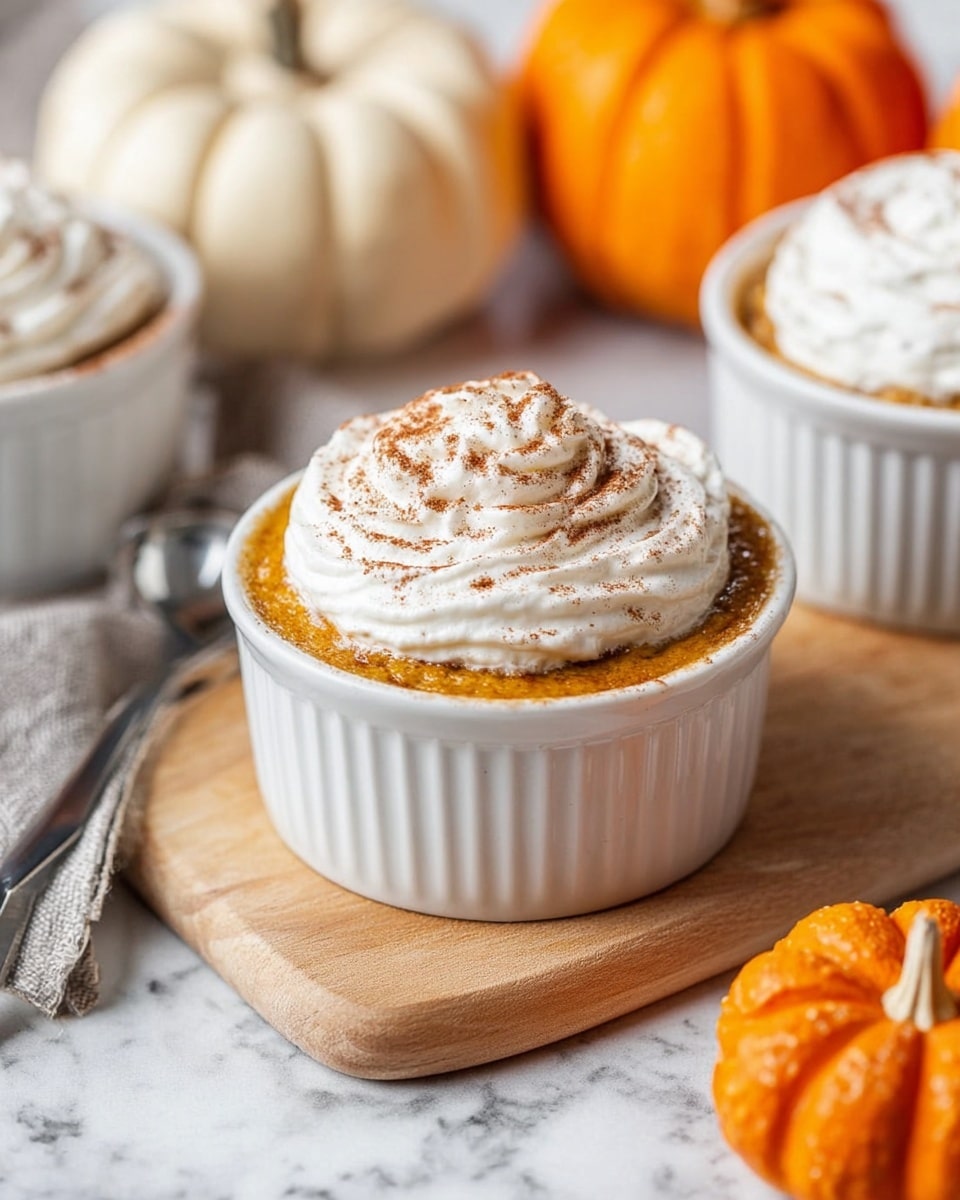
- Perfect Portions: Baking in ramekins means everyone gets their own little pie — no slicing stress.
- Deliciously Spiced: Pumpkin pie spice and lemon zest give it a beautifully balanced flavor.

Ingredients You’ll Need
All these ingredients come together to create a velvety texture and rich flavor that’s naturally sweetened and wholesome. Keep an eye out for full-fat canned coconut milk for that perfect creamy finish.
- Pumpkin Puree: Use pure pumpkin, not pumpkin pie filling, for best results and control over sweetness.
- Coconut Milk (full-fat canned): Adds the creaminess and subtle tropical hint that pairs beautifully with pumpkin.
- Pure Maple Syrup: I prefer Wholesome Yum Keto Maple Syrup, but any good-quality maple syrup works perfectly.
- Large Eggs: They help set the custard and give it that luscious texture.
- Pumpkin Pie Spice: The blend of cinnamon, nutmeg, and cloves is essential for that classic flavor.
- Lemon Zest: Just a touch brightens up the overall flavor and cuts through the richness.
- Vanilla Extract: Adds warmth and depth to the custard.
- Sea Salt: A pinch enhances all the flavors and balances the sweetness.
- Dairy-Free Whipped Cream (optional): Perfect for topping if you want an extra treat.
Variations
I love experimenting with this Crustless Pumpkin Pie Recipe — it’s so forgiving and easy to customize. You can make it your own by adjusting spices or sweeteners, depending on what your family enjoys.
- Sweetener Swap: I once swapped maple syrup for coconut sugar to cut back on liquid — it worked well and gave a deeper caramel note.
- Spice It Up: Adding a splash of freshly grated ginger can bring a lovely zest you didn’t know you wanted.
- Nut-Free Variation: Since this pie is naturally nut-free, it’s a great allergy-friendly dessert option.
- Mini Version: Using smaller ramekins creates adorable individual servings that are perfect for parties.
How to Make Crustless Pumpkin Pie Recipe
Step 1: Mix everything until silky smooth
Start by preheating your oven to 350°F. Then, grab a medium bowl and whisk together the pumpkin puree, coconut milk, maple syrup, eggs, pumpkin pie spice, lemon zest, vanilla extract, and a pinch of sea salt. I like to whisk just until everything is fully combined and the mixture is smooth with no lumps — this helps the custard bake evenly. If you want extra silky results, you can even give it a quick blitz in a blender, but usually, whisking works well.
Step 2: Pour into ramekins and bake
Divide the mixture evenly into ten 4-ounce ramekins placed on a baking sheet. This makes it easy to serve individual portions later. Then pop them into your preheated oven and bake for about 25 to 30 minutes. Watch closely towards the end — the custards are done when they slightly jiggle in the center but don’t look wet or runny.
Step 3: Cool and chill for best texture
Once out of the oven, let the ramekins cool to room temperature — this helps the custard set perfectly. Then refrigerate them for at least one hour. Chilling is key because it firm ups the filling without losing that creamy texture you want. When you’re ready to serve, you can garnish with a dollop of dairy-free whipped cream if you like.
Pro Tips for Making Crustless Pumpkin Pie Recipe
- Use Full-Fat Coconut Milk: It’s the secret to that luscious creaminess — avoid light versions which can make the custard watery.
- Don’t Overbake: The slight jiggle in the middle means perfect doneness; it will firm up as it cools.
- Fresh Lemon Zest Matters: It adds a brightness that balances the warm spices beautifully; don’t skip it.
- Chill Properly: Refrigerate for at least an hour — serving it too warm can feel too soft and less like classic pumpkin pie.
How to Serve Crustless Pumpkin Pie Recipe
Garnishes
I’m a big fan of topping mine with a little dairy-free whipped cream — it adds that light fluffy contrast to the silky pie. A sprinkle of cinnamon or some toasted pecans on top also give it nice texture and some extra warmth.
Side Dishes
Serve this crustless pumpkin pie alongside a hot cup of chai tea or spiced coffee for a perfect fall pairing. For a Thanksgiving twist, pair it with roasted pecans or a dollop of tangy cranberry compote on the side.
Creative Ways to Present
For special occasions, I’ve served these custards in clear glass ramekins on a rustic wooden board with autumn leaves scattered around. Another favorite is layering with layers of coconut whipped cream and crushed ginger snaps for a pretty parfait effect — everyone loved it!
Make Ahead and Storage
Storing Leftovers
Leftover crustless pumpkin pie stores beautifully in the fridge for up to 4 days. I keep mine covered tightly with plastic wrap or in an airtight container to maintain freshness and prevent it from absorbing fridge odors.
Freezing
I’ve frozen this pie a couple of times with good results. Just wrap individual ramekins tightly with foil and freeze. To thaw, transfer to the fridge overnight. The texture remains creamy and delicious, making it a great make-ahead option for busy holidays.
Reheating
If you want to reheat a portion, I recommend warming it gently in a low oven (about 275°F) for 10 minutes — cover with foil to prevent drying out. Avoid microwaving if you can because it can affect the texture and make it rubbery.
FAQs
-
Can I use fresh pumpkin instead of canned pumpkin puree?
Absolutely! If you have fresh pumpkin, roast it until soft then puree it in a blender or food processor. Make sure to drain any excess moisture, as fresh pumpkin can be more watery than canned, which might affect the custard’s texture.
-
Is this recipe suitable for a keto or low-carb diet?
Yes, with a slight tweak! Using a low-carb sweetener like the Wholesome Yum Keto Maple Syrup I recommend keeps this crustless pumpkin pie keto-friendly. The natural sugars in pumpkin are moderate, so it fits well into many low-carb plans when eaten in moderation.
-
Why is there no crust in this pumpkin pie recipe?
This crustless pumpkin pie recipe is designed for simplicity and to reduce carbs and calories without sacrificing flavor and texture. It’s perfect for those who want all the creamy, spiced satisfaction of pumpkin pie without the extra effort or gluten from a traditional crust.
-
Can I make this recipe ahead of time for a party?
Definitely! This recipe actually tastes better after chilling for at least an hour and can be made a day ahead. Just cover tightly and keep refrigerated. On party day, add your toppings fresh for the best presentation and flavor.
-
What should I look for to tell when the pie is done baking?
Look for a slight jiggle in the center of each ramekin. It should not be liquid or runny, but the middle will still move a little when you gently shake the baking sheet. This means the custard is perfectly baked and will set as it cools.
Final Thoughts
This Crustless Pumpkin Pie Recipe is one of those easy homemade desserts that feels impressive but is truly simple to pull together. I love sharing it because it’s sweet, spiced, and creamy, with none of the fuss that normally comes with pies. Whether you’re new to making pumpkin desserts or simply want something quicker without sacrificing flavor, this recipe has really earned a spot at my table — I know it will in yours too. Give it a try, and don’t be surprised if it quickly becomes your go-to pumpkin treat.
Print
Crustless Pumpkin Pie Recipe
- Prep Time: 15 minutes
- Cook Time: 30 minutes
- Total Time: 1 hour 45 minutes
- Yield: 10 servings
- Category: Dessert
- Method: Baking
- Cuisine: American
- Diet: Gluten Free
Description
This Crustless Pumpkin Pie is a delightful, dairy-free dessert featuring creamy pumpkin custard infused with traditional pumpkin pie spices, lemon zest, and vanilla. Baked in individual ramekins, this recipe offers a smooth texture without a crust, making it a lighter yet flavorful treat perfect for the fall season or any time of year.
Ingredients
Custard Ingredients
- 2 15-ounce cans pumpkin puree
- 1 cup coconut milk (full-fat canned)
- ¾ cup pure maple syrup (I use Wholesome Yum Keto Maple Syrup)
- 6 large eggs
- 1 tablespoon pumpkin pie spice
- Zest of 1 lemon
- 2 teaspoons vanilla extract
- 1 pinch sea salt
To Serve
- Dairy-free whipped cream (optional)
Instructions
- Preheat the oven: Set your oven to 350°F (175°C) to prepare for baking the custards.
- Mix the custard: In a medium bowl, whisk together the pumpkin puree, full-fat canned coconut milk, pure maple syrup, eggs, pumpkin pie spice, lemon zest, vanilla extract, and a pinch of sea salt until the mixture is smooth with no lumps visible.
- Portion into ramekins: Evenly distribute the custard mixture into ten 4-ounce ramekins placed on a baking sheet to catch any spills.
- Bake the custards: Place the baking sheet with ramekins in the preheated oven and bake for 25 to 30 minutes. The custards are done when they jiggle slightly in the center upon removal from the oven.
- Cool and refrigerate: Allow the custards to cool to room temperature, then transfer them to the refrigerator to chill for at least 1 hour to set properly.
- Serve: Optionally, top with dairy-free whipped cream before serving for an extra creamy touch.
Notes
- This recipe has been slightly modified with permission from Danielle Walker’s cookbook, Make It Easy.
- For best results, use full-fat canned coconut milk for creaminess and texture.
- Use pure maple syrup or a keto-friendly alternative to maintain natural sweetness.
- Allow custards to cool completely before refrigeration to prevent condensation and maintain texture.
- Individual portions make for easy serving and attractive presentation.
Nutrition
- Serving Size: 1 ramekin
- Calories: 124.5 kcal
- Sugar: 3.5 g
- Sodium: 63.5 mg
- Fat: 7 g
- Saturated Fat: 4.5 g
- Unsaturated Fat: 2.3 g
- Trans Fat: 0 g
- Carbohydrates: 25 g
- Fiber: 2.5 g
- Protein: 5 g
- Cholesterol: 111.5 mg

