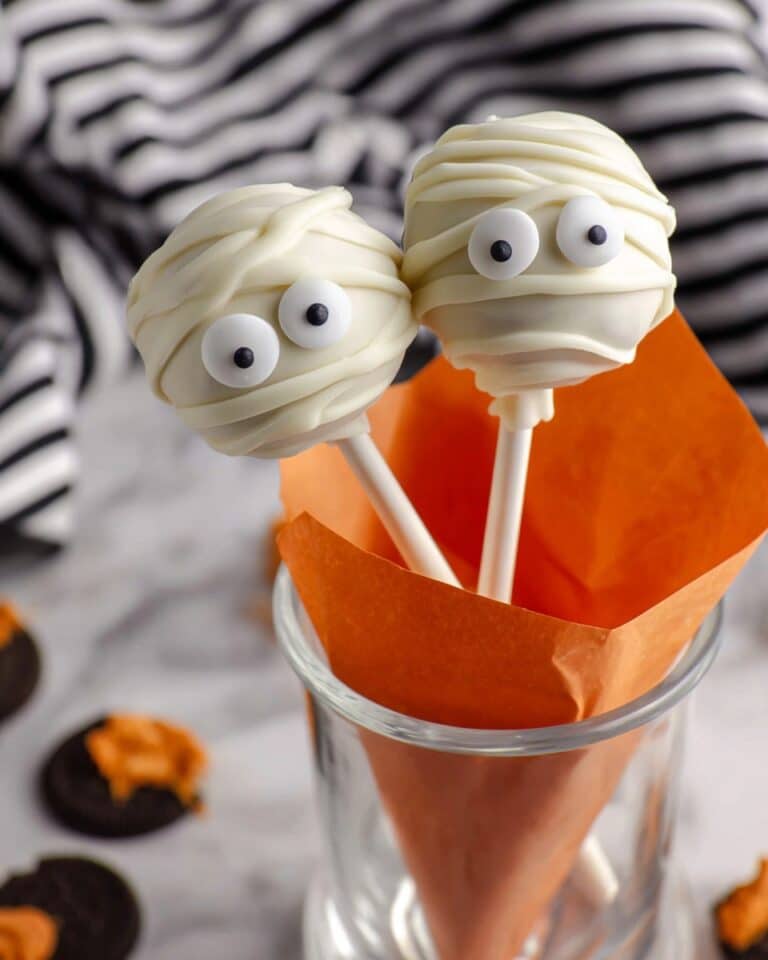
If you’re looking for a delightful little treat that’s both fun to make and absolutely delicious, then you’re going to adore this Chocolate Marshmallow Pops Recipe. I love this because it’s perfect for parties, kids’ snacks, or just that sweet craving moment when you want something easy but impressive. You’ll find that these pops are not only simple to whip up but also endlessly customizable with your favorite toppings!
Why You’ll Love This Recipe
- Super Easy Prep: You only need a handful of ingredients and less than 10 minutes to start creating these chocolate-covered delights.
- Kid-Friendly Fun: Great for getting kids involved, making it a bonding activity that ends with sweet rewards.
- Customizable Toppings: Whether you’re into sprinkles, nuts, or crushed candy, you can make these pops uniquely yours.
- Perfect for Any Occasion: From birthday parties to cozy movie nights, these pops fit right in.

Ingredients You’ll Need
The beauty of this Chocolate Marshmallow Pops Recipe lies in its simplicity—the ingredients play so nicely together that even beginners shine making this. Plus, the options for chocolate flavors let you add your personal flair.
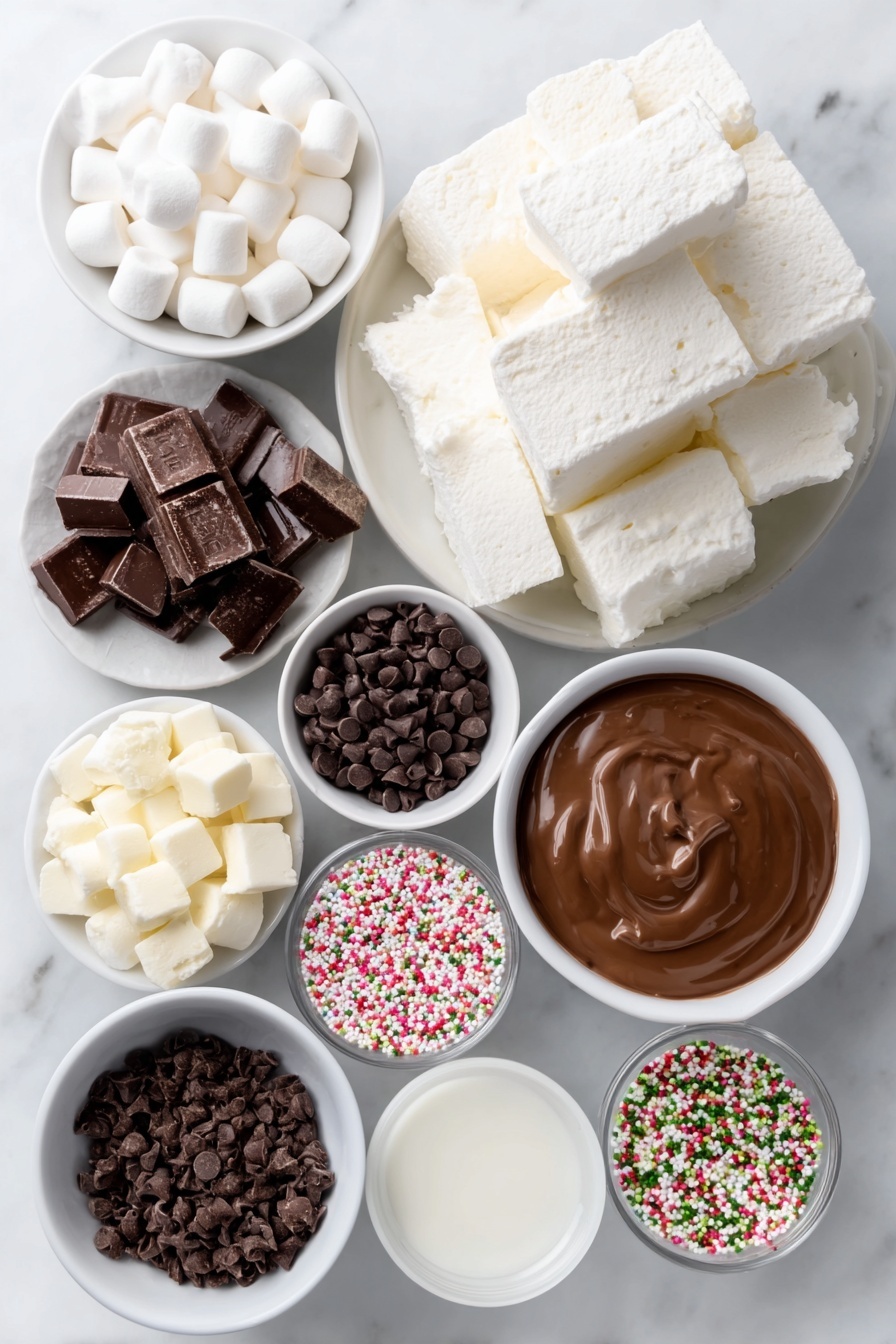
- Large Marshmallows: Use the classic store-bought kind or try homemade marshmallows if you’re feeling adventurous for an even fresher taste.
- Chocolate Candy Melts: These are easy to melt and come in a variety of flavors—milk, white, or dark chocolate all work beautifully.
- Lollipop Sticks: Essential for turning marshmallows into pops without the mess. They hold everything together perfectly.
- Sprinkles or Toppings: This is where you get to go wild—think colorful sprinkles, crushed nuts, or even mini candy pieces.
Variations
Every time I make this Chocolate Marshmallow Pops Recipe, I like to switch things up a bit. You’ll enjoy playing with different toppings or even chocolate types to match your mood—or the season!
- Dark Chocolate Upgrade: I discovered that swapping milk chocolate for dark chocolate gives a richer flavor that adults especially appreciate.
- Holiday Themes: Adding red and green sprinkles during Christmas or pastel colors for Easter instantly transforms these pops into festive treats.
- Nutty Delight: Chopped almonds or crushed peanuts add a crunchy contrast that my family goes crazy for.
- Dairy-Free Option: Use vegan chocolate candy melts and you’re all set for dairy-free enjoyment.
How to Make Chocolate Marshmallow Pops Recipe
Step 1: Melt the Chocolate Perfectly
I learned the hard way that melting chocolate too fast makes it seize and become grainy. So here’s what works best: put your chocolate candy melts in a microwave-safe bowl, then heat at 50% power for one minute. Give it a good stir, then heat again in 30-second bursts, stirring between each until silky smooth. Patience here is key—you want glossy chocolate, not burned chocolate!
Step 2: Prepare Your Marshmallow Pops
While the chocolate’s melting, stick lollipop sticks into the flat side of each marshmallow. You want them secure but be careful not to push the sticks all the way through. This step is trickier than it sounds, so a gentle push usually does the trick.
Step 3: Decorate with Style
Get your toppings ready by pouring sprinkles or other decorations into small bowls for easy access. Dip each marshmallow pop into the melted chocolate, letting excess drip off before you add your toppings. Wait about 10 seconds before sprinkling so the chocolate has a little time to start firming up—that way, your toppings stick perfectly.
Step 4: Let Them Set
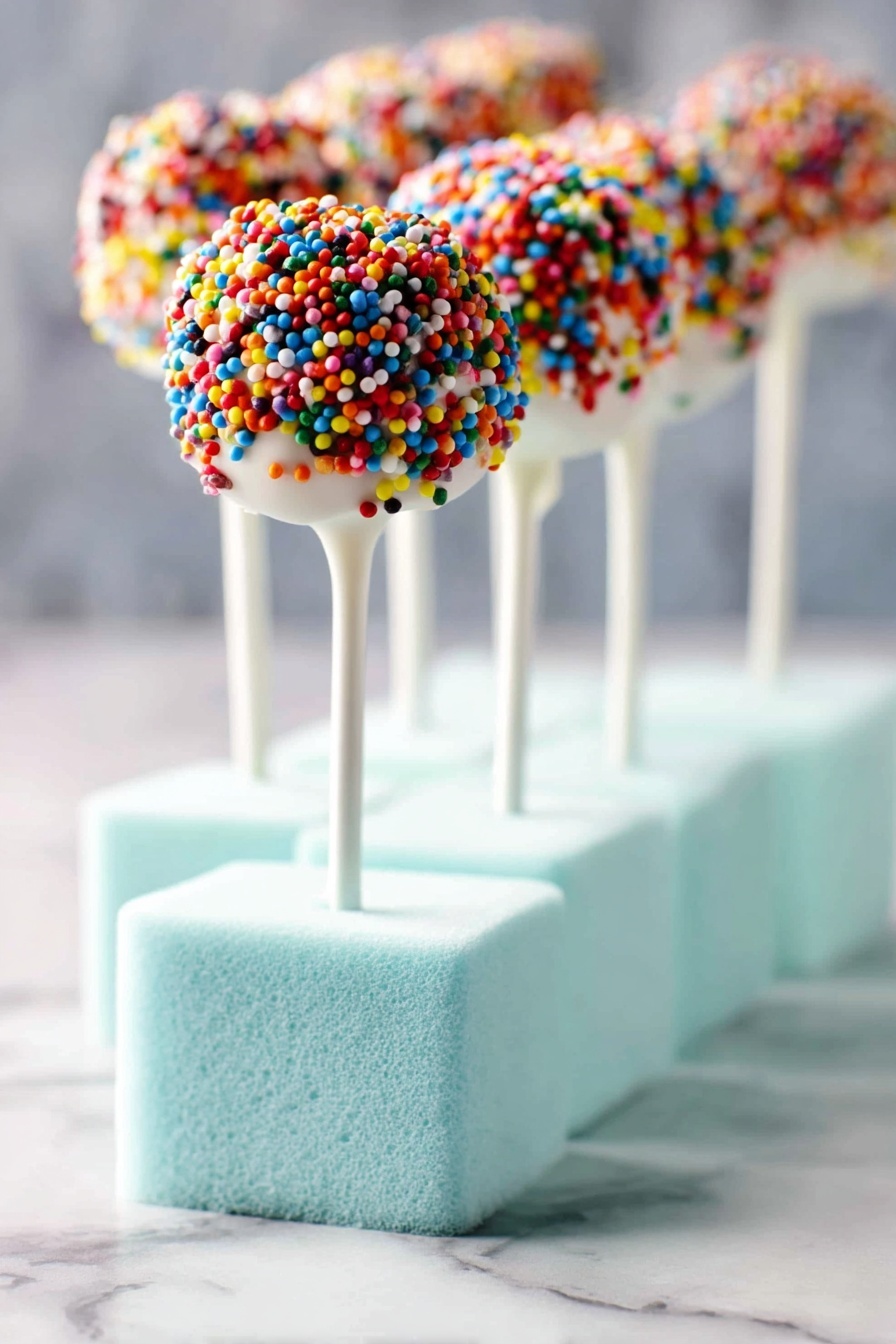
I found that standing the pops upright in a block of styrofoam or florist’s foam works wonders for keeping their shape while the chocolate sets. No styrofoam? No problem—you can line a baking sheet with wax paper and lay the pops down, stick side up. Patience here again pays off; give them about 30 minutes to harden fully.
Pro Tips for Making Chocolate Marshmallow Pops Recipe
- Choose Room Temperature Marshmallows: I learned that marshmallows at room temp soak up the chocolate better and help avoid clumpy finishes.
- Don’t Overdip Your Pops: Too much chocolate can make the marshmallow heavy and messy, so a quick dip works best.
- Use Styrofoam for Setting: Sticking them upright in foam keeps the chocolate smooth and avoids smudges, making your pops look professionally done.
- Avoid Humidity: I avoid making these on super humid days to prevent chocolate bloom and sticky pops.
How to Serve Chocolate Marshmallow Pops Recipe
Garnishes
I love using colorful sprinkles for a pop of fun, but crushed peppermint or toasted coconut takes it next-level seasonal. For a subtle crunch, a sprinkle of finely chopped nuts adds wonderful texture and flavor.
Side Dishes
These pops go wonderfully with a warm cup of hot chocolate or coffee—perfect for cozying up on chilly evenings. I also like serving them alongside simple fruit platters or buttery cookies for a little variety.
Creative Ways to Present
When I’ve hosted birthday parties, I arranged the pops in a mason jar filled with colored sugar or beads to keep them upright. It’s such a cute and functional display that guests always comment on. Wrapping each in cellophane with a ribbon makes them perfect party favors, too!
Make Ahead and Storage
Storing Leftovers
I store leftover marshmallow pops in an airtight container at room temperature—just make sure they’re not in a humid environment. They stay fresh for about 2 days with a crisp chocolate shell and fluffy marshmallow inside.
Freezing
I tried freezing these for a party once and they freeze well if tightly wrapped in plastic wrap and kept in an airtight container. Thaw them at room temperature for about 30 minutes before serving to keep the marshmallows nice and soft.
Reheating
Since marshmallows are best enjoyed fresh, I don’t recommend reheating these pops. If the chocolate loses its snap, simply let them come back to room temperature before enjoying for the best texture.
FAQs
-
Can I use regular chocolate instead of candy melts for this recipe?
Absolutely! You can use regular chocolate bars or chips. Just melt them gently using the same low-power microwave method or a double boiler. Keep in mind that candy melts are formulated to set up nicely without tempering, which makes them easier for dipping.
-
How do I prevent the chocolate from cracking after it sets?
Chocolate cracks often happen if it’s tempered incorrectly or exposed to sudden temperature changes. By using candy melts and letting the chocolate cool slowly at room temperature (not the fridge), you minimize cracking for smooth, glossy pops.
-
What other toppings work well on these pops?
Stay creative! Besides sprinkles, you can try mini chocolate chips, crushed cookies, colorful sugar crystals, shredded coconut, or even edible glitter for some sparkle.
-
Can I make these ahead for a party?
Yes! You can make them a day in advance and store in an airtight container at room temp. Just avoid humid environments to keep chocolate from softening. For longer storage, freezing works well too.
Final Thoughts
This Chocolate Marshmallow Pops Recipe is such a winner in my kitchen because it’s easy to make, brings smiles to everyone’s face, and lets you get a little creative. Whether you’re making them with kids or preparing for a party, these pops turn simple marshmallows and chocolate into magic. Give them a try—I promise you’ll be making these often, and your friends will be asking for your secret!
Print
Chocolate Marshmallow Pops Recipe
- Prep Time: 5 minutes
- Cook Time: 5 minutes
- Total Time: 40 minutes
- Yield: 20 pops
- Category: Dessert
- Method: Microwaving and Dipping
- Cuisine: American
Description
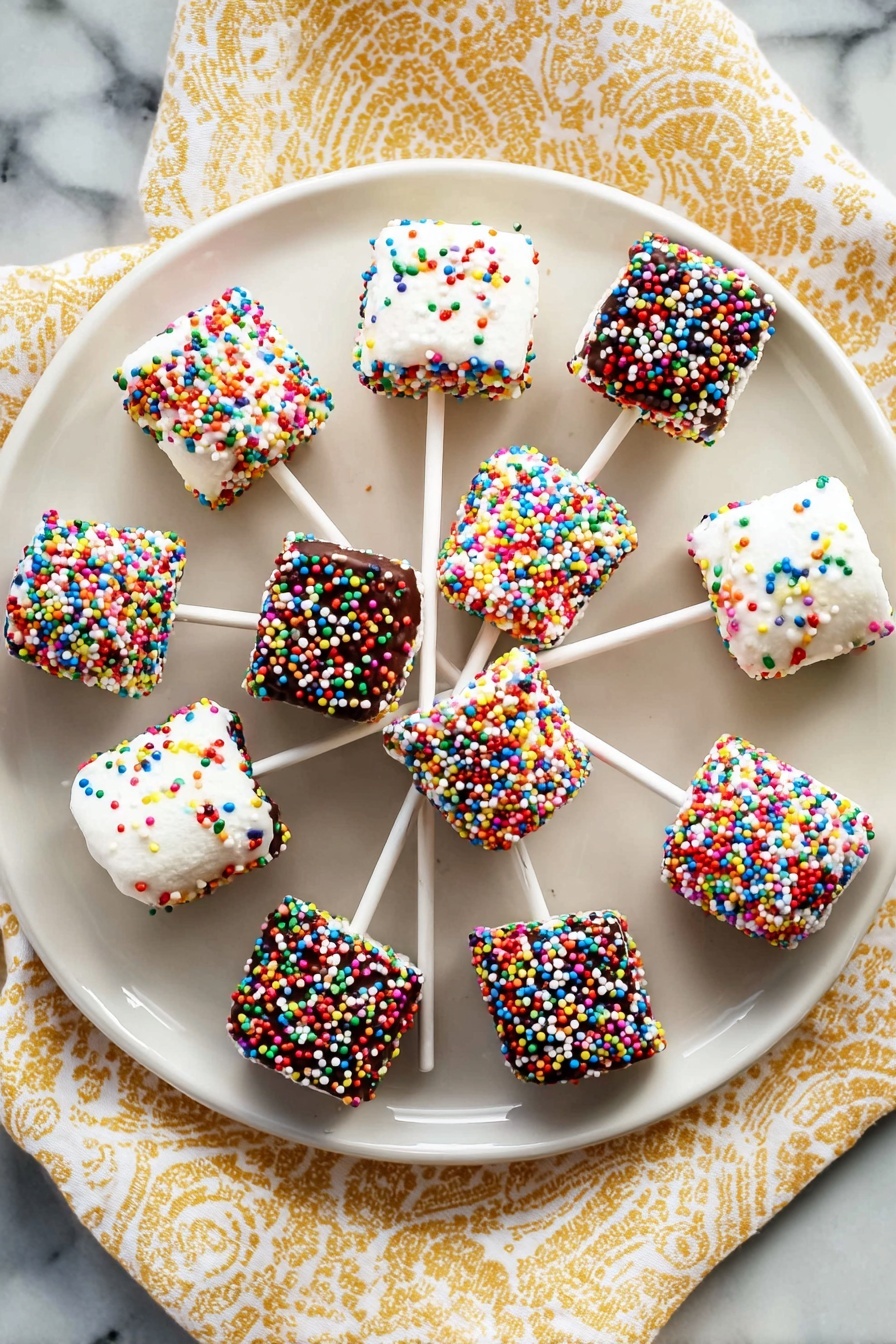
Delightful and easy-to-make Chocolate-Covered Marshmallow Pops, perfect for parties and family treats. Large marshmallows are dipped in melted chocolate and decorated with colorful sprinkles, creating a fun and festive dessert everyone will enjoy.
Ingredients
Marshmallow Pops
- 20 large marshmallows, store bought or homemade
- 1 10-ounce bag chocolate candy melts (milk, white, or dark chocolate)
- Lollipop sticks
- Sprinkles or other decorative toppings of choice
Instructions
- Melt the Chocolate: Place chocolate candy melts in a microwave-safe bowl. Heat in the microwave at 50% power for 1 minute, then stir well. Continue heating in 30-second increments at 50% power, stirring between each until fully melted. Be careful not to overheat to keep the chocolate smooth and workable.
- Prepare Marshmallows with Sticks: Insert a lollipop stick firmly into the flat side of each marshmallow, ensuring it goes deep enough to stay secure but not through the other side.
- Set Up Toppings and Workspace: Pour sprinkles and decorative toppings into small bowls. Line a sheet pan with waxed paper or prepare a styrofoam or florist’s foam block to stand the marshmallow pops while the chocolate sets.
- Dip and Decorate: Dip the marshmallow tops into the melted chocolate, letting any excess drip back into the bowl. After about 10 seconds, sprinkle your chosen toppings over the chocolate-coated marshmallows using your hands or a spoon for an even layer.
- Let the Chocolate Set: Stick the marshmallow pops upright into the prepared styrofoam blocks or place them on the lined sheet pan with the stick side down. Allow the chocolate to harden, which takes about 30 minutes, before serving or packaging.
Notes
- A fun and engaging kitchen activity suitable for all ages, perfect for celebrations or sweet treats.
- You can customize these marshmallow pops with various types of chocolate and an array of colorful sprinkles or toppings to match any occasion.
- If styrofoam blocks are unavailable, use a wax paper-lined tray and lay the pops stick side down to set.
- Be cautious while melting chocolate; overheating can cause it to seize and become unworkable.
Nutrition
- Serving Size: 2 pops
- Calories: 27
- Sugar: 4.6 g
- Sodium: 6.4 mg
- Fat: 0.3 g
- Saturated Fat: 0.3 g
- Unsaturated Fat: 0 g
- Trans Fat: 0 g
- Carbohydrates: 6.3 g
- Fiber: 0 g
- Protein: 0.2 g
- Cholesterol: 0.1 mg

