
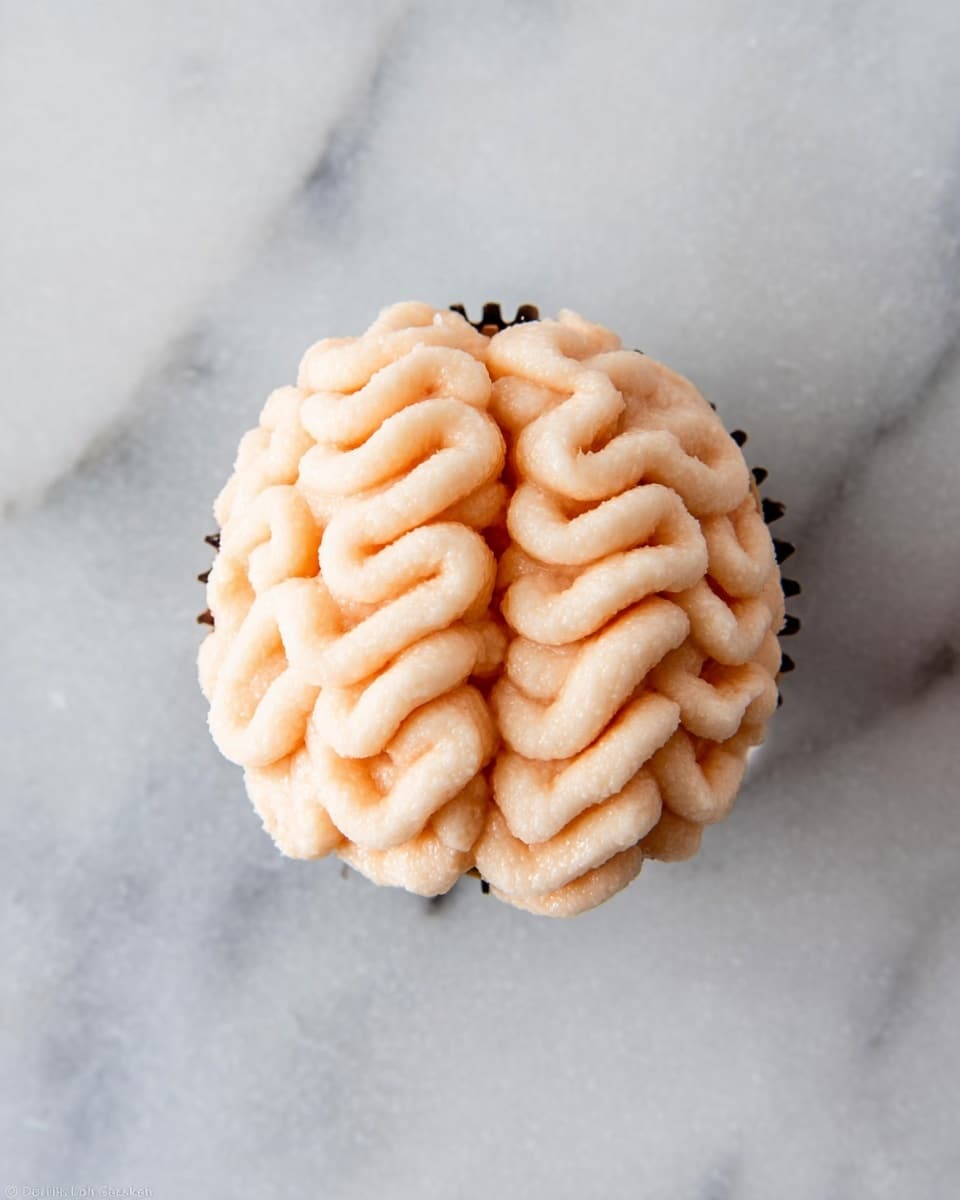
If you’re on the hunt for a spooky, fun treat to wow your guests—especially around Halloween—I’ve got you covered with a fun twist on classic cupcakes. This Brain Cupcakes Recipe is not only creepy cool but surprisingly simple to make. I absolutely love how the buttercream frosting can transform into a realistic, squiggly brain look with just a couple of gel food color drops and a bit of piping magic. Stick with me, and you’ll be serving up fearfully delicious cupcakes that get everyone talking (in a good way!).
Why You’ll Love This Recipe
- Creepy Yet Simple: You’ll get a realistic brain effect that looks way more complicated than it actually is.
- Customizable Base: Use your favorite cupcake recipe and tweak flavors as you like without losing the spooky vibe.
- Perfect for Parties: Whether it’s Halloween or a quirky get-together, these cupcakes turn every event into a brainy bash.
- Fun for All Skill Levels: If you can frost cupcakes, you can nail these brainy beauties. Plus, I’ll share all my tips to make it easier.

Ingredients You’ll Need
The magic of this Brain Cupcakes Recipe starts with a great cupcake base and a rich vanilla buttercream that’s easy to work with. I’ll show you my trick for getting the color just right to look like actual brain matter—don’t worry, it’s easier than it sounds!
- Your favorite cupcake recipe: I like classic vanilla or chocolate – whichever you prefer, just make sure it’s sturdy enough to hold the frosting design.
- Vanilla buttercream: Smooth and creamy works best here because you need consistency for detailed piping.
- Americolor Soft Gel Paste Warm Brown: Just a couple of drops to build your base brain color.
- Americolor Soft Gel Paste Ivory: Adds highlights and depth for a realistic look – just one drop does the trick.
Variations
I love how versatile the Brain Cupcakes Recipe is! Over time, I’ve played with different flavor combos and even the frosting colors to suit different moods or events. Feel free to get creative — these brainy beauties are your canvas.
- Chocolate Brain Cupcakes: For extra richness, swap out your base recipe for chocolate cupcakes; the dark crumb looks amazing beneath the brown-tinged frosting.
- Color Twist: Add a drop of red gel color to the frosting mix to create a “bloody brain” effect for Halloween parties — trust me, it gives that grossly awesome detail.
- Nut-Free Swap: If you have nut allergies, simply use a nut-free buttercream recipe — it pipes just as beautifully and keeps the design intact.
- Mini Brain Cupcakes: Make mini cupcakes and pipe tiny brains for bite-sized fun; perfect for kid parties or finger food platters.
How to Make Brain Cupcakes Recipe
Step 1: Mix the Brain-Colored Frosting
Start with your vanilla buttercream and add 2 drops of Americolor Soft Gel Paste Warm Brown and 1 drop of Ivory. This combo gives the perfect pale, slightly muddy tone that mimics real brain matter. Mix it well but don’t overdo it—you want a consistent color with subtle variation, not one flat tone. I discovered this little trick after trying several shades that were either too bright or completely off.
Step 2: Prep Your Cupcake Base Layer
Grab a knife or spatula and spread a thin, smooth layer of your colored buttercream over the entire cupcake top—this seals in crumbs and creates a neat canvas for piping. Don’t skip this step, or your piping will look messy and uneven. When I first skipped it, my “brains” lost shape quickly. Trust me, this base layer is your friend!
Step 3: Pipe the Brain Ridges
Using a piping bag fitted with a no. 12 round tip, pipe a straight line straight down the center of your cupcake. This acts as the brain’s “longitudinal fissure.” Then, on each side, pipe continuous “S” shapes—think squiggly lines mimicking the brain’s convolutions. Layer another set of these “S” squiggles on top to build dimension. It might take a few tries to get comfortable with the motion—go slow, keep the pressure consistent, and remember, each cupcake is unique.
Pro Tips for Making Brain Cupcakes Recipe
- Consistent Pressure: When piping those squiggly “S” shapes, keeping steady pressure helps prevent breaks in the line, making your brains look more lifelike.
- Practice on Parchment: Before working on your cupcakes, try piping a few “brain folds” on parchment paper to warm up your hand and get the rhythm right.
- Use a Large Round Tip: The #12 round tip is perfect for creating thick, soft brain ridges; smaller tips make it too detailed and tricky.
- Cover Cupcakes Before Piping: Frost a smooth base first to avoid crumb interference; it prevents your piping from snagging and keeps everything neat.
How to Serve Brain Cupcakes Recipe
Garnishes
I usually keep garnishes simple with these because the frosting design is the star of the show. But I’ve found a light dusting of edible luster dust in pearl or pink adds a cool sheen that makes the brains look slick and more realistic. For a spooky Halloween vibe, a small drizzle of red gel “blood” works wonders right before serving.
Side Dishes
Pair your Brain Cupcakes with some dark chocolate-dipped strawberries or a punch bowl of berry-flavored drinks to keep up the creepy-cool theme. My family also loves serving them alongside pumpkin-spiced cookies or simple fruit to balance the sweetness with some freshness.
Creative Ways to Present
Once, I arranged these cupcakes on a platter lined with faux cobwebs and plastic spiders for my Halloween party—it was a total hit! You could also serve them on a “brain scan” serving tray (think skull or anatomy-themed dishes) for a fun twist at science or horror-themed get-togethers. Adding green candy “mold” bits around the sides creates a decayed brain look for daring guests.
Make Ahead and Storage
Storing Leftovers
I store leftover Brain Cupcakes in an airtight container in the fridge for up to 3 days. The frosting holds its shape well but might firm up a bit, so I always let them come to room temperature about 30 minutes before serving to soften the buttercream and bring back that fresh-baked feel.
Freezing
If you want to make these ahead for a party, freezing works pretty well! I freeze the cupcakes unfrosted in a single layer first, then add the piped frosting after thawing. But if you’re brave, freezing fully frosted cupcakes wrapped gently in plastic wrap and placed in a container works too, just expect a slight change in frosting texture.
Reheating
For best texture on leftover cupcakes, I don’t microwave—too risky to melt the delicate “brain” frosting. Instead, I remove them from the fridge and let them sit covered at room temperature for 20-30 minutes. This little patience step makes a huge difference.
FAQs
-
Can I use store-bought cupcakes for this Brain Cupcakes Recipe?
Absolutely! Store-bought cupcakes work fine as long as they’re sturdy and not too crumbly. Just make sure the surface is fairly smooth so you can easily add your base frosting layer before piping the brain design.
-
What if I don’t have a no.12 piping tip?
If you don’t have the exact #12 round tip, use the closest large round tip you have. The goal is to pipe thick, smooth lines to mimic brain ridges. Smaller tips might make it too fiddly and harder to get the right texture.
-
How do I make the frosting color look more realistic?
Mixing warm brown with a touch of ivory gel coloring (as detailed in the recipe) gives a soft, organic look. Avoid using too much color in one go; build the shade gradually and blend well. You can add a hint of red gel color if you want a bloodier, fresher brain appearance.
-
Can kids help make these cupcakes?
Definitely! Kids love helping with the piping part especially. Just guide their hands for the squiggly “S” shapes and let them have fun. It’s a great way to get everyone involved and excited about baking.
Final Thoughts
This Brain Cupcakes Recipe has become one of my go-to fun baking projects, especially when I want to impress or entertain. I love how simple tweaks can turn everyday cupcakes into something memorable and a little spooky without needing fancy equipment or ingredients. Trust me, once you try piping these brainy swirls, you’ll find yourself making them over and over for your Halloween parties or just for a quirky treat. So go ahead—grab your piping bag and get squiggling. Your friends (and their brains) will thank you!
Print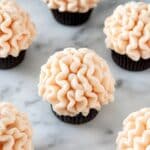
Brain Cupcakes Recipe
- Prep Time: 20 min
- Cook Time: 25 min
- Total Time: 45 min
- Yield: 12 cupcakes
- Category: Dessert
- Method: Baking
- Cuisine: American
Description
Brain Cupcakes are a spooky and fun Halloween treat featuring your favorite cupcakes adorned with vanilla buttercream piped to resemble realistic brains using warm brown and ivory gel paste colors. Perfect for parties or themed celebrations.
Ingredients
Cupcakes
- Your favorite cupcake recipe (ingredients per recipe chosen)
Frosting
- Vanilla buttercream
- 2 drops Americolor Soft Gel Paste Warm Brown
- 1 drop Americolor Soft Gel Paste Ivory
Instructions
- Color the Frosting: In a bowl, mix 2 drops of warm brown gel paste and 1 drop of ivory gel paste into the vanilla buttercream to create a brain-colored frosting.
- Base Layer Frosting: Using a knife or spatula, spread a thin, even base layer of the colored buttercream on each cupcake, ensuring all visible cupcake surfaces are covered.
- Pipe the Center Line: Fit a piping bag with a no.12 round decorating tip and pipe a straight line down the center of each cupcake to start forming the brain’s structure.
- Create Squiggles: Pipe continuous “s” shapes (squiggles) back and forth on each side of the center line to simulate brain folds.
- Build Additional Layers: Pipe another set of continuous “s” shaped squiggles on top of the first layer to add depth and texture for a realistic brain effect.
Notes
- Release your inner zombie with these creepy Halloween cupcakes piped with buttercream frosting to look like brains.
- Use a no.12 round decorating tip for best piping results.
- You can use any cupcake base flavor, but vanilla or chocolate work well for the theme.
- For a more intense brain color, adjust gel colors slightly as desired.
- Ensure frosting is firm enough to hold the piped squiggles without spreading.
Nutrition
- Serving Size: 1 cupcake
- Calories: 320
- Sugar: 25g
- Sodium: 150mg
- Fat: 16g
- Saturated Fat: 10g
- Unsaturated Fat: 5g
- Trans Fat: 0g
- Carbohydrates: 40g
- Fiber: 1g
- Protein: 3g
- Cholesterol: 50mg
