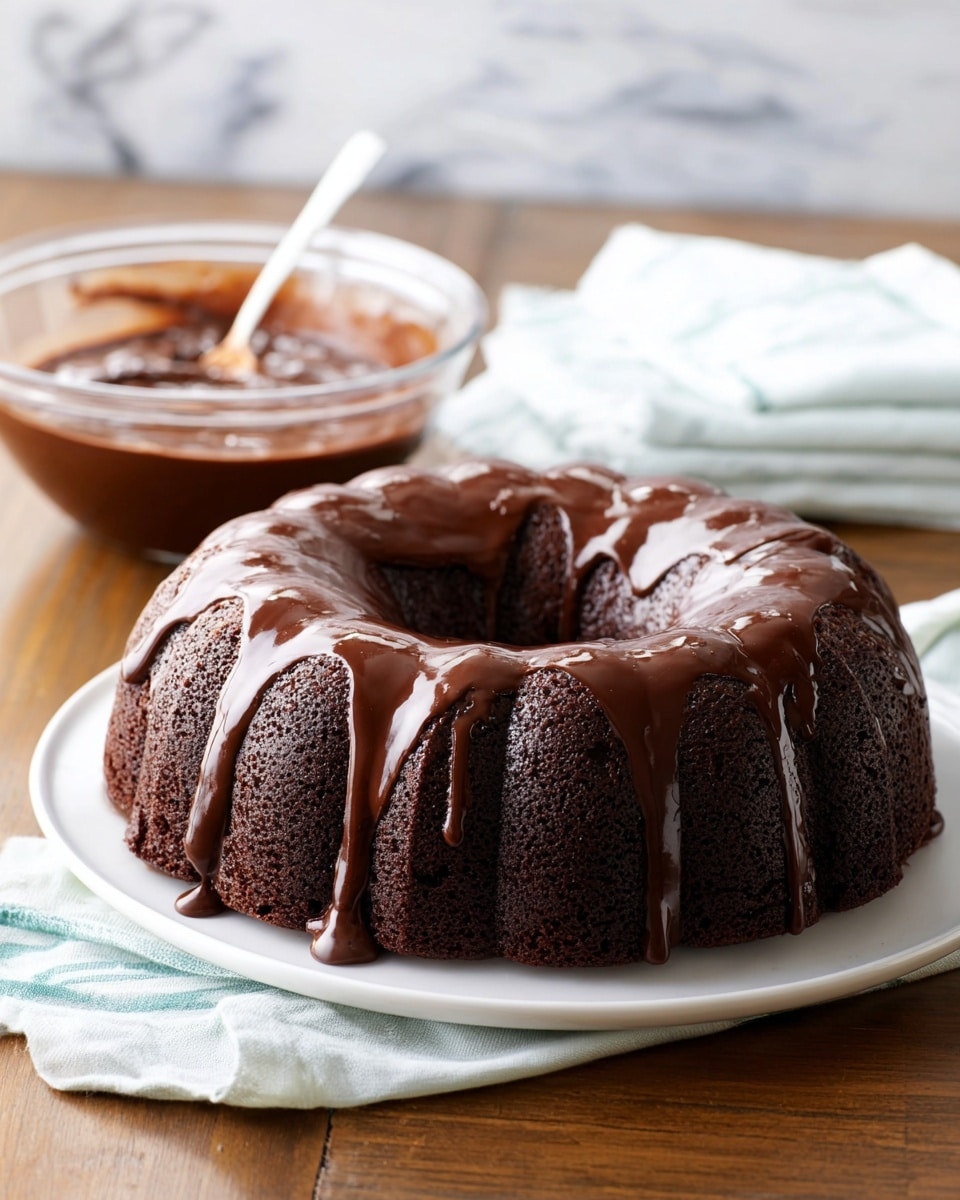
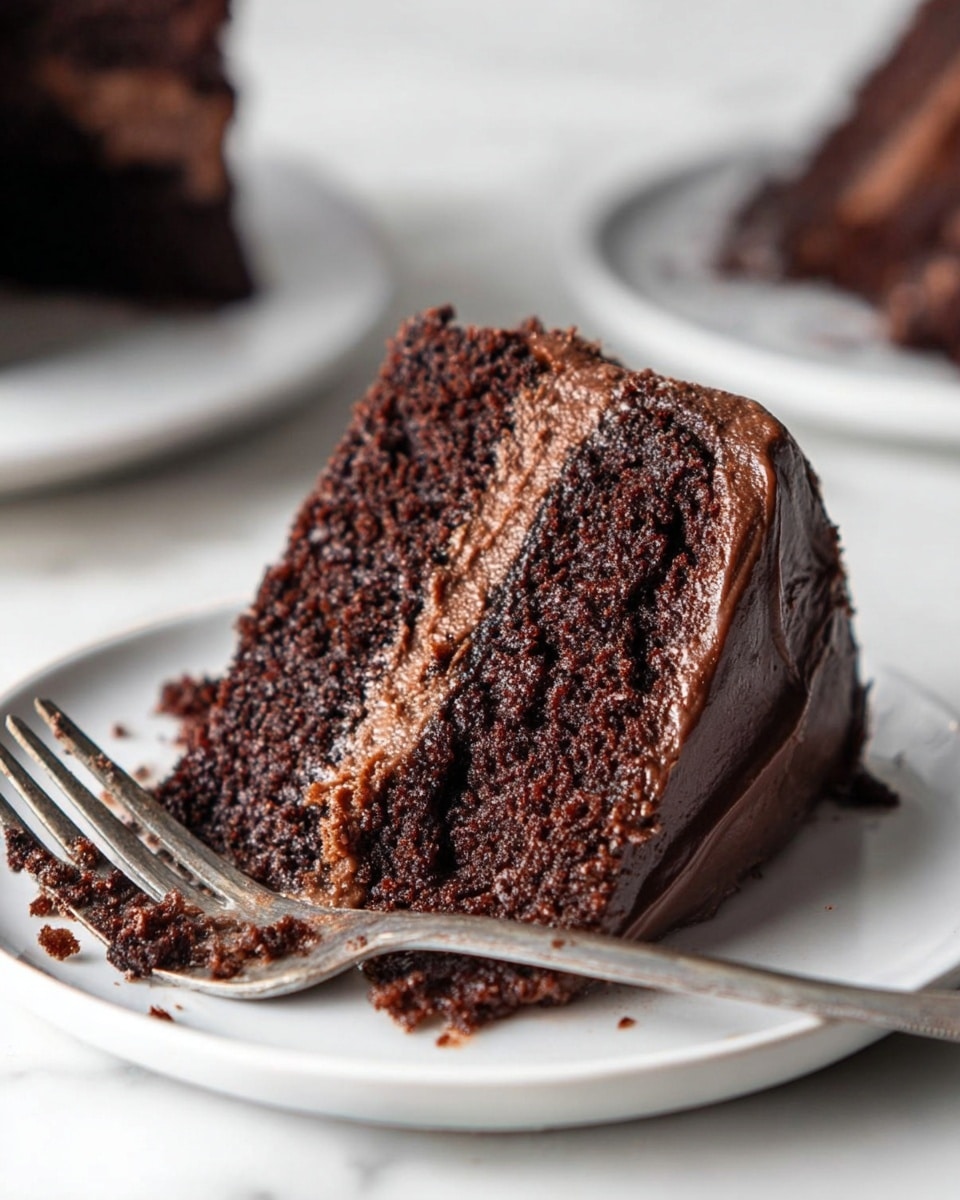
If you’re craving a chocolate cake that’s rich, moist, and utterly unforgettable, let me introduce you to the Black Magic Cake Recipe | Hersheyland Recipe. I absolutely love this cake because of its deep chocolate flavor, boosted by a surprising touch of coffee that really elevates every bite. Whether you’re a seasoned baker or just starting out, you’ll find that this recipe is approachable and delivers a show-stopping dessert that your friends and family will rave about. Stick with me—I’ll walk you through all the tips and tricks to nail this classic.
Why You’ll Love This Recipe
- Deep Chocolate Flavor: Thanks to Hershey’s Cocoa and coffee, the cake boasts intense, layered chocolate notes.
- Moist and Tender Texture: Buttermilk and vegetable oil team up to keep every slice moist without being heavy.
- Simple & Beginner-Friendly: No complicated steps or fancy tools—perfect for bakers of all levels.
- Versatile Baking Options: You can bake it in rounds, a tube pan, or a rectangular pan to suit any occasion.

Ingredients You’ll Need
The magic really starts with quality ingredients that complement each other perfectly. Hershey’s Cocoa provides a rich base, while the coffee lifts the chocolate’s depth without any bitterness. I always recommend using fresh eggs and real buttermilk (or sour milk) to get that moist crumb everyone loves.
- Sugar: Essential for sweetness balance and helps with moisture retention.
- All-purpose flour: The backbone of the cake, providing structure.
- HERSHEY’S Cocoa: The star ingredient – opt for good quality for the richest chocolate flavor.
- Baking soda and baking powder: Both leavening agents ensure the cake rises beautifully.
- Salt: Enhances all the flavors, especially chocolate.
- Eggs: Bind the ingredients and add richness.
- Buttermilk or sour milk: Adds moisture and a subtle tang that cuts sweetness.
- Coffee (strong black or instant): A secret booster that intensifies the chocolate flavor.
- Vegetable oil: Keeps the cake tender and moist even after baking.
- Vanilla extract: Rounds the flavor and adds warmth.
Variations
While the classic Black Magic Cake Recipe | Hersheyland Recipe is amazing as is, I love to play around depending on the occasion or who’s eating. Don’t be afraid to make it your own!
- Chocolate Ganache Frosting: My family goes crazy for rich ganache that adds an extra chocolate punch and a lovely glossy finish.
- Espresso Twist: For an adult party, I swap the coffee for espresso for a bolder flavor—it’s a total game changer.
- Gluten-Free Version: Try a 1:1 gluten-free flour blend—I’ve tested it with great results, just watch the baking time closely.
- Seasonal Touches: Adding orange zest or a splash of bourbon to the batter gives it a festive flair I adore during holidays.
How to Make Black Magic Cake Recipe | Hersheyland Recipe
Step 1: Prep Your Pans and Oven
First things first—preheat your oven to 350°F. Choose your pan: I often go with two 9-inch round pans for layering, but a 12-cup tube pan or a 13×9-inch pan works perfectly too. Grease and flour the pans well to make sure your cake releases easily. I like to grease with butter and dust with cocoa powder instead of flour—it keeps the crust super chocolatey!
Step 2: Mix Dry Ingredients
In a large bowl, stir together the sugar, all-purpose flour, Hershey’s Cocoa, baking soda, baking powder, and salt. I use a whisk here because it helps aerate the dry ingredients and prevents lumps, giving you a smoother batter later on.
Step 3: Add Wet Ingredients and Beat
Next, add your eggs, buttermilk, coffee, vegetable oil, and vanilla extract to the dry mixture. Using a mixer on medium speed, beat the batter for about 2 minutes. You’ll notice the batter is on the thin side—that’s totally normal and what makes the cake so moist. Resist the urge to add extra flour!
Step 4: Bake and Cool
Pour the batter evenly into your prepared pan(s). Baking times will vary: about 50–55 minutes for a fluted tube pan, 30–35 minutes for round pans, and 35–40 minutes for a rectangular pan. The key test is to insert a wooden pick in the center — if it comes out clean, it’s done! Let the cake cool for 10 minutes in the pan, then gently loosen the edges and transfer it onto a wire rack to cool completely before frosting.
Pro Tips for Making Black Magic Cake Recipe | Hersheyland Recipe
- Use Fresh Coffee: I always make fresh strong black coffee instead of instant for the richest flavor—it really makes a difference.
- Don’t Overmix: Mixing too long can toughen the cake. Stick to the 2-minute mark for a tender crumb.
- Pan Prep Matters: My trick is greasing with butter and dusting with cocoa powder instead of flour to avoid white smudges and enhance chocolate flavor.
- Test with a Pick: Avoid underbaking by testing the cake with a toothpick or skewer—it should come out clean or with just a few crumbs attached.
How to Serve Black Magic Cake Recipe | Hersheyland Recipe
Garnishes
Personally, I love topping this cake with a smooth chocolate buttercream or cream cheese frosting for a bit of tang. For a fancy twist, a sprinkle of shaved dark chocolate or roasted cocoa nibs adds texture and eye-catching detail. Fresh raspberries or a dusting of cocoa powder finish it beautifully.
Side Dishes
This cake shines with a scoop of vanilla ice cream or a dollop of whipped cream alongside. I also like serving it with fresh berries or a fresh cup of coffee for a classic pairing that complements the chocolate flavors.
Creative Ways to Present
For special occasions, I like layering it with alternating layers of espresso-soaked ladyfingers to turn it into a chocolate tiramisu-inspired cake. You can also slice it into mini squares, drizzle with chocolate glaze, and top with edible gold dust for a glam party treat.
Make Ahead and Storage
Storing Leftovers
Once frosted, I store leftover cake tightly covered in the fridge to keep it fresh. I usually place the cake in an airtight container or wrap the plate with plastic wrap to prevent it from drying out. It stays moist and delicious for up to 4 days.
Freezing
I’ve frozen this cake before, either uncut or in slices wrapped well with plastic wrap and foil. When you’re ready to enjoy it, just thaw in the fridge overnight. This method locks in freshness and keeps the cake’s texture intact.
Reheating
If you prefer your cake slightly warm, I recommend reheating individual slices in the microwave for about 10-15 seconds. This makes the chocolate flavor pop even more without drying out the cake.
FAQs
-
Can I use regular coffee instead of instant coffee in the Black Magic Cake Recipe?
Absolutely! Strong freshly brewed coffee works wonderfully and actually enhances the chocolate flavor even more than instant coffee. Just make sure your coffee is hot but not boiling when adding to the batter to keep everything smooth.
-
Is there a substitute for buttermilk in this recipe?
If you don’t have buttermilk, you can make sour milk by adding 1 tablespoon of lemon juice or white vinegar to 1 cup of milk. Let it sit for 5-10 minutes before using. This gives your cake the same tender texture and slight tang.
-
Can I make this cake gluten-free?
Yes! Using a quality 1:1 gluten-free baking flour blend works well. Keep an eye on baking time as it might vary slightly, but the chocolate and coffee flavors will stay just as indulgent.
-
How long can I store the Black Magic Cake once baked?
Stored properly in an airtight container or wrapped tightly in plastic wrap and refrigerated, the cake stays fresh for about 4 days. For longer storage, freezing is your best bet.
-
What frosting pairs best with the Black Magic Cake?
Chocolate buttercream and cream cheese frosting are classic choices that complement the rich chocolate and coffee notes perfectly. You can also keep it simple with a dusting of powdered sugar for a lighter option.
Final Thoughts
This Black Magic Cake Recipe | Hersheyland Recipe holds a special place in my heart because it’s one of those chocolate cakes that just hits all the right notes—deep, moist, and always a crowd-pleaser. I love how adaptable it is and how easily it becomes your signature dessert with just a few tweaks. Whenever I make this, I feel like I’m sharing a little slice of magic with my loved ones. Give it a try—once you master it, I promise you’ll keep coming back for seconds (and thirds!).
Print
Black Magic Cake Recipe | Hersheyland Recipe
- Prep Time: 15 minutes
- Cook Time: 50 minutes
- Total Time: 65 minutes
- Yield: 1 cake (12-cup fluted tube pan or equivalent in other pans)
- Category: Dessert
- Method: Baking
- Cuisine: American
Description
This Black Magic Cake recipe is a rich, moist chocolate cake made with HERSHEY’S Cocoa and enhanced by the unique addition of strong black coffee, which intensifies the chocolate flavor. Perfect for beginners, it yields a tender, flavorful cake that pairs beautifully with a variety of frostings like buttercream or vanilla bean icing. The recipe allows versatility in pan choice and is ideal for anyone looking to impress with a classic, homemade chocolate dessert.
Ingredients
Dry Ingredients
- 2 cups sugar
- 1-3/4 cups all-purpose flour
- 3/4 cup HERSHEY’S Cocoa
- 2 teaspoons baking soda
- 1 teaspoon baking powder
- 1 teaspoon salt
Wet Ingredients
- 2 eggs
- 1 cup buttermilk or sour milk
- 1 cup strong black coffee or 2 teaspoons powdered instant coffee plus 1 cup boiling water
- 1/2 cup vegetable oil
- 1 teaspoon vanilla extract
Instructions
- Preheat and Prepare Pans: Heat your oven to 350°F. Grease and flour your choice of baking pan: a 12-cup fluted tube pan, two 9-inch round baking pans, or one 13x9x2-inch rectangular baking pan.
- Mix Dry Ingredients: In a large bowl, combine 2 cups sugar, 1-3/4 cups all-purpose flour, 3/4 cup HERSHEY’S Cocoa, 2 teaspoons baking soda, 1 teaspoon baking powder, and 1 teaspoon salt. Stir until well incorporated.
- Add Wet Ingredients and Beat: Add 2 eggs, 1 cup buttermilk, 1 cup strong coffee, 1/2 cup vegetable oil, and 1 teaspoon vanilla extract to the dry ingredients. Beat on medium speed using a mixer for 2 minutes. The batter will be thin, which is normal for this recipe.
- Pour and Bake: Evenly pour the batter into your prepared pan(s). Bake depending on the pan used: 50 to 55 minutes for fluted tube pan, 30 to 35 minutes for round pans, or 35 to 40 minutes for the rectangular pan. Bake until a wooden pick inserted in the center comes out clean.
- Cool the Cake: Let the cake cool in the pan for 10 minutes. Then, loosen the edges and remove the cake from the pan onto wire racks. Allow the cake to cool completely before frosting.
- Frost and Serve: Once cooled, frost the cake with your favorite icing such as buttercream or vanilla bean. Slice and enjoy your rich, homemade chocolate cake.
Notes
- Skip the boxed cake mix and make this beginner-friendly chocolate cake from scratch.
- The addition of coffee enhances the chocolate flavor, making it deeper and more pronounced. Use freshly brewed or instant coffee as per your convenience.
- You can bake this cake in different types of pans: fluted tube, round, or rectangular, adjusting the baking time accordingly.
- Customize the cake with various frostings like buttercream or vanilla bean icing for a personalized touch.
- If you enjoy coffee-flavored treats, try pairing this with the Espresso-Filled Mini Cakes for an extra special indulgence.
Nutrition
- Serving Size: 1 slice (87g)
- Calories: 260
- Sugar: 26g
- Sodium: 500mg
- Fat: 11g
- Saturated Fat: 1.5g
- Unsaturated Fat: 9.5g
- Trans Fat: 0g
- Carbohydrates: 41g
- Fiber: 0g
- Protein: 4g
- Cholesterol: 35mg


