
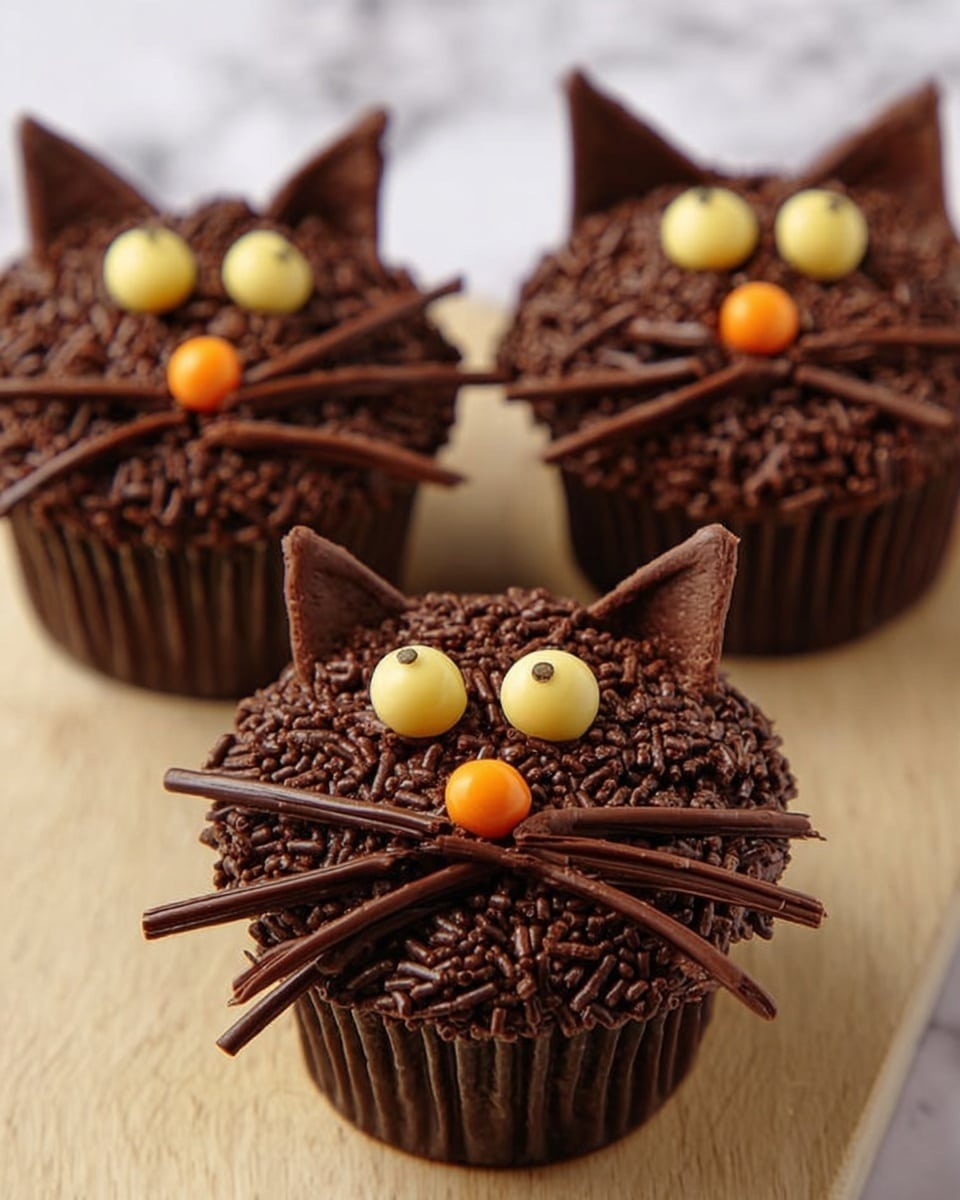
If you’re on the hunt for a fun, festive treat to wow your guests this spooky season, you’ve got to try this Black Cat Halloween Cupcakes Recipe. I absolutely love how these cupcakes turn out—they’re not only adorable but also super easy to make, perfect for a Halloween party or just a cozy night in. I’m excited to share my tips and tricks so you can nail these playful black cat faces without any stress. Trust me, once you try this, your family and friends will go crazy for these charming cupcakes!
Why You’ll Love This Recipe
- Super Easy Decoration: You don’t need to be a pro baker or artist to decorate these—you’ll be surprised how simple the techniques are.
- Perfect for Halloween: The black cat theme brings spooky fun that’s kid-friendly and festive for any Halloween gathering.
- Customizable Flavor: Use any cupcake base you love, whether it’s chocolate, vanilla, or pumpkin spice, to suit your taste buds.
- Fun Textures and Details: From the crunchy chocolate ears to the playful Pocky whiskers, every bite is a party in your mouth.

Ingredients You’ll Need
The magic of this Black Cat Halloween Cupcakes Recipe is in the details—the right mix of simple, accessible ingredients that come together beautifully. Let me walk you through what I use and why these little extras make all the difference.
- Cupcakes: Any flavor works, but chocolate or vanilla gives a great base. I often make chocolate because it pairs deliciously with the chocolate frosting.
- Chocolate frosting: Smooth and rich, it’s the perfect “glue” to hold the decorations in place and adds an indulgent layer of flavor.
- Chocolate jimmy sprinkles: These add a fantastic texture and help give the cupcakes that soft “fur” look.
- Runts red heart candies (or pink jelly beans): I use these for the noses; their size and shape work perfectly to make a cute, colorful touch.
- Green or yellow M&Ms: These form the eyes—you’ll use an edible marker to bring them to life by adding pupils.
- Edible marker: Essential for drawing the cat’s pupils on the M&Ms—don’t skip this if you want that true black cat vibe.
- Pocky sticks: Breaking these into small pieces makes the perfect whiskers; they’re crunchy and adorable.
- Chocolate bars: You’ll chop these into little triangular ears—trust me, this detail elevates the whole cupcake!
Variations
I love how versatile this Black Cat Halloween Cupcakes Recipe is. I’ve played around with different flavors and decorations, and you can totally make it your own. Don’t be afraid to swap out candies or frosting colors based on what you have at home or the theme you want.
- Flavor swaps: I’ve tried pumpkin spice cupcakes for a seasonal twist, and the chocolate frosting still pairs beautifully to keep the spooky charm.
- Allergy-friendly: You can use dairy-free frosting and gluten-free cupcakes to accommodate guests—just keep the decorations simple with safe options.
- Color variety: Instead of green or yellow M&Ms, I sometimes use orange ones for a Halloween pop of color. It changes the vibe just enough to be fresh.
How to Make Black Cat Halloween Cupcakes Recipe
Step 1: Bring Your Cat’s Eyes to Life
First, take your green or yellow M&Ms and use the edible marker to carefully draw tiny black pupils on them. This step honestly makes all the difference—it transforms simple candy into spooky cat eyes that really pop. I found holding the M&M between my fingers and drawing gently keeps them from rolling away.
Step 2: Frosting and Setting Your Base
Once your cupcakes are completely cooled (trust me, warm cupcakes will melt the frosting!), spread a good layer of chocolate frosting on top. I like to go for about a tablespoon or so, enough to hold the decorations, but not so thick you lose the cupcake underneath.
Step 3: Apply Eyes and Nose
Press the M&M eyes gently into the frosting towards the top of the cupcake. Then place your red heart Runts candy right between and just below the eyes for the nose. Positioning is key here for that classic cat face expression, so take a moment to adjust before the frosting sets.
Step 4: Roll in Chocolate Sprinkles
Next, it’s time for texture! Carefully roll the frosted cupcake sides in chocolate jimmy sprinkles. This step gives the effect of soft, fluffy black fur that’s irresistible. I learned this trick at a Halloween bake-off, and it instantly elevated my cupcakes.
Step 5: Create Ears and Whiskers
Chop your chocolate bars into little triangle shapes to form ears. Push them gently into the top sides of each cupcake, angled out for personality. Then break your Pocky sticks into short whisker lengths and poke about three pieces on each side near the nose. The whiskers add so much character—I’ve noticed people always comment on how cute they look!
Pro Tips for Making Black Cat Halloween Cupcakes Recipe
- Cool Completely Before Frosting: I learned the hard way that warm cupcakes cause the frosting to melt and decorations to slip—patience makes a huge difference.
- Use a Steady Hand with the Edible Marker: If you’re nervous about drawing pupils, practice on a spare M&M first to get comfortable.
- Roll Cupcakes Gently in Sprinkles: Don’t press too hard to avoid squishing the frosting; a light roll does wonders.
- Assemble Decorations Fresh: I wait until right before serving to add Pocky whiskers so they stay crisp and fresh.
How to Serve Black Cat Halloween Cupcakes Recipe
Garnishes
I usually stick with the classic look for garnishes—those bright candy eyes and runts noses really steal the show. But sometimes I’ll sprinkle edible glitter or tiny candy spiders around the serving plate for extra spooky fun. I recommend keeping garnishes simple so the black cat features stay the focal point.
Side Dishes
These cupcakes pair beautifully with a chilled glass of apple cider or a warm cup of spiced pumpkin latte. For a full Halloween spread, I like serving them alongside caramel popcorn or a bowl of roasted pumpkin seeds for variety.
Creative Ways to Present
One year, I arranged these cupcakes on a black serving tray lined with faux cobwebs and mini decorative pumpkins to create a “cat’s lair” effect. I’ve also nestled them in a tiered cake stand with flickering flameless candles around—the ambience really wowed my guests!
Make Ahead and Storage
Storing Leftovers
If you have leftovers (which is rare!), store them in an airtight container at room temperature for up to 2 days. The chocolate sprinkles keep their texture best when not refrigerated, in my experience.
Freezing
I’ve frozen unfrosted cupcakes before and thawed them with great results, but I recommend freezing them without decorations. After thawing completely, frost and decorate fresh to keep everything looking and tasting its best.
Reheating
For refrigerated cupcakes, I bring them to room temperature before serving to keep the frosting creamy. Avoid microwaving decorated cupcakes since the heat can melt the frosting and warp the decorations.
FAQs
-
Can I use store-bought cupcakes for this Black Cat Halloween Cupcakes Recipe?
Absolutely! Using store-bought cupcakes is a huge time-saver. Just make sure they’re completely cooled, and you can easily decorate them using the steps outlined to personalize your spooky treats.
-
What if I can’t find edible markers?
Printable edible markers are great, but if you can’t find them, you can replace the cat eyes with candy eyes that already have pupils, or carefully draw pupils on paper and adhere cut-outs instead, though edible markers definitely simplify the process.
-
Can I make these cupcakes vegan or allergy-friendly?
Yes! Use vegan or allergen-free cupcakes and frosting, and choose decorations free from allergens. You might want to double-check candy ingredients to ensure they fit your dietary needs.
-
How long do decorated Black Cat Halloween Cupcakes stay fresh?
When stored properly at room temperature in an airtight container, these cupcakes stay fresh for up to 2 days. For longer storage, freeze undecorated cupcakes and add decorations after thawing.
Final Thoughts
This Black Cat Halloween Cupcakes Recipe holds a special place in my heart because it combines simplicity with whimsy, making Halloween baking approachable and ridiculously fun. I hope you’ll give it a try and enjoy the smiles it brings as much as I do—it’s an easy recipe that really impresses. Happy baking, and may your Halloween be just as sweet and spooky as these little black cats!
Print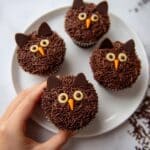
Black Cat Halloween Cupcakes Recipe
- Prep Time: 20 minutes
- Cook Time: 0 minutes (assuming cupcakes already baked)
- Total Time: 20 minutes
- Yield: 12 cupcakes
- Category: Dessert
- Method: No-Cook
- Cuisine: American
Description
These Black Cat Halloween Cupcakes are a fun and festive treat perfect for spooky celebrations. Featuring chocolate cupcakes decorated with chocolate frosting, candy eyes, and chocolate bar ears, they are easy to assemble and sure to delight kids and adults alike with their playful cat design.
Ingredients
Cupcakes and Frosting
- 12 Cupcakes (any flavor, cooled)
- 1 1/2 cups chocolate frosting
Decorations
- 1/3 cup chocolate jimmy sprinkles
- 12 red heart Runts or pink jelly beans (for noses)
- 24 green or yellow M&Ms (for eyes)
- 1 edible marker (black)
- 1 box Pocky sticks (for whiskers)
- 24 ears made from chocolate bars (chopped into triangles)
Instructions
- Draw pupils on M&Ms: Using your edible marker, carefully draw black pupils onto the green or yellow M&Ms to give them a cat-eyed appearance. Set aside to dry briefly.
- Frost cupcakes: Spread a generous layer of chocolate frosting over the top of each cooled cupcake, creating a smooth surface for decorating.
- Assemble eyes and nose: Place two decorated M&Ms on each cupcake to form the cat’s eyes, then position a red heart Runts candy or pink jelly bean below as the cat’s nose.
- Add chocolate sprinkles: Gently roll or sprinkle the frosted cupcakes in the chocolate jimmy sprinkles to create a textured, fuzzy effect around the cat’s face.
- Attach chocolate ears: Chop chocolate bars into small triangle shapes and press two pieces into the top sides of each cupcake to form cat ears.
- Add whiskers: Break Pocky sticks into small segments and insert them into the frosting around the nose to mimic cat whiskers.
Notes
- Use any cupcake flavor you prefer; chocolate or vanilla work well.
- If you don’t have an edible marker, you can use melted chocolate to pipe pupils onto the M&Ms.
- To make ears sturdier, slightly chill the chocolate bar triangles before inserting.
- For a different look, try using different colored M&Ms for eyes.
- Store cupcakes in an airtight container at room temperature for up to 2 days for best freshness.
Nutrition
- Serving Size: 1 cupcake
- Calories: 250
- Sugar: 23g
- Sodium: 150mg
- Fat: 12g
- Saturated Fat: 6g
- Unsaturated Fat: 5g
- Trans Fat: 0g
- Carbohydrates: 32g
- Fiber: 1g
- Protein: 3g
- Cholesterol: 25mg

