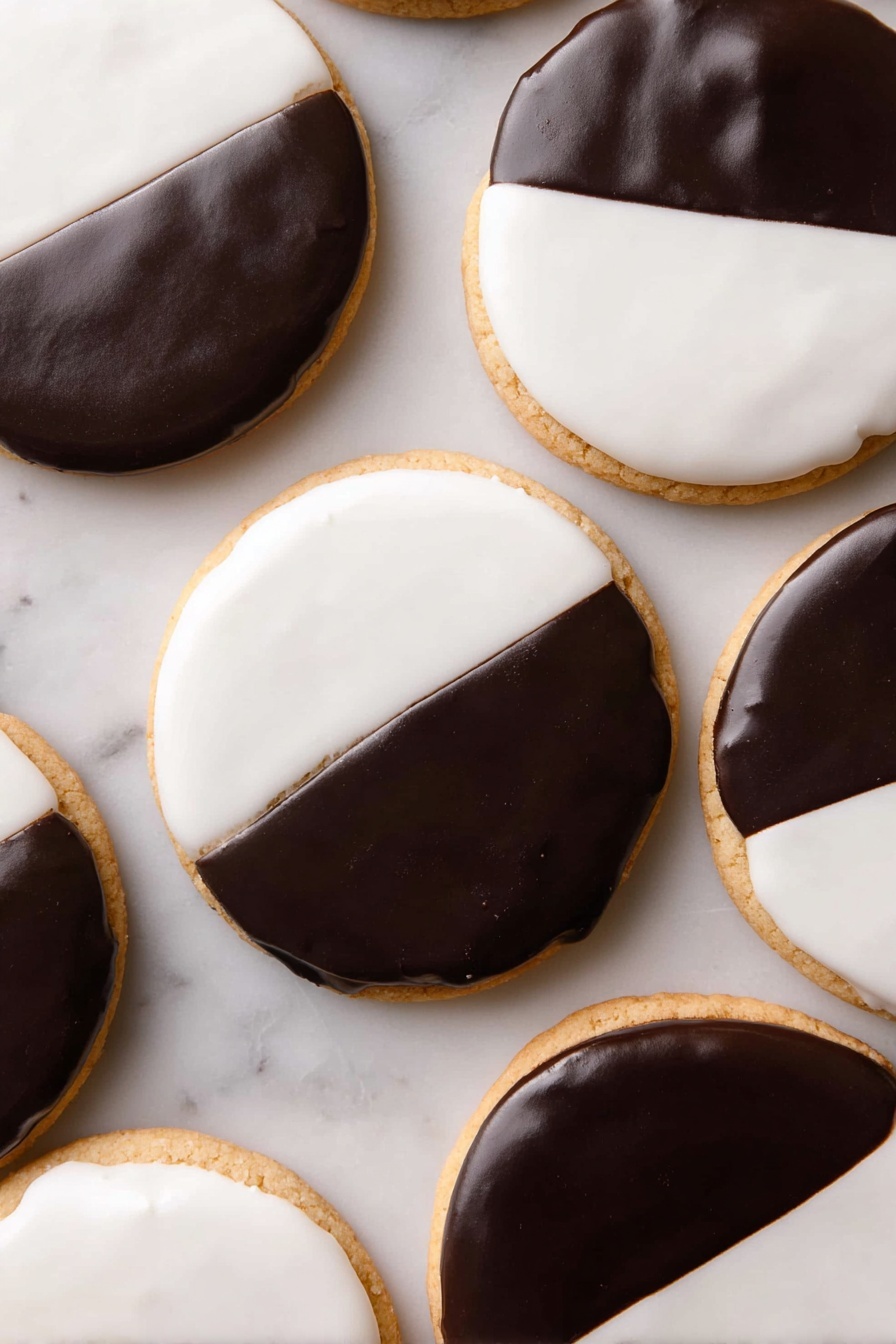
If you’re on the hunt for the perfect balance of soft cake-like cookies and glossy icing, look no further than this Black and White Cookies Recipe. I absolutely love how these cookies combine a tender crumb with that iconic split icing—half vanilla, half chocolate—giving you the best of both worlds. When I first tried making these at home, I was amazed at how close they got to the bakery-style versions that always make my family go crazy. Stick with me, and I’ll share all my tips so you can nail this classic treat right in your kitchen.
Why You’ll Love This Recipe
- Classic Bakery Taste: You’ll find these cookies capture the soft, cakey texture and iconic split icing just like the NYC delis do.
- Balanced Flavors: The lemon juice in the vanilla icing adds a subtle brightness that perfectly offsets the rich cocoa side.
- Simple Ingredients: With basic pantry staples, you can whip these up anytime without hunting for specialty items.
- Fun and Impressive: This recipe makes enough to share, and people will be amazed you made these beautiful cookies yourself.

Ingredients You’ll Need
This Black and White Cookies Recipe uses simple, straightforward ingredients that work in harmony to produce a tender, moist cookie base and the glossy two-tone icing everyone loves. Pay attention to quality here—creamery butter and fresh vanilla extract make a noticeable difference.
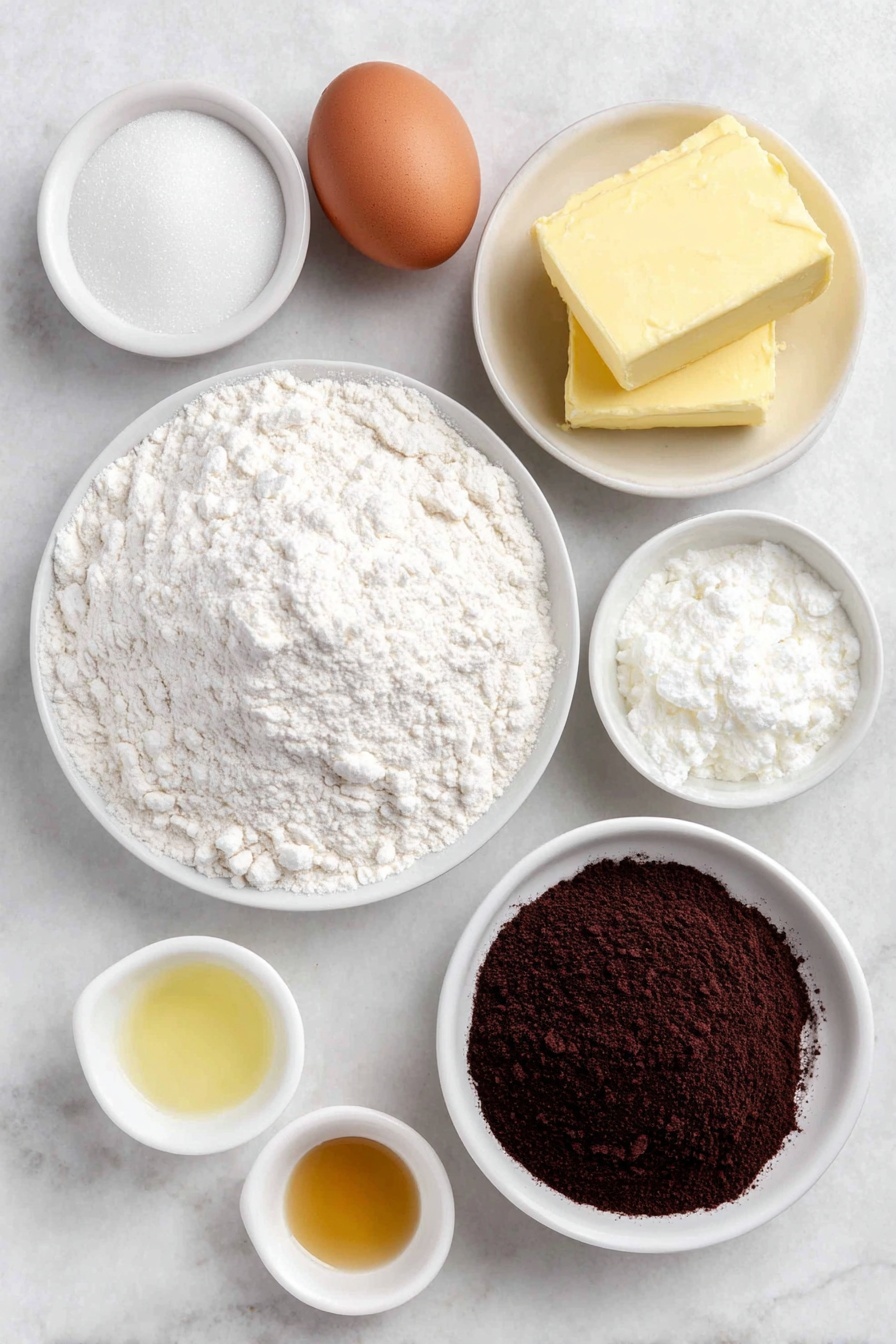
- All-purpose flour: The backbone of the cookie—choose a good-quality brand for consistent texture.
- Baking soda: Just a pinch helps these cookies rise gently and develop that soft crumb.
- Salt: Balances sweetness and enhances flavor.
- Unsalted butter: Room temperature is key for proper creaming, which creates that light, fluffy texture I love.
- Granulated sugar: Sweetens and aerates the cookie dough.
- Large egg: Brings richness and structure.
- Vanilla extract: Pure vanilla makes the vanilla icing sing and adds warmth to the cookie dough.
- Buttermilk: Adds tenderness and a subtle tang that lifts the flavor.
- Confectioners’ sugar: The base for that perfectly smooth icing, sift it to avoid lumps.
- Lemon juice: Optional, but I recommend it to brighten the vanilla icing and cut through the sweetness.
- Water: Helps achieve that ideal glide-y icing consistency.
- Light corn syrup: Gives the icing a glossy finish and helps keep it soft.
- Cocoa powder: Dutch-process preferred for a rich, smooth chocolate flavor in the icing.
Variations
While I adore the classic split icing, I sometimes like to switch things up depending on the season or occasion. Feel free to customize this Black and White Cookies Recipe to suit your taste or dietary needs—there’s plenty of room to personalize!
- Gluten-Free Option: I’ve swapped out regular flour for a 1:1 gluten-free baking blend with great results—just be sure to check the blend includes xanthan gum for structure.
- Citrus Twist: Adding a bit of orange zest to the vanilla icing brings a fresh zing that my family loves during the holidays.
- Chocolate Lovers: For an extra indulgent touch, I sometimes mix a teaspoon of espresso powder into the chocolate icing—it deepens the flavor beautifully.
- Dairy-Free Adaptation: Use dairy-free butter and substitute buttermilk with almond milk plus a bit of vinegar to keep the tender crumb intact.
How to Make Black and White Cookies Recipe
Step 1: Prepare Your Dry Ingredients
Start by preheating your oven to 350°F and lining two baking sheets with silicone mats or parchment paper. In a medium bowl, whisk together the flour, baking soda, and salt. This step is important because mixing them well ensures even distribution in the dough, which helps your cookies rise evenly without any salty or flat spots.
Step 2: Cream Butter and Sugar Until Fluffy
Using your stand mixer with the paddle attachment, cream the room-temperature butter until it’s soft and creamy. Then add the granulated sugar and mix on high speed until the mixture turns light and fluffy—this should take about 3 to 4 minutes. The fluffier it gets here, the better your cookie texture will be, so don’t rush this step!
Step 3: Add Egg, Vanilla, and Incorporate Dry Ingredients Alternately with Buttermilk
Mix in the egg and vanilla extract until fully incorporated. Then add the dry flour mixture and buttermilk alternately in three batches: start with the flour mixture, then buttermilk, and end with flour, mixing on low speed to avoid overworking the batter. Use a spatula to scrape down the bowl after each addition. This alternating method keeps the batter tender and well blended, so your cookies come out super soft.
Step 4: Portion and Bake the Cookies
Drop roughly ¼ cup scoops of batter onto your prepared sheets, spacing them about 4 inches apart to allow for spreading—and trust me, they do spread! I like to bake no more than five cookies per sheet to ensure even heat distribution. Bake on the center rack for 13-14 minutes, until the centers feel springy. Cool them for a few minutes on the pan before inverting each cookie onto a wire rack to cool completely. Cooling upside down creates that perfectly flat surface for icing, which makes all the difference.
Step 5: Make and Apply the Vanilla and Chocolate Icing
While the cookies cool, whisk together confectioners’ sugar, vanilla, lemon juice, corn syrup, and water until smooth. Adjust water for a spreadable but not runny consistency. Divide and set aside nearly half of this vanilla icing. To the remaining half, mix in cocoa powder, extra water, and corn syrup for that rich chocolate gloss. Spread vanilla icing thinly on half of each cookie, then carefully drag a knife edge along the center to create a clean line. Let it set, then ice the other half with chocolate, smoothing it right up to the line. It’s a little finesse but the contrast of glossy black and white icing is so worth it!
Pro Tips for Making Black and White Cookies Recipe
- Butter Temperature Matters: I always make sure my butter is soft but not melted—this makes whipping it with sugar so much easier and yields a better crumb.
- Don’t Skip the Lemon Juice: Adding even a little fresh lemon juice to the vanilla icing cuts sweetness and adds brightness I swear makes it taste fresher.
- Spacing is Key: Give cookies plenty of space on the baking sheets or they’ll merge as they bake—trust me, I learned this the hard way!
- Patience With Icing: Let the vanilla side set before adding chocolate. Rushing this step can cause colors to bleed and muddle the classic look.
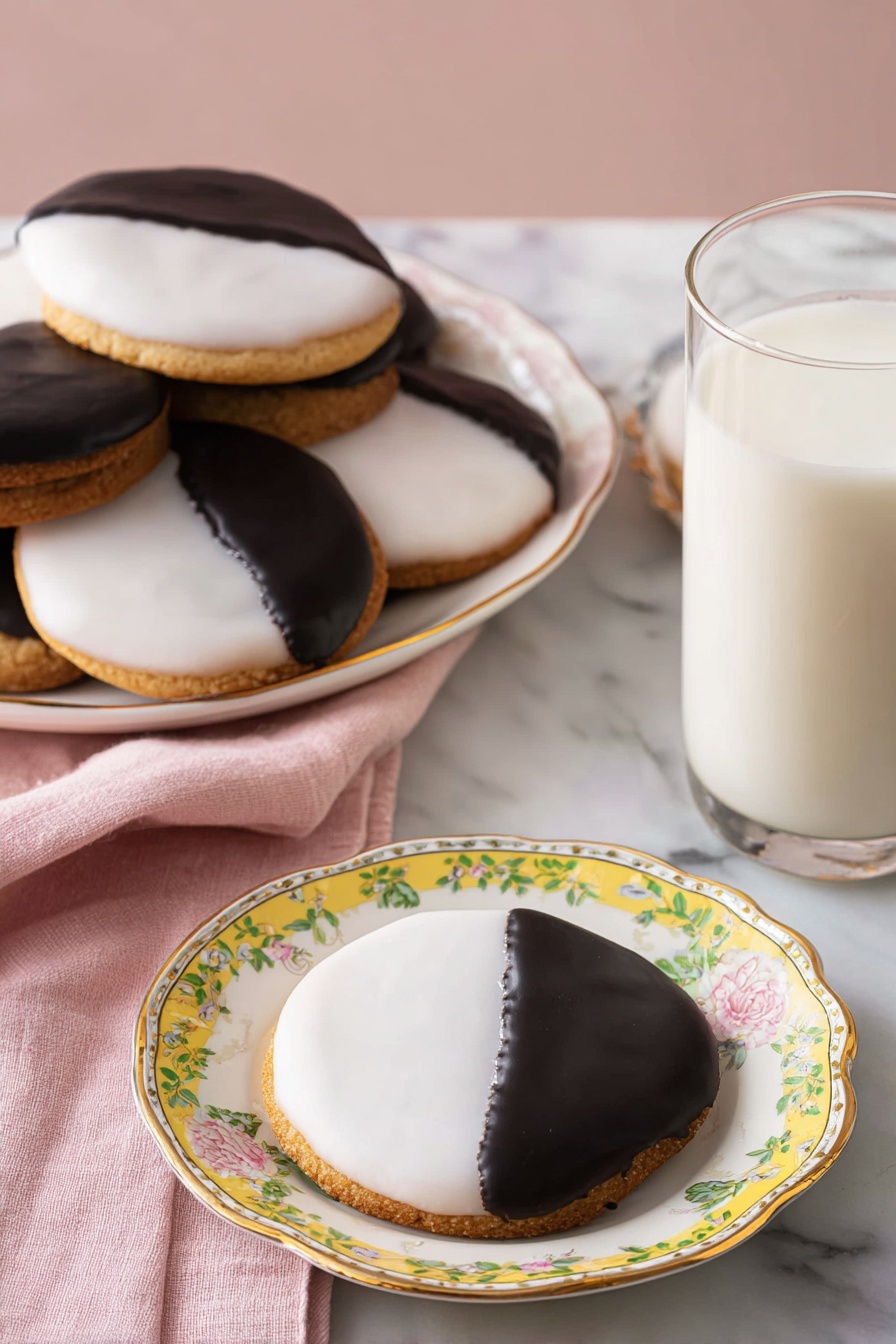
How to Serve Black and White Cookies Recipe
Garnishes
I usually keep it simple here—these cookies speak for themselves visually and flavorwise—but I’ve had fun dusting a little extra confectioners’ sugar on the edges for a more delicate touch at a brunch party. Sometimes a tiny edible gold leaf on the chocolate side adds a wow factor if I’m feeling fancy.
Side Dishes
Pair these cookies with a cup of strong black coffee or a creamy latte to balance the sweetness. For afternoon tea, I love serving them alongside fresh berries or mild cheese like ricotta for a lovely contrast.
Creative Ways to Present
For birthdays or gatherings, I arrange the cookies in a neat circle on a contrasting platter, alternating the black and white sides for a graphic look. You can even package them individually in cute cellophane bags tied with a pink or black ribbon—guaranteed crowd-pleasers and perfect gifts!
Make Ahead and Storage
Storing Leftovers
I store leftover black and white cookies in an airtight container at room temperature, layering parchment paper between them to prevent sticking. They stay fresh and soft for up to 3 days, though honestly they rarely last that long in my house!
Freezing
I’ve frozen these cookies both with and without icing. For best results, I freeze un-iced cookies in a single layer on a baking sheet, then transfer to a freezer-safe container or bag. When ready to enjoy, thaw and then ice fresh. This way, your icing stays glossy and true to texture.
Reheating
If you want to warm a cookie, I gently microwave it for about 10 seconds—just enough to soften the crumb and slightly melt the icing edges, which makes it even more irresistible. Avoid overheating, though, or the icing can get grainy.
FAQs
-
Can I make this Black and White Cookies Recipe vegan?
Absolutely! Swap the butter for a vegan spread or coconut oil, use a flax egg or commercial egg replacer, and substitute the buttermilk with almond or soy milk mixed with one teaspoon of vinegar. The texture might be slightly different but still delicious.
-
How do I prevent the icing from cracking?
To keep icing smooth and crack-free, use corn syrup as directed, and let the icing set at room temperature rather than in the fridge. Also, avoid applying icing too thickly; a thin, even layer sets better and stays flexible.
-
Can these cookies be made gluten-free?
Yes! Using a 1:1 gluten-free baking flour blend with xanthan gum works well. Since gluten-free flours behave differently, watch the dough carefully, and try to keep the same liquid ratios for best tenderness.
-
What’s the best way to store iced Black and White Cookies?
Store iced cookies in a single layer in an airtight container at room temperature, with parchment paper between layers if stacking. Avoid refrigeration, as it can dry out the cookies and dull the icing’s shine.
Final Thoughts
This Black and White Cookies Recipe reminds me of those afternoons spent in cozy bakeries with friends, sharing stories and sweet treats. It’s a timeless classic that feels fancy but is so simple to make—and once you try it at home, you might never buy them from the store again! I hope you enjoy baking and sharing them as much as my family and I do. Go ahead, give it a try—you’ll be so glad you did.
Print
Black and White Cookies Recipe
- Prep Time: 20 minutes
- Cook Time: 13-14 minutes
- Total Time: 33-34 minutes (excluding cooling and icing setting time)
- Yield: 8 cookies
- Category: Dessert
- Method: Baking
- Cuisine: American
Description
Classic Black and White Cookies feature a soft, cake-like base topped with half vanilla and half chocolate glaze. These iconic New York-style cookies offer a perfect balance of rich cocoa and sweet vanilla icing, making them a delightful treat for any occasion.
Ingredients
Dry Ingredients
- 1 ⅓ cups all-purpose flour (160g)
- ½ tsp baking soda
- ½ tsp salt
Wet Ingredients
- 6 Tbsp unsalted butter, room temperature (85g)
- ½ cup granulated sugar (100g)
- 1 large egg, room temperature
- 2 tsp vanilla extract (10mL)
- ⅓ cup buttermilk (80mL)
Vanilla Icing
- 2 cups confectioners’ sugar (240g)
- 2 tsp lemon juice, fresh (optional)
- 2 Tbsp water, plus more as needed
- 1 Tbsp light corn syrup
- ½ tsp vanilla extract
Chocolate Icing
- 3 Tbsp cocoa powder, dutch-process preferred (18g)
- Additional water, few teaspoons as needed
- 1 tsp light corn syrup
Instructions
- Preheat and Prepare: Preheat the oven to 350°F (175°C) and line two baking sheets with silicone mats or parchment paper to prevent sticking and ensure even baking.
- Mix Dry Ingredients: In a bowl, whisk together the all-purpose flour, baking soda, and salt until well combined; set this mixture aside.
- Cream Butter and Sugar: Using a stand mixer fitted with the paddle attachment, cream the unsalted butter on medium-high speed until smooth, then add the granulated sugar and continue mixing until the mixture becomes light and fluffy.
- Add Egg and Vanilla: Beat in the large egg and 2 teaspoons of vanilla extract, scraping down the sides of the bowl to ensure everything is well incorporated.
- Combine Wet and Dry Ingredients: On low speed, alternate adding the flour mixture and buttermilk in three batches, starting and ending with the flour. Mix just until combined, then use a spatula to scrape the bowl and gently fold any remaining flour in.
- Portion the Dough: Using a ¼ cup cookie scoop or a greased measuring cup, drop batter balls onto the prepared baking sheets, spacing them about 4 inches apart to allow for spreading. Limit to 5 cookies per sheet for even baking.
- Bake Cookies: Place the baking sheets on the center rack and bake for 13-14 minutes, or until the centers feel springy when lightly touched. Remove from oven and let cool slightly on the sheets.
- Cool Cookies: Transfer cookies upside down to a wire rack to cool completely, ensuring the flat bottoms become the top surface ready for icing.
- Prepare Vanilla Icing: In a large bowl, whisk together confectioners’ sugar, vanilla extract, lemon juice (if using), light corn syrup, and 2 tablespoons of water until smooth. Add more water as needed to achieve a thin, spreadable consistency.
- Prepare Chocolate Icing: Transfer about half of the vanilla icing to another bowl. Add the cocoa powder, a teaspoon of corn syrup, and a few teaspoons of water. Mix on high speed until the chocolate icing becomes glossy and smooth, adjusting water to match the vanilla icing’s consistency.
- Ice Cookies: Using a small or offset spatula, spread a thin layer of vanilla icing over half of each cookie. Use the edge of a knife or spatula to create a clean, neat dividing line in the center by gently pulling icing from the center to the edge. Allow this icing to set slightly.
- Ice with Chocolate: Spread the chocolate icing on the other half of the cookie, pushing it gently to the center and smoothing with your spatula. Let the icing set completely before serving to ensure firm, distinct chocolate and vanilla halves.
Notes
- For best texture, use room temperature ingredients to ensure proper mixing and fluffiness.
- Allow the icing to fully set before stacking or storing cookies to avoid smudging the glaze.
- Using Dutch-process cocoa powder yields a richer chocolate flavor and smoother icing.
- Cooling cookies upside down creates a flat surface perfect for even icing application.
- These cookies are best enjoyed within 2-3 days, stored in an airtight container at room temperature.
Nutrition
- Serving Size: 1 cookie
- Calories: 347 kcal
- Sugar: 45 g
- Sodium: 238 mg
- Fat: 10 g
- Saturated Fat: 6 g
- Unsaturated Fat: 3 g
- Trans Fat: 1 g
- Carbohydrates: 62 g
- Fiber: 1 g
- Protein: 4 g
- Cholesterol: 47 mg


