If there’s a dessert that tastes like sunshine and summer afternoons, it’s the Berry Icebox Cake. Brimming with luscious layers of lightly sweet cream, juicy fresh berries, and soft vanilla wafers, this chilled treat is as easy as it is irresistible—no oven required!
Why You’ll Love This Recipe
- No Baking Required: Enjoy all the creamy, cake-like decadence—without ever turning on the oven.
- Make-Ahead Magic: The Berry Icebox Cake actually improves with chilling, making it the ultimate stress-free dessert for gatherings.
- Berry Bliss: Every bite bursts with the juicy, tangy-sweet flavor of fresh berries—it’s a summer celebration in cake form!
- Customizable to the Core: From the cookies to the fruit, you can mix and match ingredients for your perfect combination.

Ingredients You’ll Need
You only need a handful of everyday ingredients to create this Berry Icebox Cake, but each one brings something special to the party—richness, sweetness, creaminess, or that pop of berry brightness. Every layer matters, so let’s break down what you’ll need and why!
- Vanilla Wafers (11 oz box): These cookies soften into perfectly cake-like layers as the dessert chills, absorbing the berry and cream flavors. Graham crackers work well too for a slightly different twist.
- Cream Cheese (8 oz, softened): Adds just the right amount of tang and silkiness, so the filling tastes like cheesecake clouds.
- Instant Cheesecake-Flavored Pudding (2 boxes, 4-serving size): This shortcut brings luscious flavor and helps the filling thicken up. Vanilla pudding is a great substitute, if you prefer.
- Milk (2 1/2 cups): Binds the pudding and cream cheese into a dreamy, spoonable texture.
- Whipped Topping (8 oz): Lightens everything up and gives the filling a gorgeous, fluffy loft. For an extra touch of homemade love, swap in your own whipped cream!
- Fresh Berries (4-5 cups): The stars of the show! Use a mix of strawberries, blueberries, raspberries, or blackberries for a beautiful explosion of color and taste.
Variations
This Berry Icebox Cake loves to play dress up—you can easily swap out flavors or adjust it for different diets. Don’t be afraid to make it your own based on what’s in your fridge or what you’re craving!
- Chocolate Lovers: Use chocolate wafers or graham crackers, and add a drizzle of fudge between layers for an indulgent twist.
- Dairy-Free Delight: Substitute dairy-free cream cheese, plant-based milk, and coconut whipped topping for a decadent vegan version.
- Tropical Vibes: Fold in sliced bananas, mango, or pineapple along with berries for a summer-in-the-tropics feel.
- All Citrus: Add lemon or orange zest to the pudding mixture, or use lemon instant pudding for a tangy kick.
How to Make Berry Icebox Cake
Step 1: Prepare the Creamy Filling
In a large mixing bowl, combine your softened cream cheese with both boxes of instant cheesecake pudding. Blend them together using a mixer—handheld or stand—until smooth and lump-free. Gradually add in the milk, beating until the mixture is silky and thick. Then gently fold in the whipped topping for that irresistibly airy finish.
Step 2: Add the Berries
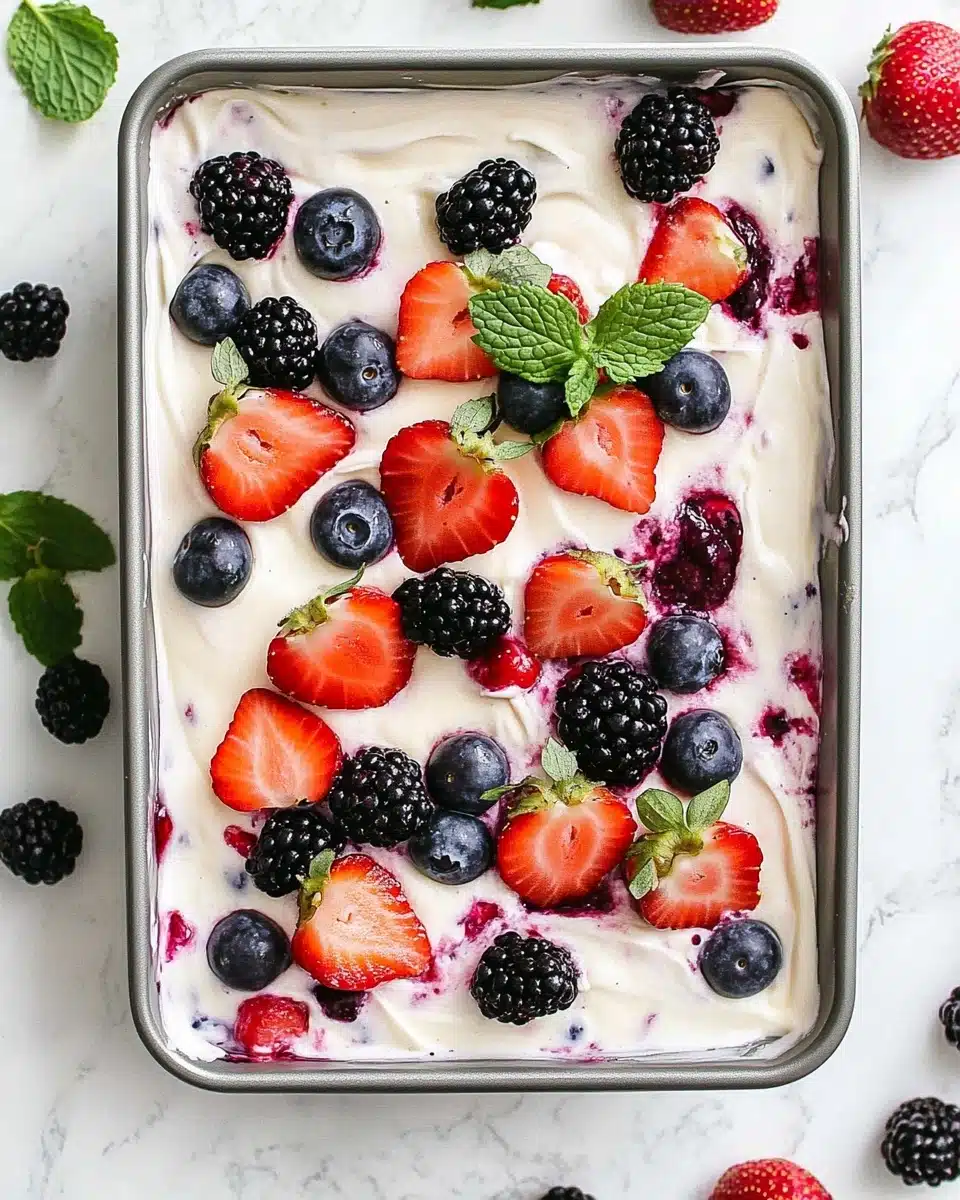
Reserve a cup or so of your prettiest berries for garnish, and gently fold the rest (about 3-4 cups) into the cream cheese filling. This way, every slice is swirled with juicy, colorful goodness—without the fruit getting smashed or watery.
Step 3: Layer and Build
Spread a spoonful of the berry cream mixture into the bottom of a 9×13 inch dish (this helps the wafers stay in place). Now, lay out a solid layer of vanilla wafers, breaking a few if needed to fill in the gaps. Top with half the berry cream, smoothing it evenly to the edges, then add another layer of wafers. Finish with the rest of the berry cream, gently smoothing the top.
Step 4: Chill Until Set
Patience pays off! Cover your dish with plastic wrap and refrigerate for at least 4 hours (overnight is even better). This is when the wafers transform into soft, cake-like layers, and all the flavors mingle to perfection.
Step 5: Top and Serve
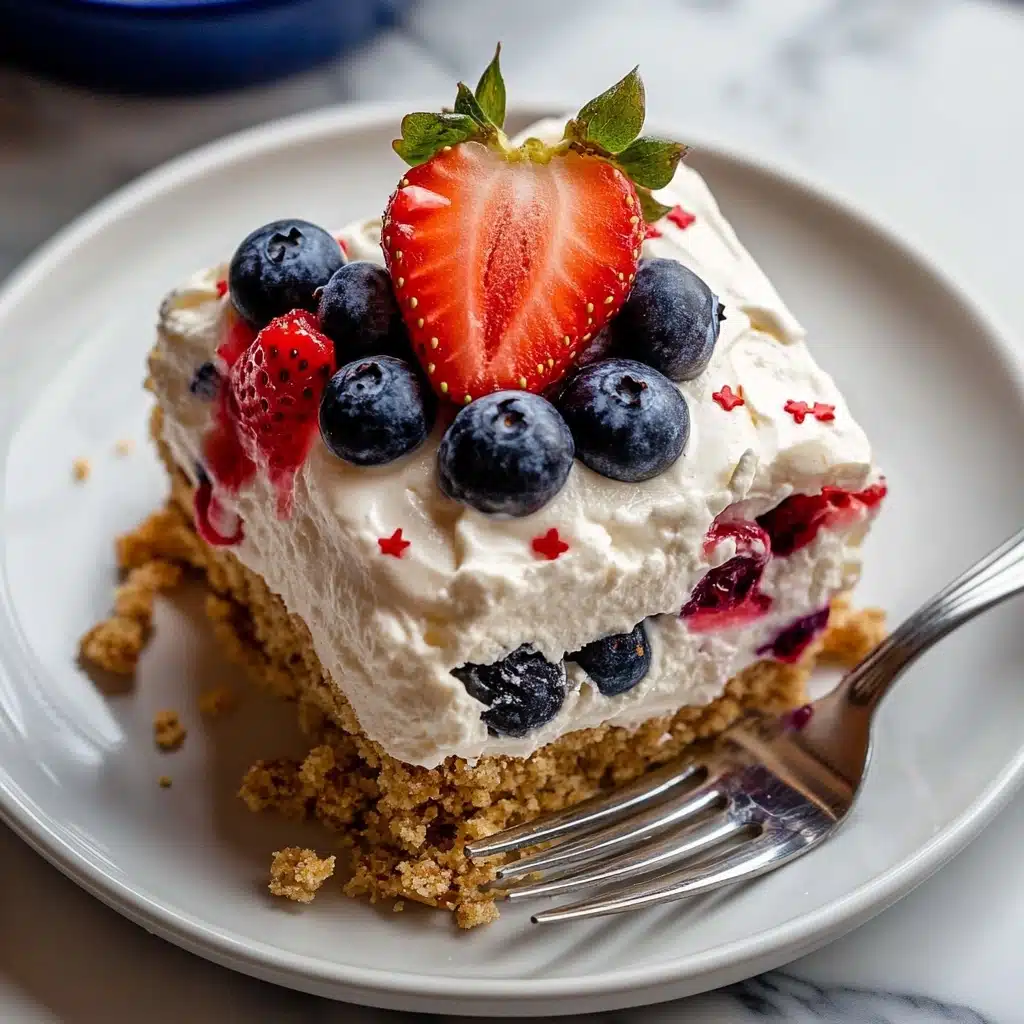
Just before serving, scatter the reserved fresh berries over the top for a show-stopping finish. Slice, serve, and enjoy cheers all around—your Berry Icebox Cake is ready for the spotlight!
Pro Tips for Making Berry Icebox Cake
- Ultra Smooth Base: Let the cream cheese come to room temperature before beating for the creamiest, lump-free filling.
- Berry Prep: Pat berries completely dry after washing so your cake doesn’t get watery as it chills.
- Perfect Layers: Gently press each wafer layer into the filling to prevent them from floating, which keeps those beautiful layers distinct.
- Overnight Upgrade: While four hours works, letting your Berry Icebox Cake chill overnight results in the most heavenly, sliceable texture.
How to Serve Berry Icebox Cake
Garnishes
You can truly make this cake a vision! Top with halved strawberries, a medley of mixed berries, a few mint sprigs, or even a dusting of powdered sugar for an extra-pretty presentation. For a little crunch, a sprinkle of toasted sliced almonds is a delicious way to finish things off.
Side Dishes
This cake is perfect all on its own, but if you’d like to round out a party spread, serve it alongside light tea sandwiches, a simple summer salad, or even lemonade and coffee for a fresh, sunny afternoon gathering. Its cool sweetness also pairs beautifully after a spicy barbecue meal.
Creative Ways to Present
For a showy twist, try layering your Berry Icebox Cake in mini trifle glasses or mason jars for individual desserts—adorable and easy to serve! Or cut it into neat squares and add a dollop of whipped topping and a berry or two on each for a party-perfect platter.
Make Ahead and Storage
Storing Leftovers
Berry Icebox Cake stores wonderfully covered in the refrigerator for up to three days. The layers may get a little softer with time, but the flavor just gets better and better! Be sure to keep it well-covered so the cream stays fresh.
Freezing
Want to save slices for later? You can freeze Berry Icebox Cake for up to one month. Wrap pieces well in plastic wrap and aluminum foil. Thaw overnight in the refrigerator for best texture—just note, the berries may weep a bit, but it’s still delicious!
Reheating
No need to reheat—it’s best enjoyed straight from the fridge! If frozen, just allow the Berry Icebox Cake to thaw in the refrigerator before enjoying.
FAQs
-
Can I use frozen berries instead of fresh?
Yes—you can use frozen berries, but thaw them and drain off any excess liquid to prevent the cake from becoming soggy. For best texture and color, pat them very dry before folding into the cream mixture and use fresh berries for the top garnish.
-
Can I make Berry Icebox Cake ahead of time?
Absolutely! In fact, this cake is even better when made ahead. Chill it for at least 4 hours, but overnight is ideal for the best flavor and sliceability.
-
What other fruit can I use?
This recipe is endlessly flexible—try peaches, sliced kiwi, pitted cherries, or bananas along with or instead of berries. Just be sure to choose firm, ripe fruit for the prettiest slices.
-
Can I use homemade whipped cream instead of store-bought whipped topping?
Definitely! Whip 2 cups of heavy cream until soft peaks form; fold it gently into the cream cheese and pudding mixture. The result is a rich, slightly less sweet—and totally dreamy—Berry Icebox Cake.
Final Thoughts
If you’re after a make-ahead dessert that delivers pure joy with every slice, Berry Icebox Cake is for you. Gather your berries, layer up, and let the fridge do the magic—then watch faces light up when you serve this cool, creamy beauty. Enjoy every bite!
Print
Berry Icebox Cake Recipe
- Prep Time: 15 minutes
- Cook Time: 4 hours
- Total Time: 4 hours 15 minutes
- Yield: 12 servings
- Category: Dessert
- Method: No-Bake
- Cuisine: American
- Diet: Vegetarian
Description
A delightful no-bake dessert that combines creamy layers of cheesecake pudding with fresh berries and vanilla wafers, creating a deliciously light and fruity icebox cake.
Ingredients
Vanilla Wafers:
- 1 (11 ounce) Box Vanilla Wafers, Can substitute graham crackers
Cheesecake Filling:
- 8 ounces Cream Cheese, Softened
- 2 (4 serving size) Boxes Instant Cheesecake Flavored Pudding, Can substitute vanilla
- 2 1/2 cups Milk
- 8 ounces Whipped Topping
Berries:
- 4–5 cups Fresh Berries
Instructions
- Cheesecake Filling: In a large bowl, mix cream cheese and instant pudding. Gradually add milk and fold in whipped topping.
- Adding Berries: Fold in 3-4 cups of berries into the cream cheese mixture.
- Layering: Line baking dish with vanilla wafers, spread half of the mixture, add another layer of wafers, then the remaining filling.
- Chill: Refrigerate for at least 4 hours. Top with reserved berries before serving.
Notes
- COOK TIME LISTED IS FOR CHILLING.
- I find that cool whip works best in this recipe. However, you can substitute for homemade whipped cream if you prefer. To do this, you can beat 2 cups of heavy whipping cream with your mixer until fluffy and stiff.
Nutrition
- Serving Size: 1 slice
- Calories: 150 kcal


