
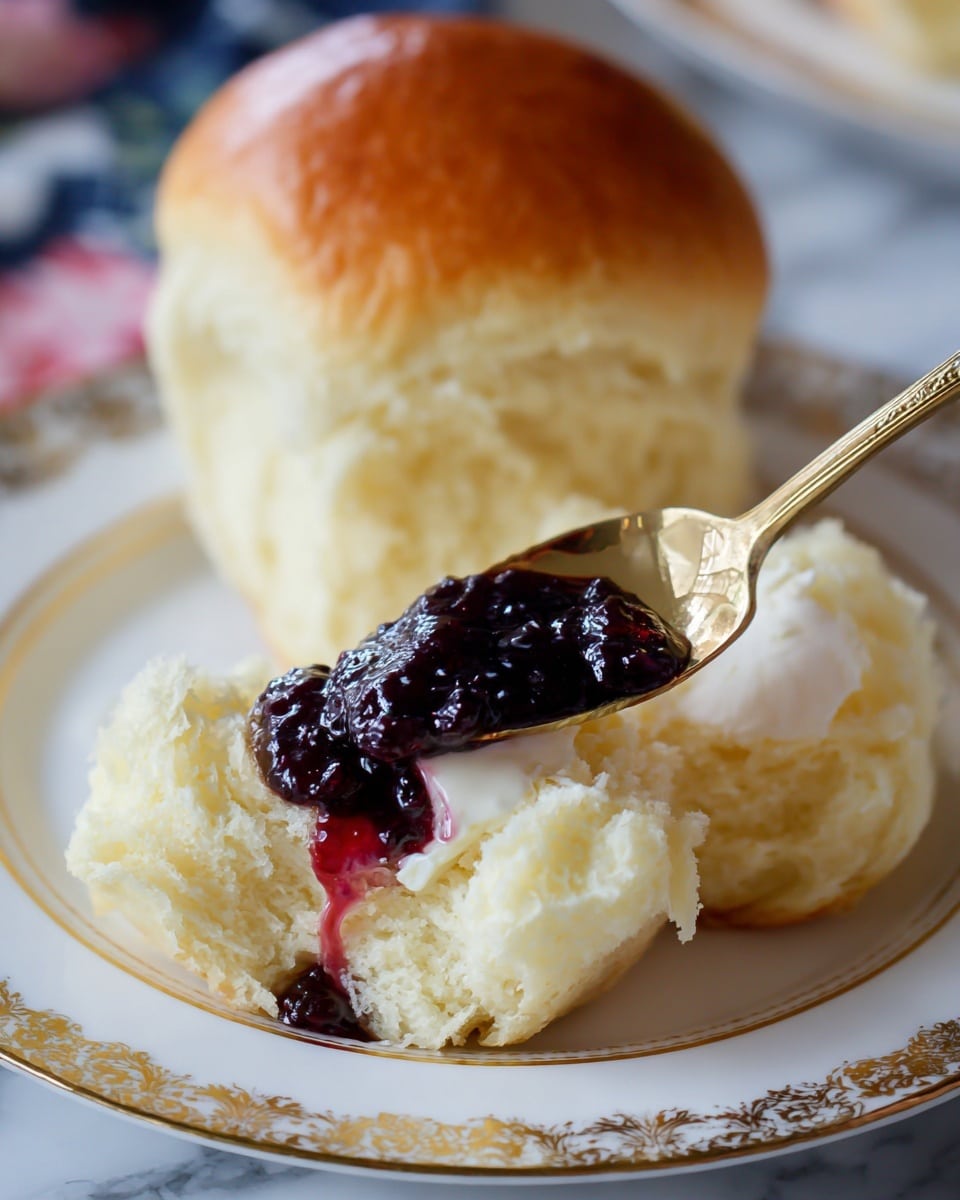
If you’re on the hunt for the fluffiest, softest, most buttery rolls to ever hit your dinner table, I have just the thing for you. The BEST Dinner Rolls Recipe is exactly what it sounds like — a tried-and-true recipe that yields golden, tender rolls with a perfect crumb every time. I absolutely love how these rolls turn out because they’re quick enough for a weeknight but special enough to wow your guests. Stick with me, and I’ll walk you through every step to make sure you nail these irresistible dinner rolls.
Why You’ll Love This Recipe
- Fluffy & Buttery: These rolls come out soft and fluffy with just the right buttery richness that will keep you coming back for more.
- Simple Ingredients: No fancy add-ins or hard-to-find items—just everyday pantry staples that deliver amazing results.
- Perfect for Any Occasion: Whether it’s a family dinner, holiday feast, or a simple weeknight meal, these rolls fit right in.
- Foolproof Method: I break it down so well, even if you’re new to baking bread, you’ll succeed with ease.

Ingredients You’ll Need
Each ingredient here works to create the perfect balance between soft, fluffy texture and rich flavor. When shopping, pick good quality butter and fresh yeast to get the best rise and taste in your rolls.
- All Purpose Flour: The backbone of your rolls; adding the right amount ensures tenderness without toughness.
- Rapid Rise Instant Yeast: This yeast helps your dough rise quickly and reliably—no proofing needed.
- Granulated Sugar: Adds a touch of sweetness that balances the savory flavors and feeds the yeast.
- Salt: Enhances flavor and controls yeast activity so your rolls don’t over-rise.
- Warm Milk: Warm (not hot!) milk activates the yeast gently and keeps the dough tender.
- Butter: Both softened butter in the dough and melted butter brushed on top add richness and moisture.
- Egg: Adds structure and richness, plus helps with that lovely golden color.
Variations
I love customizing this recipe depending on the season or what mood I’m in. Feel free to tweak it—this recipe is forgiving and adapts well to all sorts of changes!
- Herb-Infused Rolls: Adding fresh rosemary or thyme into the dough gives a fragrant twist that my family can’t get enough of.
- Garlic Butter Variation: Mix minced garlic with the melted butter before brushing on top for a savory upgrade that pairs wonderfully with soup or pasta.
- Whole Wheat Option: Swap half the all-purpose flour for whole wheat for a nuttier flavor and a touch more fiber.
- Sweet Rolls: Add a handful of cinnamon and raisins for a sweet spin that’s perfect for breakfast or brunch.
How to Make The BEST Dinner Rolls Recipe
Step 1: Mixing the Dough with Love
Start by combining 3 cups of flour with the yeast, sugar, salt, warm milk, softened butter, and the egg in your stand mixer bowl. Using the dough hook on low speed, mix everything until the flour is mostly incorporated—scraping down the sides helps keep things even. Once mixed, bump the speed to medium and beat for 2 minutes. This little boost does wonders for developing gluten, making the rolls tender but structured.
Step 2: Adding Flour Gradually
Add ½ cup of flour and mix until it disappears into the dough, then do another ½ cup. Keep mixing at medium speed for a couple more minutes until the dough forms a smooth ball that’s a bit sticky but pulling away from the bowl. If it’s too sticky to handle, sprinkle a touch more flour—but don’t overdo it, since that’s how you get tough rolls!
Step 3: First Rise — Patience Pays Off
Transfer your dough to a lightly greased bowl and cover it with a towel or plastic wrap. Let it rise in a warm spot for about 30 minutes. You’ll see it gently puff up—that’s the yeast working its magic. This step is crucial for those soft, airy rolls you’re aiming for.
Step 4: Shaping Your Rolls
After the first rise, punch down your dough gently — just enough to deflate it without stressing it out. Then pinch off roughly 24 pieces and roll each into a smooth ball. I like weighing mine (about 2 ounces each) so they’re even; it helps them bake uniformly. Place the rolls on a greased baking sheet or dish, cover again, and let them rise for another 30 minutes. This second rise adds the final fluff.
Step 5: Baking to Perfection
Preheat your oven to 375°F (190°C). Bake the rolls for 12 to 15 minutes or until they’re beautifully golden and cooked through. If you notice them browning too fast, just tent some foil on top—no worries. Right out of the oven, brush with melted butter for that irresistible shine and buttery flavor. Serve warm, or let cool and store.
Pro Tips for Making The BEST Dinner Rolls Recipe
- Warm Milk Temperature: I learned the hard way that milk that’s too hot kills the yeast; keep it warm around 110°F for a perfect rise.
- Don’t Over-Flour: Adding flour gradually helped me avoid dense rolls—stickiness is OK, and it leads to softness after baking.
- Cover Dough Properly: I always use a damp towel to cover the dough during rising to avoid dry edges forming on my rolls.
- Timing the Rises: I found letting the dough rise in a warm, draft-free spot quickly results in the best texture and height.
How to Serve The BEST Dinner Rolls Recipe
Garnishes
I like to brush these rolls with a little extra melted butter right after baking and sometimes sprinkle a pinch of flaky sea salt or chopped fresh parsley on top. It adds a nice shimmer and a burst of flavor that makes the rolls even more inviting.
Side Dishes
These rolls are the perfect partners for hearty soups like chicken noodle or creamy tomato, classic mashed potatoes with gravy, or a big holiday meal with roasted turkey and veggies. My family goes crazy for pairing them with a rich beef stew too!
Creative Ways to Present
For special occasions, I love arranging the rolls in a braided or pull-apart style on a large rimmed tray, topping with herbs or thin garlic slices. It turns something simple into a beautiful centerpiece that guests can’t resist digging into.
Make Ahead and Storage
Storing Leftovers
Once fully cooled, I store leftover rolls in an airtight plastic bag or container at room temperature for up to 3 days. This keeps them soft but still delicious—no refrigeration necessary unless your kitchen is very warm.
Freezing
These rolls freeze beautifully. I freeze them individually wrapped in plastic wrap inside a freezer bag. When you want them, thaw overnight at room temperature or for a few hours wrapped in a towel.
Reheating
To revive frozen or leftover rolls, I heat them in the oven at 300°F for about 10 minutes wrapped in foil, or pop them in the microwave for 10-15 seconds wrapped in a damp paper towel. This brings back that fresh-from-the-oven softness.
FAQs
-
Can I make The BEST Dinner Rolls Recipe without a stand mixer?
Absolutely! You can mix and knead the dough by hand. Just combine the ingredients and knead on a floured surface for about 8-10 minutes until smooth and elastic. It’s a great way to connect with the dough if you’re not in a rush.
-
What’s the secret to keeping these rolls soft the next day?
Softness comes from proper storage—keep your rolls in airtight bags at room temperature and reheat gently with a little moisture when serving. Brushing with extra melted butter after warming also helps restore softness and flavor.
-
Can I make these rolls vegan?
You can swap the butter with a plant-based alternative and use a flax egg or other egg replacer. Keep in mind the texture might vary slightly, but it’s a great way to enjoy similar fluffy rolls!
-
How do I know when the rolls are done baking?
The rolls should be golden brown on top and sound hollow when tapped gently on the bottom. If they’re too pale or soft, just give them a couple more minutes, tenting with foil if needed to avoid over-browning.
Final Thoughts
Honestly, once you try The BEST Dinner Rolls Recipe, you might never want to buy store-bought again. There’s something so comforting about pulling soft, buttery rolls fresh from your own oven. I love how this recipe strikes the perfect balance between easy and special, making every meal feel a bit more festive. So grab your ingredients, roll up your sleeves, and make these rolls your new kitchen favorite—you’ll be glad you did.
Print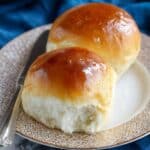
The BEST Dinner Rolls Recipe
- Prep Time: 10 minutes
- Cook Time: 12 minutes
- Total Time: 1 hour 12 minutes
- Yield: 24 rolls
- Category: Bread
- Method: Baking
- Cuisine: American
Description
These BEST Dinner Rolls are soft, fluffy, and buttery homemade rolls made with simple ingredients. Perfectly golden and tender, they’re ideal as a side for any meal or as sliders. Easy to make with just a bit of mixing, kneading, rising, and baking, these dinner rolls will quickly become a family favorite.
Ingredients
Dry Ingredients
- 4 to 5 cups all-purpose flour
- 2 tablespoons rapid rise, instant yeast
- ⅓ cup granulated sugar
- 1 teaspoon salt
Wet Ingredients
- 1½ cups warm milk (110°F)
- 5 tablespoons softened butter
- 1 egg (room temperature)
- 2 tablespoons melted butter (for brushing after baking)
Instructions
- Combine Ingredients: In the bowl of a stand mixer, combine 3 cups of flour, yeast, sugar, salt, warm milk, softened butter, and egg.
- Mix Initial Dough: Attach the dough hook and mix on the lowest speed until the flour is incorporated, scraping down the bowl sides as needed.
- Knead Dough: Increase mixer speed to medium and beat for 2 minutes to develop the dough’s structure.
- Add More Flour: Add ½ cup flour and mix with the dough hook until incorporated. Repeat with another ½ cup flour and continue mixing at medium speed for 2 more minutes. Dough should form a soft, slightly sticky ball pulling away from the bowl edges. Add additional flour if necessary.
- First Rise: Transfer dough to a lightly greased bowl, cover with a towel or plastic wrap, and let it rise at room temperature for 30 minutes.
- Deflate Dough: Remove cover and gently punch down the dough to release air.
- Shape Rolls: Pinch off pieces of dough and form 24 rolls, each about 2 ounces. Use a scale for uniformity if desired.
- Second Rise: Place rolls on a lightly greased quarter baking sheet or 9×13-inch baking dish. Cover and let rise again at room temperature for 30 minutes.
- Bake Rolls: Preheat oven to 375°F. Bake rolls for 12 to 15 minutes until golden brown and cooked through. Tent with foil if they brown too quickly.
- Brush with Butter: Remove from oven and immediately brush hot rolls with melted butter for a shiny, flavorful finish.
- Serve or Store: Serve warm for best taste, or cool and store rolls in a plastic bag for up to 3 days.
Notes
- Light, fluffy, buttery dinner rolls are irresistible and the perfect side for any meal.
- Adjust flour amounts slightly as needed to achieve the right dough consistency—soft yet slightly sticky.
- Using warm milk at 110°F activates yeast without killing it, ensuring a good rise.
- Brushing rolls with melted butter after baking adds flavor and a soft crust.
- These rolls freeze well—cool completely, then freeze in a sealed bag for up to 1 month.
Nutrition
- Serving Size: 1 roll
- Calories: 74 kcal
- Sugar: 3 g
- Sodium: 136 mg
- Fat: 4 g
- Saturated Fat: 2 g
- Unsaturated Fat: 2 g
- Trans Fat: 0 g
- Carbohydrates: 7 g
- Fiber: 0.3 g
- Protein: 1 g
- Cholesterol: 17 mg


