
If you’re looking for a cupcake that’s not just delicious but also has a wickedly cool presentation, then this Blood Drip Cupcakes Recipe is exactly what you need. I absolutely love how these cupcakes come out—with rich, chocolatey goodness topped off by this striking candy “blood” drip that’s perfect for Halloween or anytime you want to wow your guests. Stick with me, and I’ll walk you through every step so your cupcakes turn out just right, even if you’re new to candy making!
Why You’ll Love This Recipe
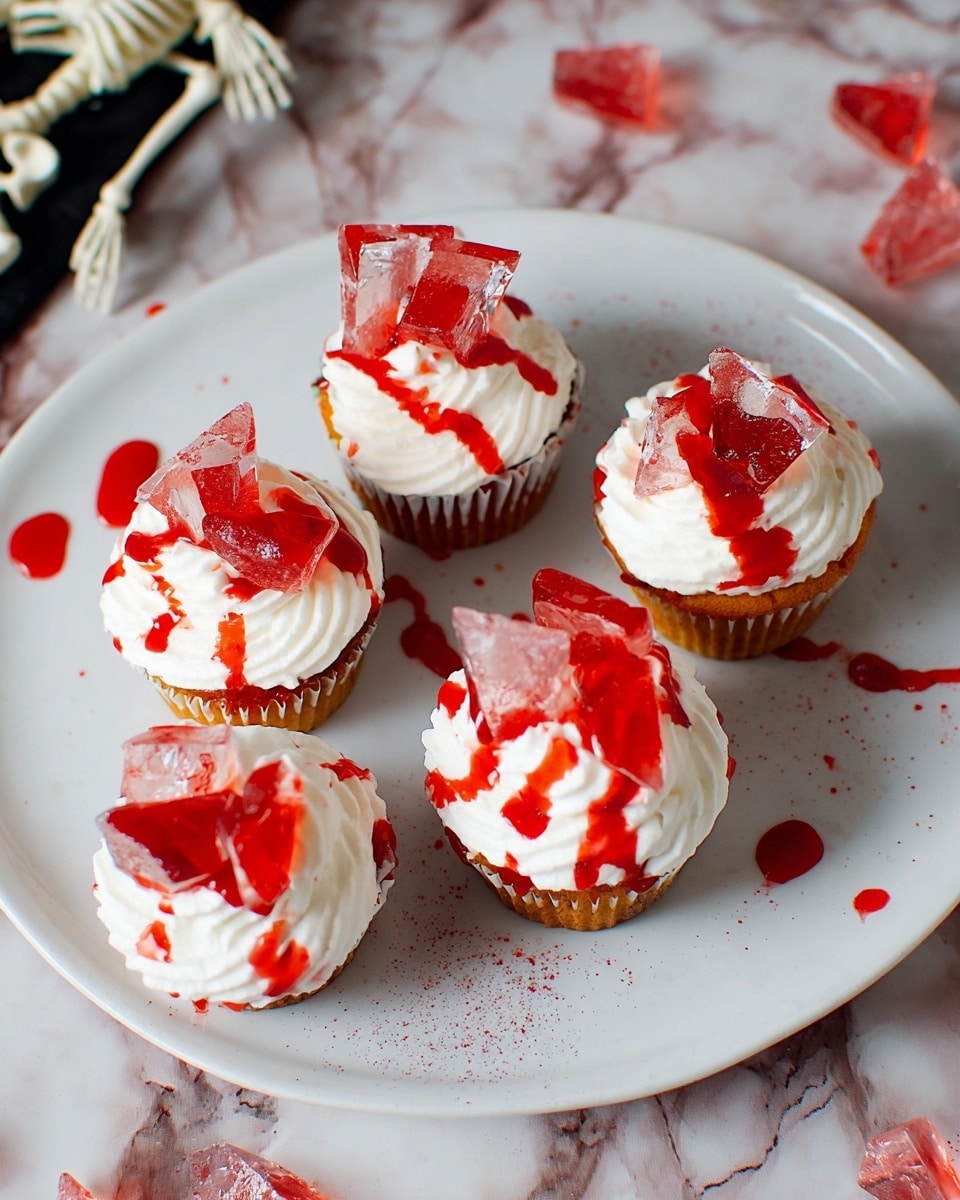
- Show-stopping presentation: The blood drip candy shards on top make these cupcakes look like they belong in a horror movie—so impressive and fun for parties.
- Rich, moist cupcakes: The combo of cocoa, malt powder, and buttermilk creates a deeply chocolatey, tender crumb that everyone raves about.
- Hands-on candy making: You’ll get to make your own glass candy shards, a cool kitchen skill that’s easier than it looks once I show you the tricks.
- Customizable and fun: You can easily tweak the “blood” effect or frosting to make these cupcakes uniquely yours.

Ingredients You’ll Need
The ingredients here work together beautifully to create a cupcake that’s rich and full of flavor, with that addictive malt undertone. Plus, the candy “blood” brings the perfect dramatic touch. When you shop, look for good-quality cocoa powder and malt powder to really make these pop.
- All-purpose flour: The base that gives structure to your cupcakes.
- Unsweetened cocoa powder: For that intense chocolate flavor—don’t skip or swap with sweetened versions.
- Malt powder: Adds a subtle nutty, toasted note that makes the chocolate extra special.
- Sugar: Sweetens the cupcakes and balances the cocoa bitterness.
- Instant coffee: Just a hint to deepen chocolate flavor without a coffee taste.
- Baking soda and baking powder: Both work together to give these cupcakes a light, fluffy rise.
- Kosher salt: Enhances all the flavors—you’ll want it for sure.
- Large eggs: Bind everything and add richness.
- Buttermilk: Keeps the cupcakes moist and tender with a slight tang.
- Unsalted butter (melted): Adds richness and helps the batter blend smoothly.
- Pure vanilla extract: Rounds out the flavors perfectly.
- Buttercream frosting: Smooth and creamy, the perfect backdrop for the candy shards.
- Light corn syrup: Essential for that glossy, hard candy finish in the “blood” drip.
- Sugar (for candy): The main ingredient for your glass candy shards.
- Cream of tartar: Helps prevent crystallization when making candy.
- Water (for candy): Dissolves sugar so it cooks evenly.
- Red food coloring gel: Makes your blood drip vibrantly red—use gel for the best color punch.
Variations
One of my favorite things about the Blood Drip Cupcakes Recipe is how easy it is to tweak for different occasions or dietary needs. You can play with the frosting, candy colors, or even turn it into a gluten-free treat.
- Chocolate ganache frosting: For a decadent twist, swap out buttercream for a rich ganache—I tried this once, and my family went crazy for the fudgy top!
- Gluten-free version: Use a 1:1 gluten-free baking flour blend instead of all-purpose flour; just be sure to check your malt powder and baking powder are gluten-free.
- Different candy colors: Experiment with blood colors like deep purple or green for a spooky vibe; red is classic, but I’ve had great Halloween parties with variations.
- Spicy kick: Add a pinch of cayenne or cinnamon to the batter to surprise your guests with subtle heat that pairs well with the chocolate.
How to Make Blood Drip Cupcakes Recipe
Step 1: Whip up the perfect cupcake batter
Start by preheating your oven to 350°F and lining your cupcake pan with liners. I find silicone liners don’t always get the sides as neat, so I prefer classic paper ones here. In a large bowl (or your mixer bowl), sift together the flour, cocoa powder, malt powder, sugar, instant coffee, baking soda, baking powder, and kosher salt. Mixing the dry ingredients first ensures everything’s evenly distributed and that those cocoa lumps don’t sneak in. Then, add your eggs, buttermilk, melted butter, and vanilla extract and beat on medium speed for a couple of minutes until smooth and well combined. Last, pour in 3/4 cup of boiling water—yes, boiling! This helps bloom the cocoa flavor and makes the batter wonderfully smooth. Mix that in gently but thoroughly.
Step 2: Bake until just right
Fill each cupcake liner about two-thirds full—you want just enough batter to rise nicely without spilling over. Bake for 18 to 22 minutes; I usually start checking at 18 by inserting a toothpick to see if it comes out clean. When they’re done, transfer the cupcakes to a wire rack to cool completely. I’ve learned cooling fully before frosting helps the buttercream stay stable and keeps the candy “blood” from melting down the sides.
Step 3: Make your glass candy blood drip
This step is where the magic happens! Line a baking sheet with foil to pour your candy onto. In a small saucepan set over medium-high heat, combine the light corn syrup, sugar, cream of tartar, and water. Stir just until the sugar dissolves and it starts boiling—you’ll want to use a candy thermometer clipped to the pan to monitor the temperature carefully. When it hits 300°F (hard crack stage), remove it from heat. Here’s a trick I learned: use a pastry brush dipped in water to wash down any sugar crystals clinging to the sides of the pan—that keeps your candy smooth and clear. Pour your hot candy mixture onto the foil-lined sheet and let it set at room temperature for at least an hour. Once hardened, break it into irregular shards that look just like broken glass dripping with blood.
Step 4: Assemble with style
Pipe a generous swirl of buttercream frosting onto each cooled cupcake. Then, carefully stick one or two candy shards right into the center—make them dramatic! Finally, add little “blood drips” by piping on red food coloring gel in streaks and drops. I found using a small offset spatula or toothpick to drag the gel down the sides adds a really convincing effect. This final touch turns these cupcakes into an edible Halloween masterpiece.
Pro Tips for Making Blood Drip Cupcakes Recipe
- Room temperature ingredients: Always bring eggs, butter, and buttermilk to room temp before mixing for better batter consistency and rise.
- Watch your candy thermometer: Candy-making requires precision—don’t wander away or your candy can burn or not set properly.
- Clean your pan sides: Using a water-dipped brush early during candy cooking prevents nasty crystals that ruin texture.
- Cool cupcakes completely: Frosting warm cupcakes causes melting; patience pays off for a clean, beautiful finish.
How to Serve Blood Drip Cupcakes Recipe
Garnishes
I like to keep the garnishes simple because the blood drip candy shards really shine on their own. Sometimes, I’ll scatter a few edible silver balls or tiny fake spiders around the cupcakes for extra spooky flair. If you want to add a little freshness, a small mint leaf tucked behind the candy shard adds a pop of color and contrast.
Side Dishes
These cupcakes are a perfect dessert centerpiece, but I sometimes pair them with a cool berry compote or freshly whipped cream on the side to balance the richness. For Halloween parties, they’re great next to hot apple cider or a dark chocolate mousse for a deeply indulgent spread.
Creative Ways to Present
Once, I displayed these cupcakes on a black slate tray with dry ice underneath for a spooky smoky effect—guests loved the theatrical vibe. Another time, I used cupcake stands with spiderweb doilies and little flickering LED candles. You can also serve each cupcake in a clear dome cloche with red “blood splatter” stickers for a creepy but chic presentation.
Make Ahead and Storage
Storing Leftovers
Cupcakes store beautifully in an airtight container at room temperature for up to 2 days. If you want to keep the candy shards crisp, I recommend storing the shards separately and assembling right before serving. This way, your blood drips stay shiny and don’t get sticky.
Freezing
I’ve frozen these cupcakes un-frosted sometimes, wrapped tightly to prevent freezer burn. Just thaw overnight in the fridge before frosting and decorating. Freezing frosted cupcakes isn’t ideal since the candy drip can get soggy, so plan ahead to add that final touch after thawing.
Reheating
Since these are best enjoyed at room temperature with the candy intact, I skip reheating. If you do want warm cupcakes, remove the candy first and add it back on once the cupcake cools slightly. Microwaving can melt frosting and candy, so handle with care.
FAQs
-
Can I make the Blood Drip Cupcakes Recipe ahead of time?
Absolutely! You can bake the cupcakes and prepare the candy shards a day ahead. Just keep the candy shards stored separately in an airtight container so they don’t become sticky, and frost and decorate your cupcakes on the day you plan to serve them for the best look and texture.
-
What if I don’t have malt powder?
If malt powder isn’t in your pantry, don’t worry—you can omit it or swap with an equal amount of cocoa powder, though you’ll lose that unique toasted note. Some people substitute malted milk powder, but that can be sweeter, so reduce sugar slightly if using.
-
Is there a shortcut to the candy drip?
While making your own glass candy adds an incredible effect, you can cheat a bit by using red-colored rock candy or edible sugar decorations from specialty stores. It won’t be exactly the same, but it can save time if you’re rushed or intimidated by candy-making.
-
How do I avoid sticky candy shards?
To keep your candy shards crisp and non-sticky, store them in a cool, dry place away from humidity. Wrapping them in parchment paper before placing in an airtight container can help a lot. High humidity causes sugar to dissolve slightly, making shards tacky.
Final Thoughts
Making the Blood Drip Cupcakes Recipe was one of those “wow” kitchen moments for me—I mean, who doesn’t love a cupcake that tastes amazing and also looks like it came from a Halloween movie set? I hope you’ll give this a try, especially if you love showing off your baking skills with fun and creative methods. With the tips and tricks I shared, you’ll nail every step, and your friends and family will definitely ask you to make these again (and again). Now, go ahead and surprise everyone with these wickedly tasty cupcakes!
Print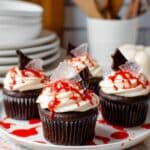
Blood Drip Cupcakes Recipe
- Prep Time: 25 minutes
- Cook Time: 20 minutes
- Total Time: 1 hour 45 minutes
- Yield: 16 to 18 cupcakes
- Category: Dessert
- Method: Baking
- Cuisine: American
Description
Blood Drip Cupcakes are a spooky and delicious treat perfect for Halloween or themed parties. These rich chocolate cupcakes are moist and flavorful thanks to the addition of malt powder and espresso. Topped with smooth buttercream frosting and a striking shard of homemade glass candy, they’re finished with a dramatic red food coloring gel ‘blood drip’ effect that makes these cupcakes both fun and visually impressive.
Ingredients
Cupcakes
- 1 1/4 cups all-purpose flour
- 1/2 cup unsweetened cocoa powder
- 1/4 cup malt powder
- 1 3/4 cups sugar
- 1 teaspoon instant coffee
- 1 teaspoon baking soda
- 1 teaspoon baking powder
- 1 teaspoon kosher salt
- 2 large eggs
- 1 cup buttermilk
- 2/3 cup unsalted butter, melted
- 2 teaspoons pure vanilla extract
- 3/4 cup boiling water
Buttercream Frosting
- 2 cups buttercream frosting (prepared or homemade)
Glass Candy
- 1/2 cup light corn syrup
- 3 cups sugar
- 1/4 teaspoon cream of tartar
- 1 1/2 cups water
Decoration
- Red food coloring gel, for garnish
Instructions
- Preheat Oven: Preheat your oven to 350°F (177°C). Line a cupcake pan with liners and set aside.
- Make Cupcakes: In a large bowl using a hand mixer or stand mixer with a whisk attachment, combine the flour, cocoa powder, malt powder, sugar, instant coffee, baking soda, baking powder, and kosher salt. In another bowl or directly add, incorporate the eggs, buttermilk, melted butter, and vanilla extract. Beat on medium speed until the mixture is well combined, about 2 minutes. Carefully stir in 3/4 cup of boiling water and continue mixing until incorporated. The batter will be thin.
- Bake Cupcakes: Pour the batter into the lined cupcake tins, filling each about two-thirds full. Bake for 18 to 22 minutes, or until a toothpick inserted into the center of a cupcake comes out clean. Once baked, remove from the oven and transfer the cupcakes to a wire rack to cool completely before frosting.
- Make Glass Candy: Line a baking sheet with foil. In a small saucepan over medium-high heat, combine light corn syrup, sugar, cream of tartar, and water. Stir until mixture begins to boil, then stop stirring. Attach a candy thermometer to the side of the pan and use a wet pastry brush to wash down any sugar crystals from the sides. Bring the mixture to 300°F (hard crack stage). Immediately pour the hot candy mixture onto the prepared foil-lined baking sheet and let it cool at room temperature for at least 1 hour. Once hardened, break the candy into shards.
- Assemble Cupcakes: Pipe or spread buttercream frosting generously on each cooled cupcake. Insert a shard of the glass candy into the center of each frosted cupcake. Using red food coloring gel, pipe a “blood drip” effect around the edge of the frosting to create a spooky finishing touch.
Notes
- Use malt powder to deepen the chocolate flavor and add complexity to the cupcakes.
- Instant coffee enhances the cocoa flavor without making the cupcakes taste like coffee.
- Be careful when handling the hot candy mixture, as it reaches very high temperatures.
- The glass candy shards add an impressive dramatic look but must be eaten cautiously to avoid injury.
- You can prepare the glass candy a day in advance and store it in an airtight container to save time on the day of serving.
- If you don’t have buttermilk, you can make a substitute by adding 1 tablespoon vinegar or lemon juice to 1 cup milk and letting it sit for 5 minutes.
Nutrition
- Serving Size: 1 cupcake with frosting and candy shard
- Calories: 380
- Sugar: 42g
- Sodium: 180mg
- Fat: 18g
- Saturated Fat: 11g
- Unsaturated Fat: 6g
- Trans Fat: 0.2g
- Carbohydrates: 52g
- Fiber: 3g
- Protein: 4g
- Cholesterol: 55mg

