
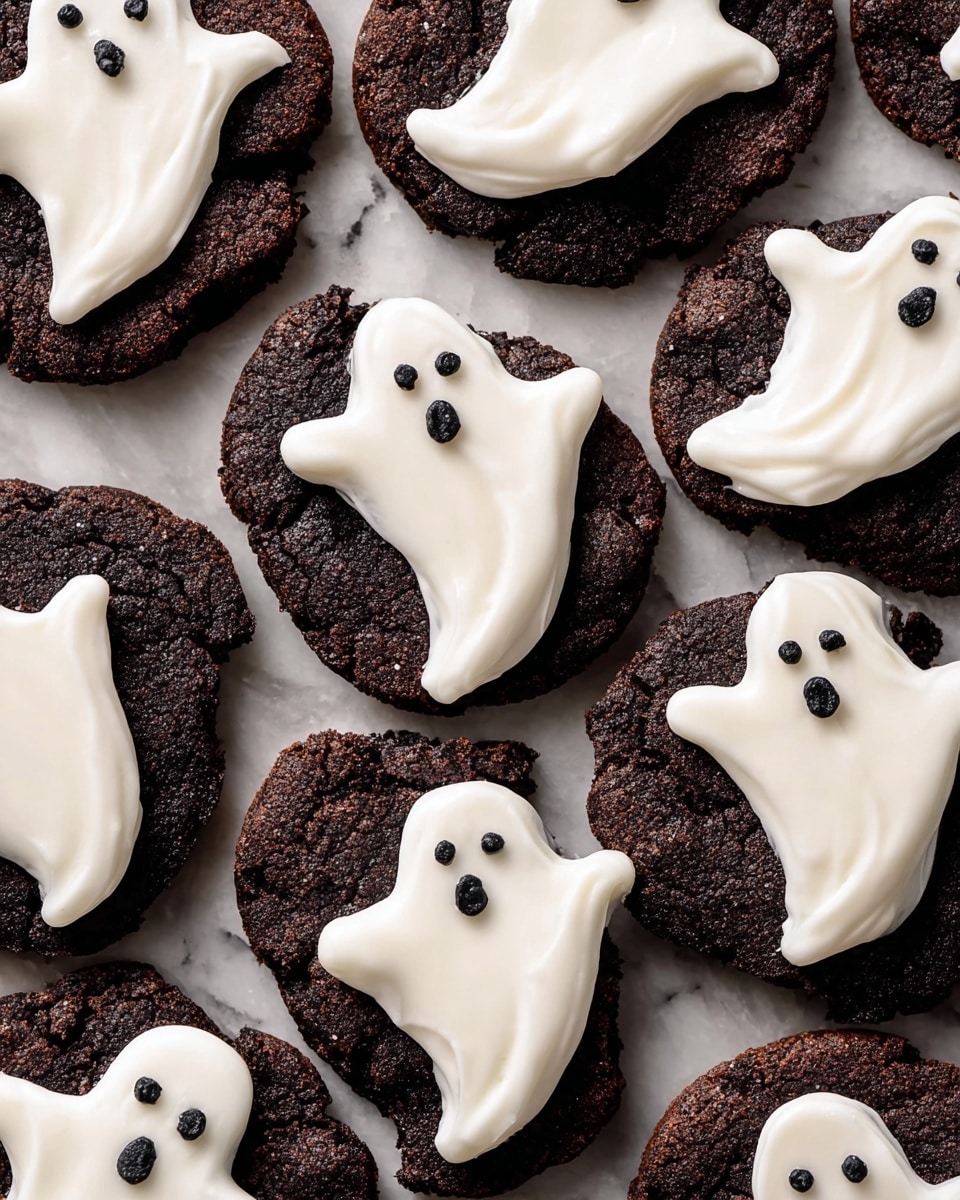
If you’re looking for a fun, delicious, and slightly spooky treat, this Ghost Cookies Recipe is exactly what you need. I absolutely love how these black cocoa cookies rolled in sugar turn out — the perfect balance of rich chocolatey goodness and a ghostly white chocolate topping that you and your friends won’t stop talking about. Whether you’re baking for Halloween or just craving a unique cookie, you’re going to want to keep this one in your recipe stash.
Why You’ll Love This Recipe
- Rich, Chocolatey Flavor: The black cocoa powder makes these cookies decadently dark and irresistible.
- Fun Presentation: The white chocolate ghosts add a whimsical, festive touch perfect for holidays or any gathering.
- Easy To Follow: I’ve added tips to help you avoid common baking pitfalls so you end up with perfect cookies every time.
- Perfect Texture: Slightly crisp on the outside, soft and chewy within — just how I like my cookies!

Ingredients You’ll Need
Each ingredient here plays a key role in getting the flavor and texture spot on. Plus, a couple of pantry staples and some special additions make this Ghost Cookies Recipe really stand out. Here’s what I always stock up on before I start:
- All-purpose flour: The base of the cookie dough, giving structure and chew.
- Baking powder & baking soda: These little leaveners ensure just the right amount of rise without making the cookies cakey.
- Salt: Enhances the chocolate flavor and balances the sweetness.
- Black cocoa powder: This is the secret behind the rich, dark color and bold chocolate flavor—don’t substitute regular cocoa if you want that signature look.
- Unsalted butter: I like to melt and cool it first so it blends smoothly and helps with the cookie’s chewiness.
- Brown sugar & white granulated sugar: A combo that adds moisture, depth, and crunch from the sugar coating.
- Pure vanilla extract: Brings warmth and rounds out the chocolate notes.
- Egg and egg yolk: Gives richness and helps bind everything together perfectly.
- White granulated sugar (for rolling): Coats the cookie dough balls giving them that lovely crackly crust.
- White chocolate chips: The star of the ghost decoration—use good quality for the best melting and flavor.
- Heavy cream: Helps create the smooth white chocolate ghost topping.
- Black writing gel: Essential for drawing cute ghost faces—available in most baking aisles.
- White food dye (optional): For intensifying the ghostly white color if you like a brighter contrast.
Variations
I love how versatile this Ghost Cookies Recipe can be. Over time, I’ve played around with different tweaks depending on who I’m baking for or what I have on hand. You should definitely feel free to personalize this recipe to your liking!
- Add a hint of spice: Once, I added a pinch of cinnamon and a touch of cayenne to amp up the flavor for an adult-only batch — it was a hit!
- Make it dairy-free: Swap the butter for coconut oil and use dairy-free white chocolate chips to make this allergy-friendly.
- Colorful ghosts: Use food-safe gel colors to make blue or pink ghosts for birthday parties instead of just white.
- Miniature versions: I sometimes roll smaller cookies to make bite-sized treats perfect for kids’ lunchboxes.
How to Make Ghost Cookies Recipe
Step 1: Mix your dry ingredients to build flavor
Start by whisking together your all-purpose flour, black cocoa powder, baking powder, baking soda, and salt in a bowl until well combined. This ensures the leavening agents are evenly distributed and your cookies bake perfectly. I’ve found that sifting the cocoa powder helps avoid lumps and gives a smoother batter.
Step 2: Cream together butter and sugars for chewy goodness
In a separate large bowl, mix the melted (and cooled!) unsalted butter with both the brown and white sugars until they’re well incorporated. This combo is key for soft, chewy cookies with a nice sweetness. When I first tried this, I made the mistake of using warm butter and ended up with greasy dough, so let it cool to room temperature.
Step 3: Add eggs and vanilla for moisture and flavor
Next, beat in the large egg, egg yolk, and pure vanilla extract to your butter and sugar mix. This adds richness and helps bind the dough. Use eggs at room temperature for a smoother dough texture — cold eggs can cause the butter to seize up.
Step 4: Combine wet and dry ingredients gently
Slowly add your dry mixture into the wet ingredients, folding just until combined. Overmixing will develop gluten and make your cookies tough, so stop as soon as you don’t see dry flour. When I learned to stop mixing early, my cookies came out perfectly tender every time.
Step 5: Chill and shape the dough for perfect texture
Cover your dough and chill it in the fridge for at least 30 minutes. This firms it up, making it easier to form into balls and preventing excessive spreading. From experience, this step is essential—skipping it often leads to flat cookies that lose their shape.
Step 6: Roll dough balls in sugar and bake
Roll the chilled dough into about 1 ½ inch balls, then coat them thoroughly in white granulated sugar. Place them on a baking sheet lined with parchment paper, spacing the cookies about 2 inches apart. Bake at 350°F (175°C) for 8 minutes — you want them set around the edges but still soft in the center. I always watch closely here because black cocoa cookies can go from perfect to overdone quickly.
Step 7: Create the white chocolate ghost topping
While the cookies cool, gently melt your white chocolate chips with heavy cream using a double boiler or microwave in short bursts, stirring often. Once smooth, you can add a touch of white food dye if you want a brighter ghostly finish. Spoon or pipe this creamy mixture over each cookie in a ghost shape. Let them set completely before moving on.
Step 8: Draw those spooky faces!
After the white chocolate ghosts have set, use black writing gel to carefully draw cute or spooky ghost faces. This part is so fun, especially if you’re baking with kids! If you’re nervous about freehand drawing, you can practice on parchment paper before decorating the cookies.
Pro Tips for Making Ghost Cookies Recipe
- Cool Butter Properly: Always let melted butter cool before mixing — this prevents the dough from becoming too loose or oily.
- Chill the Dough: Don’t skip chilling; it controls spread and helps cookies keep their shape on baking.
- Watch the Bake Time: Because black cocoa darkens the cookie, it’s easy to overbake, so keep an eye around the 8-minute mark.
- Practice Your Ghost Faces: Use a toothpick or parchment paper to practice with the black gel before decorating the cookies themselves.
How to Serve Ghost Cookies Recipe
Garnishes
I like to keep garnishes simple here since the cookies are already show-stoppers: a sprinkle of powdered sugar dusted lightly over the top gives a bit of “moonlight” effect and contrasts beautifully. If it’s Halloween, adding candy eyes or tiny edible stars around the serving plate amps up the fun vibe.
Side Dishes
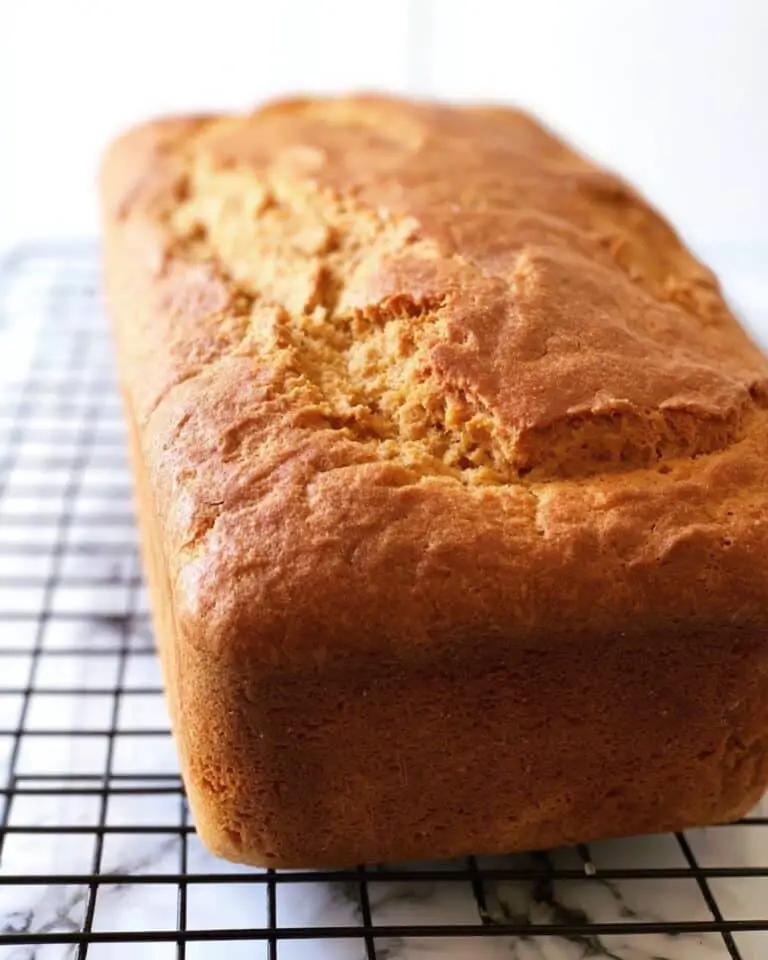
These cookies go wonderfully with a cold glass of milk or a warm cup of spiced chai or hot chocolate. I’ve also served them alongside soft pumpkin bread at fall gatherings — the balance between flavors makes your taste buds dance!
Creative Ways to Present
For special occasions, I’ve arranged these cookies on a tiered cake stand decorated with mini pumpkins and faux cobwebs. Another fun idea is placing each cookie inside a small treat bag tied with black and white twine for party favors — such a cute way to share the Halloween spirit.
Make Ahead and Storage
Storing Leftovers
I store leftover cookies in an airtight container at room temperature with a little bit of parchment paper between layers to prevent sticking. They stay fresh and soft for up to 4 days this way. I learned that storing them uncovered dries them out too fast, so airtight is key.
Freezing
If you need to freeze, place the baked cookies in a single layer on a baking sheet first to freeze solid, then transfer to a freezer-safe bag or container. I freeze the cookies without the white chocolate ghosts to prevent damage during thawing. Freeze for up to 3 months.
Reheating
To enjoy your stored or thawed cookies, pop them in a 300°F oven for 3-5 minutes to regain some fresh-baked warmth. I avoid microwaving because it can melt the white chocolate ghosts or make the cookies too soft.
FAQs
-
Can I use regular cocoa powder instead of black cocoa?
While you can substitute regular cocoa powder, black cocoa powder gives these ghost cookies their signature dark color and intense chocolate flavor. If you use regular cocoa, the cookies will be lighter in color and less rich, but still tasty.
-
How do I prevent my white chocolate ghosts from melting or smudging?
Make sure the cookies are completely cool before adding the white chocolate topping. After spreading or piping, allow the ghosts to set firmly at room temperature or in the fridge. Also, avoid stacking cookies once decorated to protect the design.
-
Can I make these cookies dairy-free?
Yes! Substitute the butter with a plant-based alternative like coconut oil and use dairy-free white chocolate chips and cream alternatives for the topping. The texture and flavor may shift slightly, but they’ll still be delicious.
-
What’s the best way to draw ghost faces if I’m not confident?
Practice on parchment paper first with your black writing gel and start simple—basic eyes and a smile go a long way. You could also use small edible eyes or pre-made decorations as an alternative.
-
How long will the cookies stay fresh?
Stored properly in an airtight container at room temperature, these cookies will stay fresh and soft for up to four days. Beyond that, consider freezing them for longer storage.
Final Thoughts
I can’t recommend this Ghost Cookies Recipe enough if you want to impress your friends or family with something that’s both super tasty and utterly adorable. I remember the first time I made these for a Halloween party — everyone kept asking where I got them! The rich chocolate paired with the fun white chocolate ghosts makes baking feel like a treat itself. You’ll enjoy making these as much as you enjoy eating them, and I promise, once you try this recipe, it will be a staple in your cookie repertoire.
Print
Ghost Cookies Recipe
- Prep Time: 20 min
- Cook Time: 8 min
- Total Time: 58 min
- Yield: 18 small cookies
- Category: Dessert
- Method: Baking
- Cuisine: American
Description
Delightfully spooky and delicious, Ghost Cookies are rich black cocoa sugar cookies rolled in sugar and topped with creamy white chocolate ghosts. These cookies combine the deep, chocolatey flavor of black cocoa with the sweetness of white chocolate, making them perfect for Halloween or any fun occasion.
Ingredients
Dry Ingredients
- 1 1/3 cups All-purpose flour
- 1/4 tsp Baking powder
- 1/4 tsp Baking soda
- 1/2 tsp Salt
- 1/2 cup Black cocoa powder
Wet Ingredients
- 1/2 cup Unsalted butter, melted and cooled
- 3/4 cup Brown sugar, packed (light or dark)
- 1/4 cup White granulated sugar
- 1 tsp Pure vanilla extract
- 1 Large egg, room temperature
- 1 Egg yolk, room temperature
Coating and Topping
- 1/3 cup White granulated sugar (for rolling)
- 1 cup White chocolate chips (good quality)
- 1/3 cup Heavy cream
- Black writing gel (available in baking section at Walmart)
- White food dye (optional)
Instructions
- Prepare dry ingredients: In a medium bowl, sift together the all-purpose flour, baking powder, baking soda, salt, and black cocoa powder. Set aside.
- Mix wet ingredients: In a large bowl, combine the melted and cooled unsalted butter, brown sugar, white granulated sugar, and pure vanilla extract. Beat in the large egg and egg yolk until the mixture is smooth and creamy.
- Combine dry and wet ingredients: Gradually fold the dry ingredient mixture into the wet ingredients, mixing gently until fully incorporated and a dough forms. Do not overmix.
- Chill the dough: Cover the dough with plastic wrap and refrigerate for about 30 minutes to firm up, making it easier to shape.
- Preheat the oven: Preheat your oven to 350°F (175°C) and line baking sheets with parchment paper or silicone mats.
- Form and coat cookies: Scoop small portions of dough (about 1 tablespoon each) and roll them into balls. Roll each ball in the additional 1/3 cup white granulated sugar to coat thoroughly.
- Bake: Place the sugar-coated dough balls evenly spaced on the prepared baking sheets. Bake in the preheated oven for 8 minutes or until the edges are set but the centers remain soft. Avoid overbaking to maintain a tender texture.
- Cool cookies: Remove from the oven and allow cookies to cool on the baking sheets for 5 minutes before transferring them to wire racks to cool completely.
- Prepare white chocolate ghosts: In a small saucepan over low heat or using a double boiler, melt the white chocolate chips with the heavy cream, stirring until smooth. Optionally add white food dye to achieve a vibrant white color.
- Decorate cookies: Spoon or pipe the white chocolate mixture onto the cooled cookies to create ghost shapes. Allow the white chocolate to partially set.
- Add ghost faces: Using black writing gel, carefully draw eyes and mouths on the white chocolate ghosts to complete the look.
- Final chilling: Place the decorated cookies in the refrigerator for 10-15 minutes to allow the white chocolate ghosts to harden before serving.
Notes
- These ghost cookies feature rich black cocoa cookies rolled in sugar for a delightful texture contrast.
- The white chocolate ghost topping adds a creamy sweetness and festive touch perfect for Halloween.
- Be sure to use good quality white chocolate for the best flavor and smoother melting.
- Room temperature eggs ensure better mixing and a tender cookie texture.
- Chilling the dough helps prevent spreading and makes rolling easier.
- Use black writing gel for precise and easy decoration of ghost faces.
Nutrition
- Serving Size: 1 cookie
- Calories: 211 kcal
- Sugar: 21 g
- Sodium: 100 mg
- Fat: 10 g
- Saturated Fat: 6 g
- Unsaturated Fat: 3.4 g
- Trans Fat: 0.2 g
- Carbohydrates: 29 g
- Fiber: 0.3 g
- Protein: 2 g
- Cholesterol: 31 mg


![Pumpkin Gnocchi [4 Ingredient] Recipe](https://tastyrates.com/wp-content/uploads/2025/09/0_1-1757618332994-768x960.jpeg)
