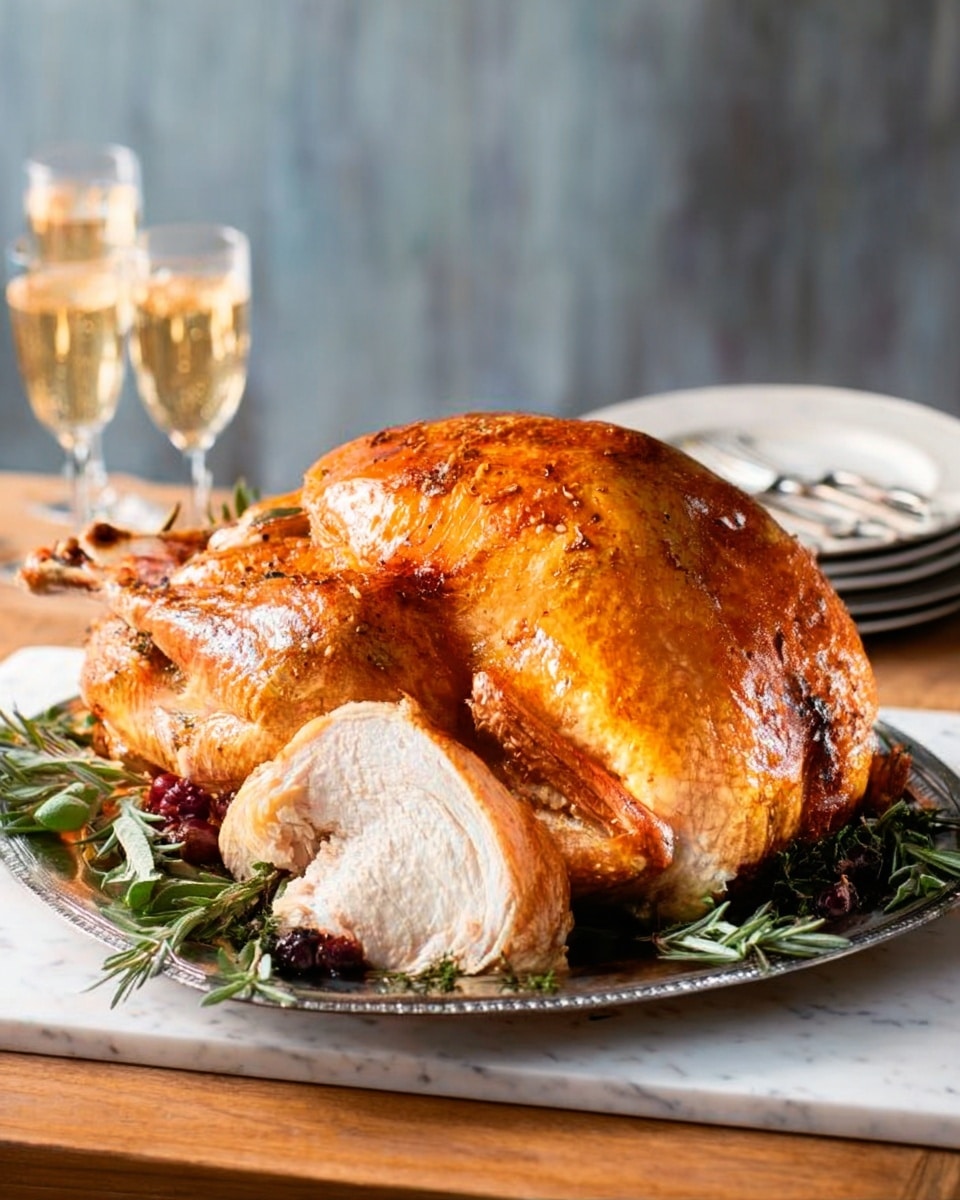
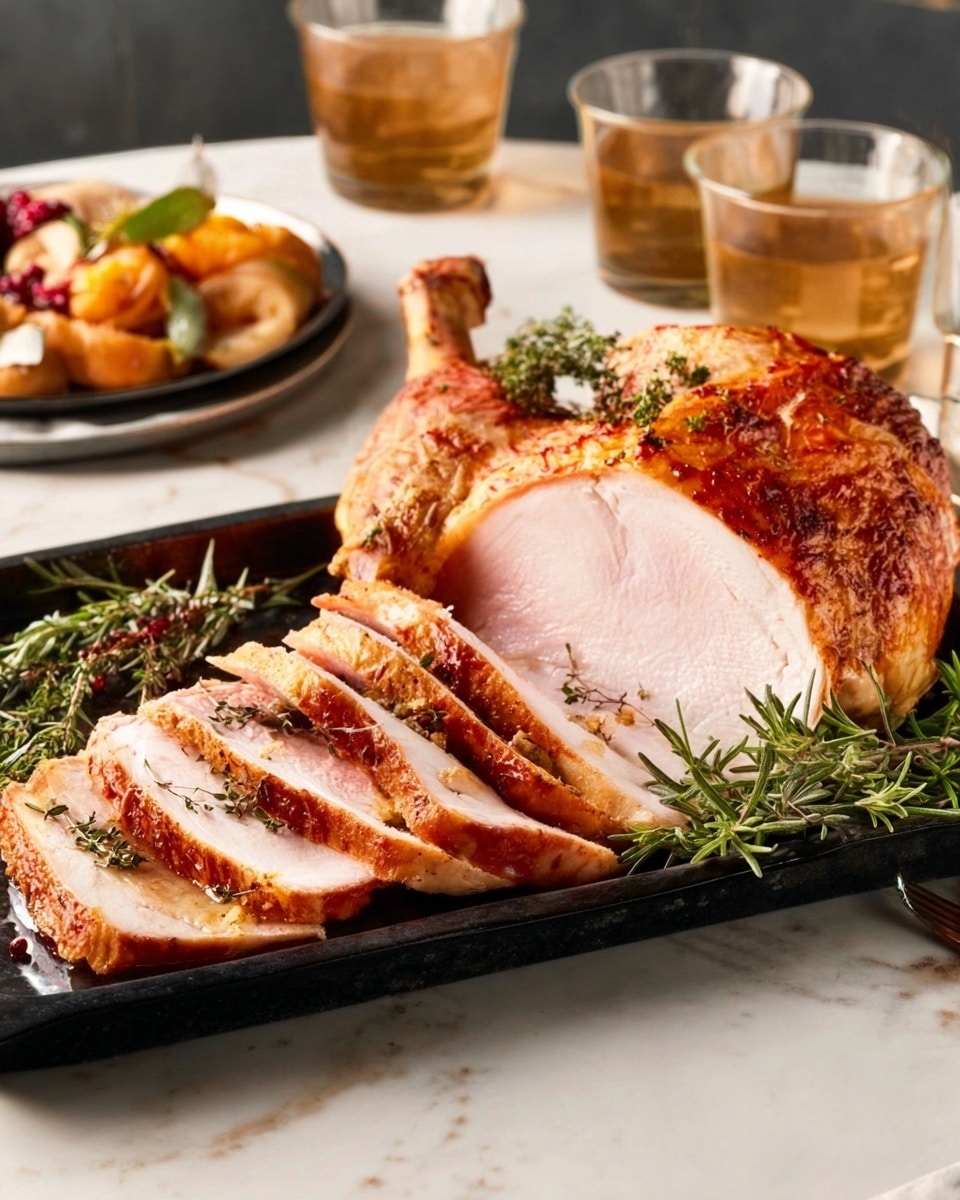
I absolutely love the way this Herb and Salt-Rubbed Dry Brine Turkey Recipe transforms a classic holiday staple into something truly extraordinary. The blend of fresh and dried herbs, combined with a precise dry brine, locks in flavor and keeps the turkey incredibly juicy—something I used to struggle with until I discovered this method. Whether for Thanksgiving, Christmas, or any special family gathering, this recipe works beautifully to deliver a moist, flavorful centerpiece that everyone will rave about.
When I first tried this recipe, I was amazed at how the herbs infused the meat deeply without overpowering its natural taste. You’ll find that the dry brine not only seasons the turkey thoroughly but also helps to crisp up the skin perfectly, giving you that golden-brown finish that’s not just pretty to look at but irresistible to bite into. If you’ve been hunting for a foolproof way to up your turkey game, this Herb and Salt-Rubbed Dry Brine Turkey Recipe is the one to bookmark.
Why You’ll Love This Recipe
- Deep Flavor Infusion: The herb and salt rub seeps into the turkey, making every bite packed with layered herbs and seasoning.
- Juicy and Tender Meat: The dry brine method gently tenderizes the bird so it stays moist even after roasting.
- Crispy, Golden Skin: Air-drying the turkey uncovered after brining helps get that coveted crispy skin.
- Simple Prep with Big Results: Minimal fuss upfront leads to a restaurant-quality turkey at home.
Ingredients You’ll Need
These ingredients aren’t just a list—they’re a lineup of flavors that work in harmony. Fresh herbs bring brightness, dried herbs add earthiness, and kosher salt is the unsung hero that makes the magic happen during dry brining.
- Fresh thyme: Adds a subtle, lemony herbal note that stays fresh without overpowering.
- Fresh sage: Brings that classic savory flavor often associated with traditional turkey.
- Fresh rosemary: Offers piney aroma and slight woodsy depth to the herb mix.
- Dried marjoram: Gives a gentle sweetness that balances out the stronger herbs.
- Dried oregano: Adds a different layer of earthiness to round out the palette.
- Extra-virgin olive oil: Helps carry the herbs under the skin and keeps them in place during brining.
- 16-lb turkey (fresh or thawed): Fresh is best for texture and flavor, but make sure it’s fully thawed if frozen.
- Diamond Crystal Kosher Salt: Preferred for dry brining because of its texture and lower sodium density compared to Mortons.
Variations
I love how customizable this Herb and Salt-Rubbed Dry Brine Turkey Recipe is — it’s a great canvas to tweak according to season, pantry, or personal flavor preferences. One of my favorite tweaks is adding a little lemon zest for a bright kick or swapping out some herbs depending on what’s fresh.
- Garlic and Citrus Variation: I add garlic powder and lemon zest to the herb mix sometimes, which adds a fragrant zing that my family goes crazy for.
- Spiced Up Version: Adding a bit of smoked paprika and black pepper gives it a lovely warmth and subtle smoky edge that’s perfect for autumn meals.
- Herb Only: For a lighter touch, I occasionally leave out the dried herbs and stick with fresh rosemary, thyme, and sage.
- Dietary Modification: This recipe is naturally gluten-free and can be made fully paleo-friendly by skipping any margarine or butter add-ons during roasting.
How to Make Herb and Salt-Rubbed Dry Brine Turkey Recipe
Step 1: Prep the Herb Mixture and Turkey
Start by mixing the fresh thyme, sage, rosemary, dried marjoram, and oregano with the extra-virgin olive oil in a small bowl. This fragrant herb-oil paste will be rubbed under the skin, infusing the meat directly. Remove the turkey’s neck and giblets — I like to save them for making stock later, so don’t toss them! Then, gently loosen the skin from the shoulders and breast by carefully sliding your hand underneath; this might feel delicate, but it’s worth it for the flavor to get straight onto the meat.
Step 2: Rub Herbs and Salt, Then Bag It Up
Spread the herb and olive oil mixture evenly beneath the skin, making sure to cover the breasts, thighs, and drumsticks. Next, give the turkey a generous rub of kosher salt over the skin and inside the cavity. This salt layer is what creates the dry brine effect, drawing out moisture initially but then allowing the turkey to reabsorb its own juices, locking in flavor. Tuck wing tips behind the neck and tie the legs together with kitchen twine to keep everything compact. Place the turkey inside a large food-safe plastic bag—double bag it to avoid leaks—and tie it tightly.
Step 3: Refrigerate and Turn Daily for 3 Days
Lay the bagged turkey on a rimmed baking sheet and pop it into your refrigerator. For the next three days, turn the turkey over daily. This helps the brine settle evenly and ensures every bit of meat gets seasoned. I remind friends not to skip this step because turning really makes a difference! It’s perfectly fine to keep it in the same bag throughout these days; just be sure it’s sealed well.
Step 4: Air-Dry the Turkey Overnight
On day four, remove the turkey from the bags and pat it dry with paper towels. Then, transfer it to a roasting pan and refrigerate uncovered overnight. This air-drying step is key for crisp skin. In my kitchen, this is when I notice the skin tightens and looks beautifully matte, the perfect canvas for roasting to golden perfection.
Step 5: Roast Your Turkey to Juicy Perfection
Remove the turkey from the fridge and let it sit at room temperature for 1 to 3 hours before roasting—that tempering step helps it cook evenly. Preheat your oven to 425°F and roast the bird breast-side up on a rack inside a shallow roasting pan. Roast for about one hour at this high heat to jump-start browning, then lower the temperature to 325°F. Continue roasting until an instant-read thermometer placed in the thickest part of the thigh reads 170°F—this usually takes about 1¾ to 2 hours, but ovens can vary. Let the turkey rest for at least 30 minutes before carving to lock in those flavorful juices.
Pro Tips for Making Herb and Salt-Rubbed Dry Brine Turkey Recipe
- Loosen the Skin Gently: Use your fingertips, not nails, to avoid tearing the skin and losing precious herb flavor underneath.
- Double Bag for Safety: Prevent any leaks in the fridge by sealing the turkey in two bags—trust me, it’s worth the extra step.
- Use a Probe Thermometer: I can’t recommend this enough for perfectly cooked turkey without guesswork.
- Don’t Skip the Air-Dry: Leaving the turkey uncovered overnight is what gives that coveted crisp, golden skin.
How to Serve Herb and Salt-Rubbed Dry Brine Turkey Recipe
Garnishes
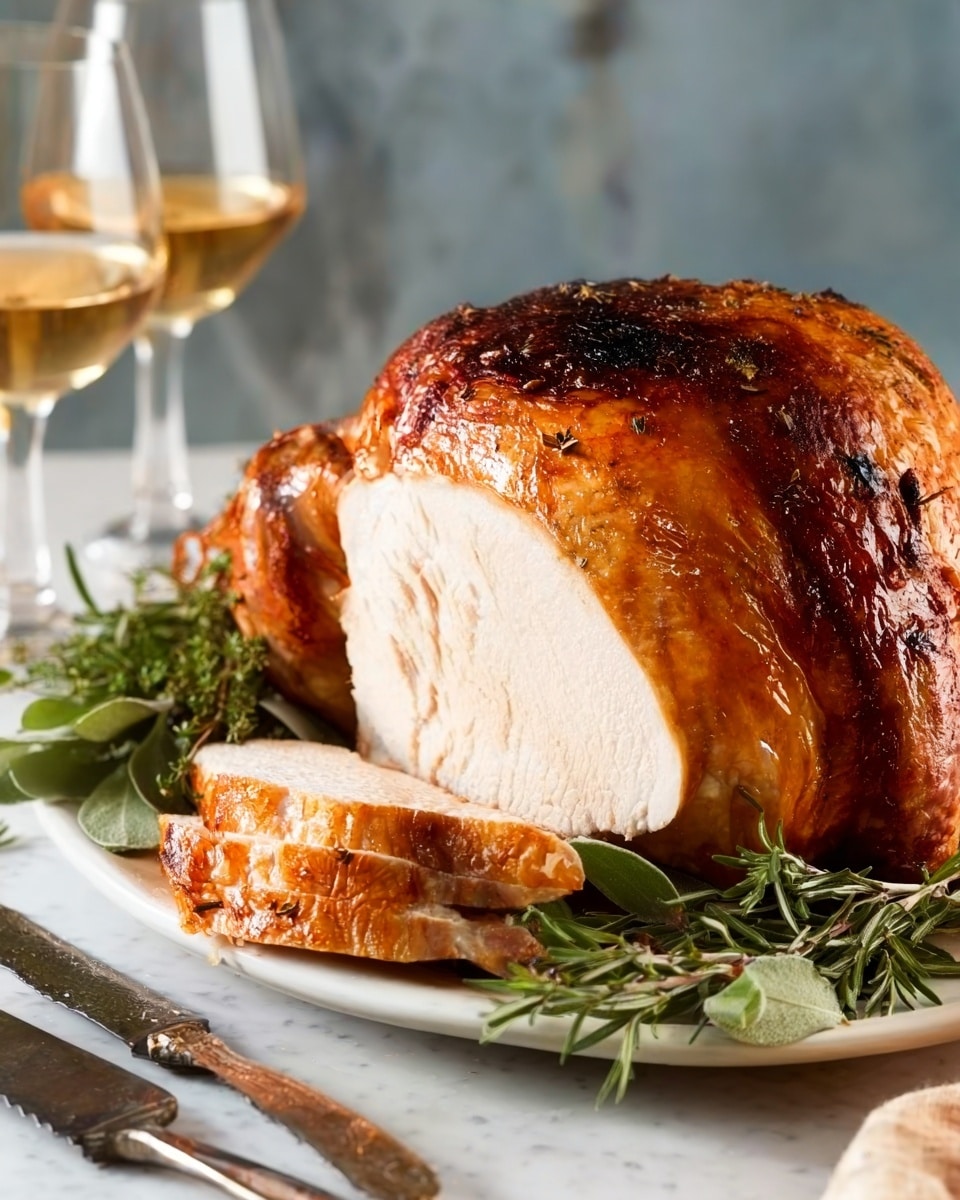
I often garnish my carved turkey platter with fresh herb sprigs—rosemary, thyme, and sage from the same bunch used in the brine. It adds an inviting, fresh aroma and looks so pretty on the table. A few thin slices of lemon scattered around the edges brighten the plate visually and add a hint of citrus scent that complements the herbs.
Side Dishes
This turkey pairs beautifully with classic mashed potatoes and gravy, roasted root vegetables, cranberry sauce, and green bean almondine. My family goes crazy for sweet potato casserole on the side, too, which balances the hearty turkey flavors perfectly.
Creative Ways to Present
One special touch I like to do is carve the breast meat into thick slices and fan them out on a large wooden board surrounded by the roasted legs and wings, garnished with garlic cloves roasted alongside the turkey. Adding a small bowl of herb-infused pan gravy right in the center invites guests to serve themselves beautifully.
Make Ahead and Storage
Storing Leftovers
I always store leftover turkey in airtight containers in the fridge, separating the white meat from the dark meat if possible. This keeps everything tasting fresh for 3-4 days. Wrapping the pieces in foil before popping them in containers helps prevent drying out—trust me, it makes a difference for turkey leftover texture.
Freezing
When I know there will be excess turkey, I freeze portions in freezer-safe bags with as much air removed as possible. I like freezing slices individually, so I can grab just what I need. These turkey portions freeze well up to 3 months without losing much flavor or texture.
Reheating
To reheat, I gently warm turkey slices in a covered dish with a splash of broth or pan juices at 275°F until warmed through. This slow warming keeps the meat tender and juicy instead of drying it out like microwaving often does. I learned this trick after losing a batch of leftovers that got too tough reheated the fast way!
FAQs
-
Can I use this Herb and Salt-Rubbed Dry Brine Turkey Recipe with a frozen turkey?
Yes, but it’s crucial to fully thaw the turkey before starting the dry brine process. A frozen or partially frozen bird won’t absorb the salt and herbs evenly. Plan ahead to allow 3-4 days for thawing in the refrigerator before you begin the brining steps.
-
Why do I need to turn the turkey every day during the dry brine?
Turning the turkey helps redistribute the brine and juices, ensuring consistent seasoning throughout the meat. It also prevents pooling of liquid on one side, which could lead to uneven salting or texture.
-
Can I make the herb and salt rub ahead of time?
Absolutely! You can prepare the herb and olive oil mixture a day in advance and keep it refrigerated. Just bring it to room temperature before rubbing under the turkey skin for easier spreading.
-
How do I know when the turkey is perfectly cooked?
Using an instant-read or probe thermometer is the safest method. The turkey is done when the thickest part of the thigh reaches 170°F. Always let the turkey rest for about 30 minutes afterward to let juices redistribute for moist, tender meat.
Final Thoughts
This Herb and Salt-Rubbed Dry Brine Turkey Recipe has truly changed how I approach cooking turkey at home. It’s reliable, simple, and delivers that perfect juicy texture and deep herb flavor every time, without the stress or guesswork. If you’re looking to impress your guests or simply elevate your holiday meal, I can’t recommend it enough. Give it a try—you might just find it becomes your new go-to turkey recipe too!
Print
Herb and Salt-Rubbed Dry Brine Turkey Recipe
- Prep Time: 1 hour
- Cook Time: 3 hours
- Total Time: 4 days 4 hours
- Yield: 16 servings
- Category: Main Course
- Method: Roasting
- Cuisine: American
Description
This Herb and Salt-Rubbed Dry Brine Turkey recipe delivers a deeply flavorful and juicy roast turkey through a days-long dry brining process using fresh and dried herbs combined with kosher salt. The method involves rubbing the turkey under its skin with an aromatic herb and olive oil blend, followed by a multi-day refrigeration that allows the salt and herbs to penetrate the meat, resulting in enhanced moisture retention and savory taste. Roasting the turkey in the oven with convection settings guarantees a perfectly cooked bird with crisp skin and tender meat, making it an ideal centerpiece for special occasions and holiday dinners.
Ingredients
Herb Mixture
- 2 tablespoons chopped fresh thyme
- 2 tablespoons chopped fresh sage
- 1 tablespoon chopped fresh rosemary
- 1 tablespoon dried marjoram
- ½ tablespoon dried oregano
- 1 tablespoon extra-virgin olive oil
Turkey
- 1 whole 16-lb turkey, thawed or fresh (preferably fresh, not kosher or self-basting)
- ¼ cup Diamond Crystal Kosher Salt (use less if using Morton’s kosher salt)
Instructions
- Prepare the Herb Rub: Four days before roasting, combine chopped fresh thyme, sage, rosemary, dried marjoram, dried oregano, and extra-virgin olive oil in a small bowl. This herb oil mixture will infuse the turkey with deep, aromatic flavors during the dry brine.
- Prepare the Turkey: Remove the neck and giblets from the turkey cavity and set aside if desired for stock. Carefully loosen the skin around the shoulders, breast, thighs, and drumsticks by sliding your hands gently underneath to separate the skin from the meat without tearing it. This will allow the herb mixture to penetrate the meat directly.
- Apply Herb Rub: Rub the herb and olive oil mixture liberally under the skin on the breasts, thighs, and drumsticks, spreading evenly to coat the meat. Return the skin to its original position and gently pat it down to secure the herbs beneath.
- Salt the Turkey: Rub kosher salt evenly inside the cavity and over the skin of the turkey. This salt application will function as the dry brine, drawing moisture out and then reabsorbing it to keep the meat juicy and flavorful.
- Truss and Bag: Tuck the wing tips behind the neck, tie the legs together securely with kitchen twine, then place the turkey in a large food-safe plastic bag such as a turkey-size roasting bag. Tie the bag closed tightly and place it inside a second bag for extra protection. Tie the second bag securely.
- Refrigerate and Turn: Place the double-bagged turkey on a rimmed baking sheet and refrigerate. Each day for the next three days, turn the turkey over within the bags to ensure even distribution of the brine and herbs.
- Air-Dry: On the fourth day, remove the turkey from the bags and pat it dry with paper towels. Transfer it to a large roasting pan and refrigerate uncovered overnight to allow the skin to air dry, which will help achieve a crispier skin after roasting.
- Temper the Turkey: About 1 to 3 hours before roasting, remove the turkey from the refrigerator and let it come to room temperature on the counter. This ensures more even cooking.
- Prepare for Roasting: Place the turkey breast side up on a roasting rack sprayed lightly with oil, set inside a shallow roasting pan approximately 2 to 2½ inches deep. Position a rack in the bottom third of your oven and preheat the oven to 350°F using the convection roast setting if available.
- Roast the Turkey: Insert a probe thermometer into the thickest part of the thigh without touching the bone and set it to 170°F. Roast the turkey until the probe reaches this temperature, which generally takes about 1½ to 2 hours or longer depending on the bird’s size. Alternatively, if not using a probe, roast at 425°F for 1 hour then reduce the heat to 325°F and continue roasting until an instant-read thermometer registers 170°F in the thigh, typically 1¾ to 2 hours total.
- Rest Before Carving: Remove the turkey from the oven and let it rest for 30 minutes before carving. This resting period allows the juices to redistribute throughout the meat, enhancing moistness and flavor for serving.
Notes
- You can customize the herb blend by adding garlic powder, lemon zest, freshly ground black pepper, dried bay leaf, or other herbs and spices to suit your taste preferences.
- Choosing fresh, non-kosher, unfrozen (or properly thawed) turkey is recommended for best results with this dry-brine method.
- Tying the legs and tucking wing tips helps the turkey maintain shape during brining and roasting.
- Using a probe thermometer ensures perfectly cooked juicy meat without overcooking.
- The overnight air-dry step is crucial for crispy skin; do not skip it if possible.
Nutrition
- Serving Size: 6 oz turkey breast no skin
- Calories: 225
- Sugar: 0 g
- Sodium: 896.5 mg
- Fat: 3.5 g
- Saturated Fat: 1 g
- Unsaturated Fat: 2.5 g
- Trans Fat: 0 g
- Carbohydrates: 0 g
- Fiber: 0 g
- Protein: 45.5 g
- Cholesterol: 121 mg

